Outfitting a Pyranha 9R as a C1

Kaykers have it so easy. Outfitting a boat consists of shoving a few slivers of foam in for hip blocks, adjusting the bulkhead and backhand, and hitting it. It takes, at most, about five minutes.
But, I do not kayak. Frankly, I never have. I paddle C1 exclusively - always have. When I get a new boat, even if I do nothing else, it takes me at least two days to outfit it before I can get in it. Now, with two boys under the age of four, it takes much longer than two days.
C1 paddlers are a rare (strange?) breed. Whitewater kayaking is a very unforgiving sport with a ridiculously steep initial learning curve. Paddling C1 takes everything difficult about kayaking, and increases it exponentially. Further, you have to completely outfit your boat from scratch before you can even begin to learn how to paddle C1.
The twist is, typically you are starting with a kayak. As a result, it resembles what rally car teams have to do, start with a perfectly good vehicle, and take the entire thing apart just to be able to start building. Similar to building a rally car, the end result is also far superior to the starting point. Due to this combination of factors, is little surprise C1 paddlers are rather rare, but it happens to be all I do.
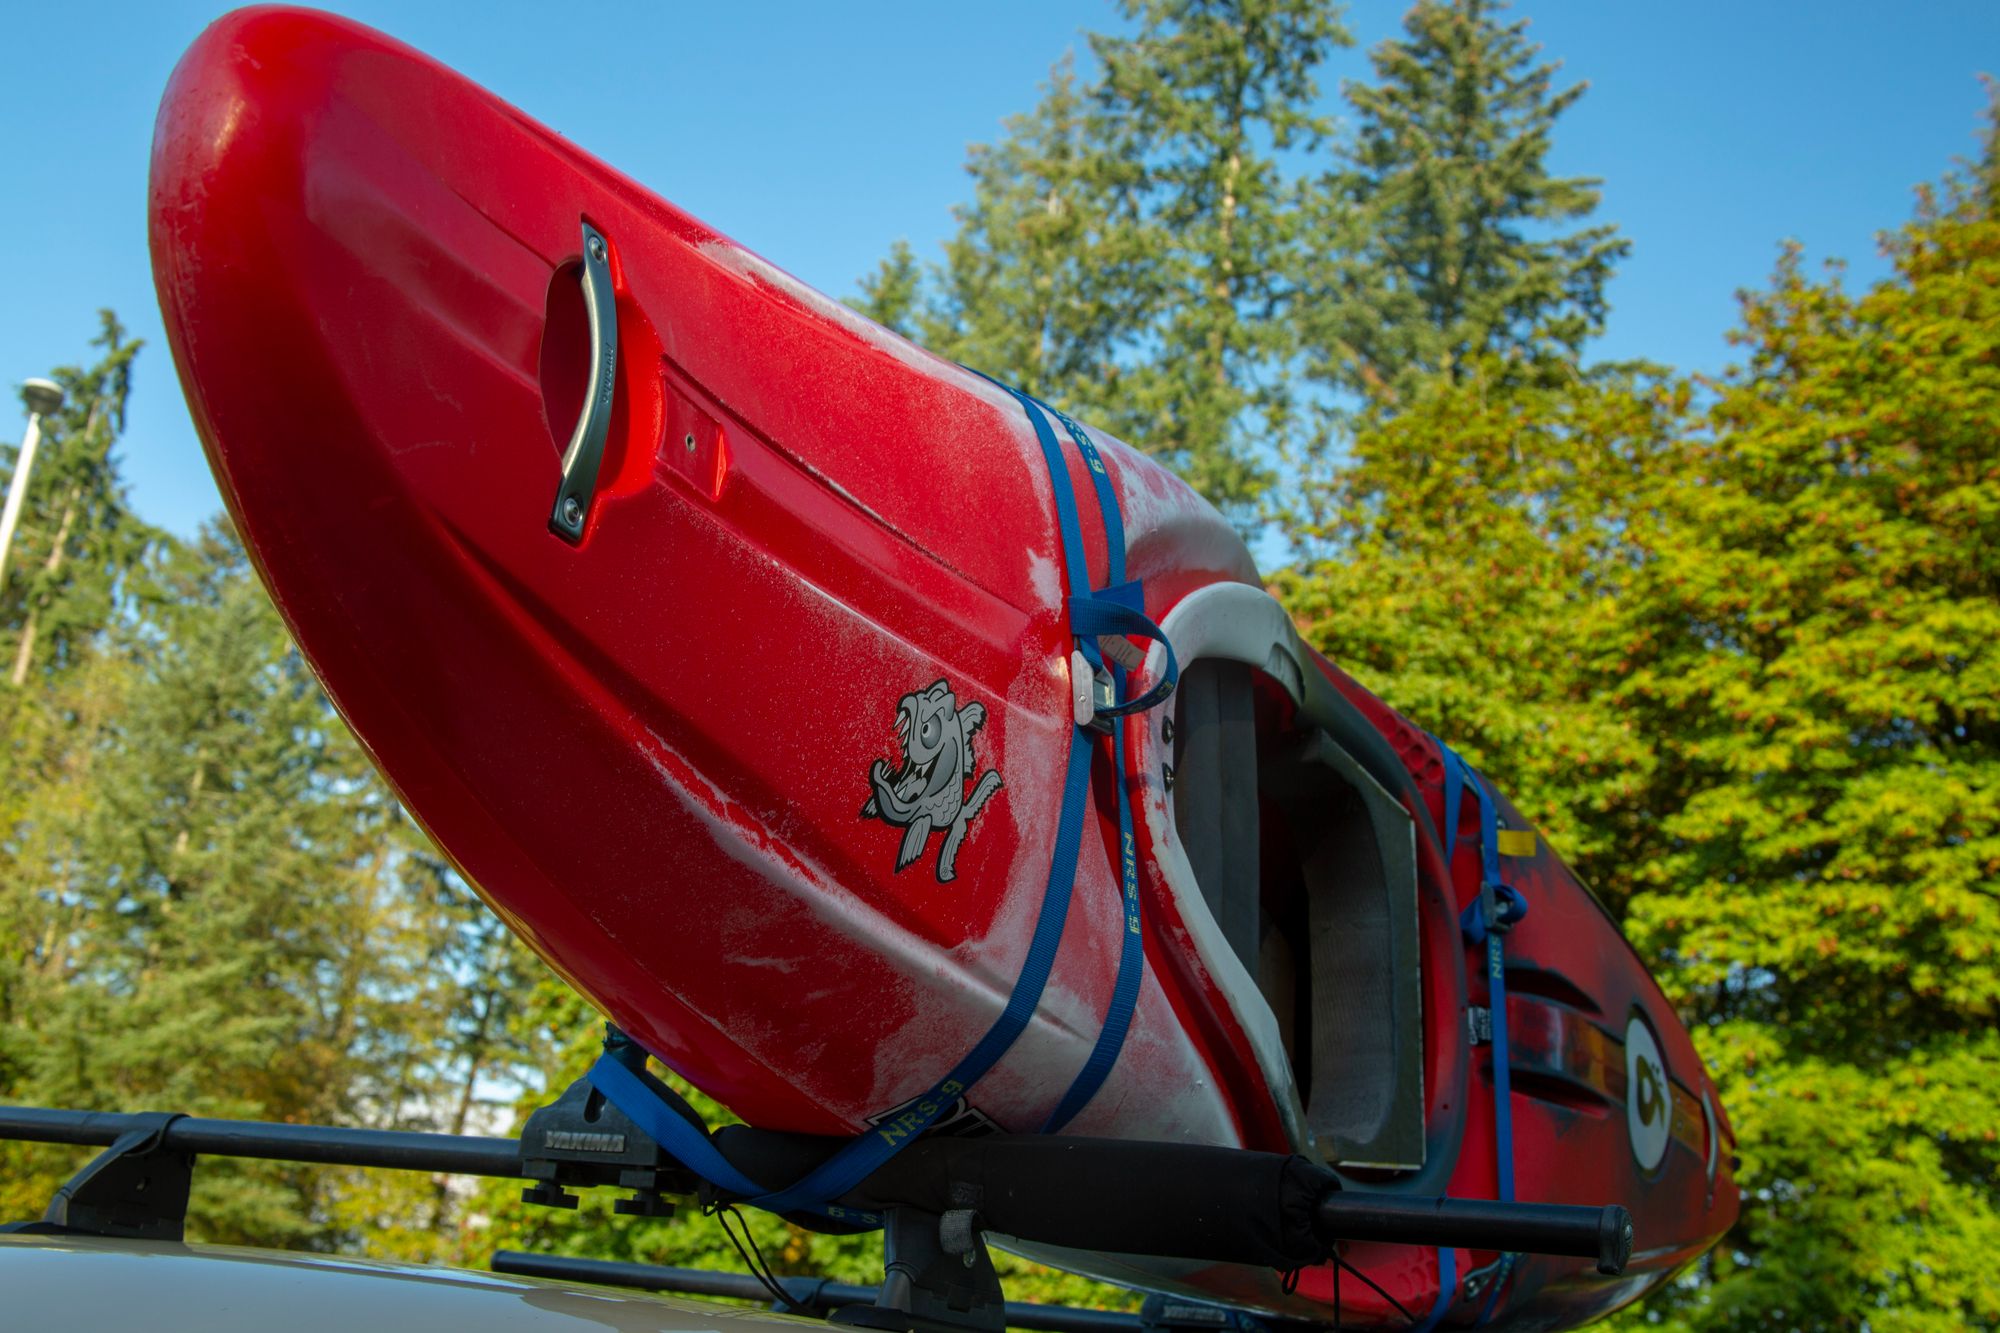
Recently I acquired a used Pyranha 9R in very good condition to be my new creeker, and documented the outfitting process - more or less. The idea is maybe I will remember some of the details of what I did for next time, and maybe you can benefit from over 20 years of experience outfitting canoes (open, closed, royalex, composite, plastic, slalom, playboat, creeker) for whitewater on your own project.
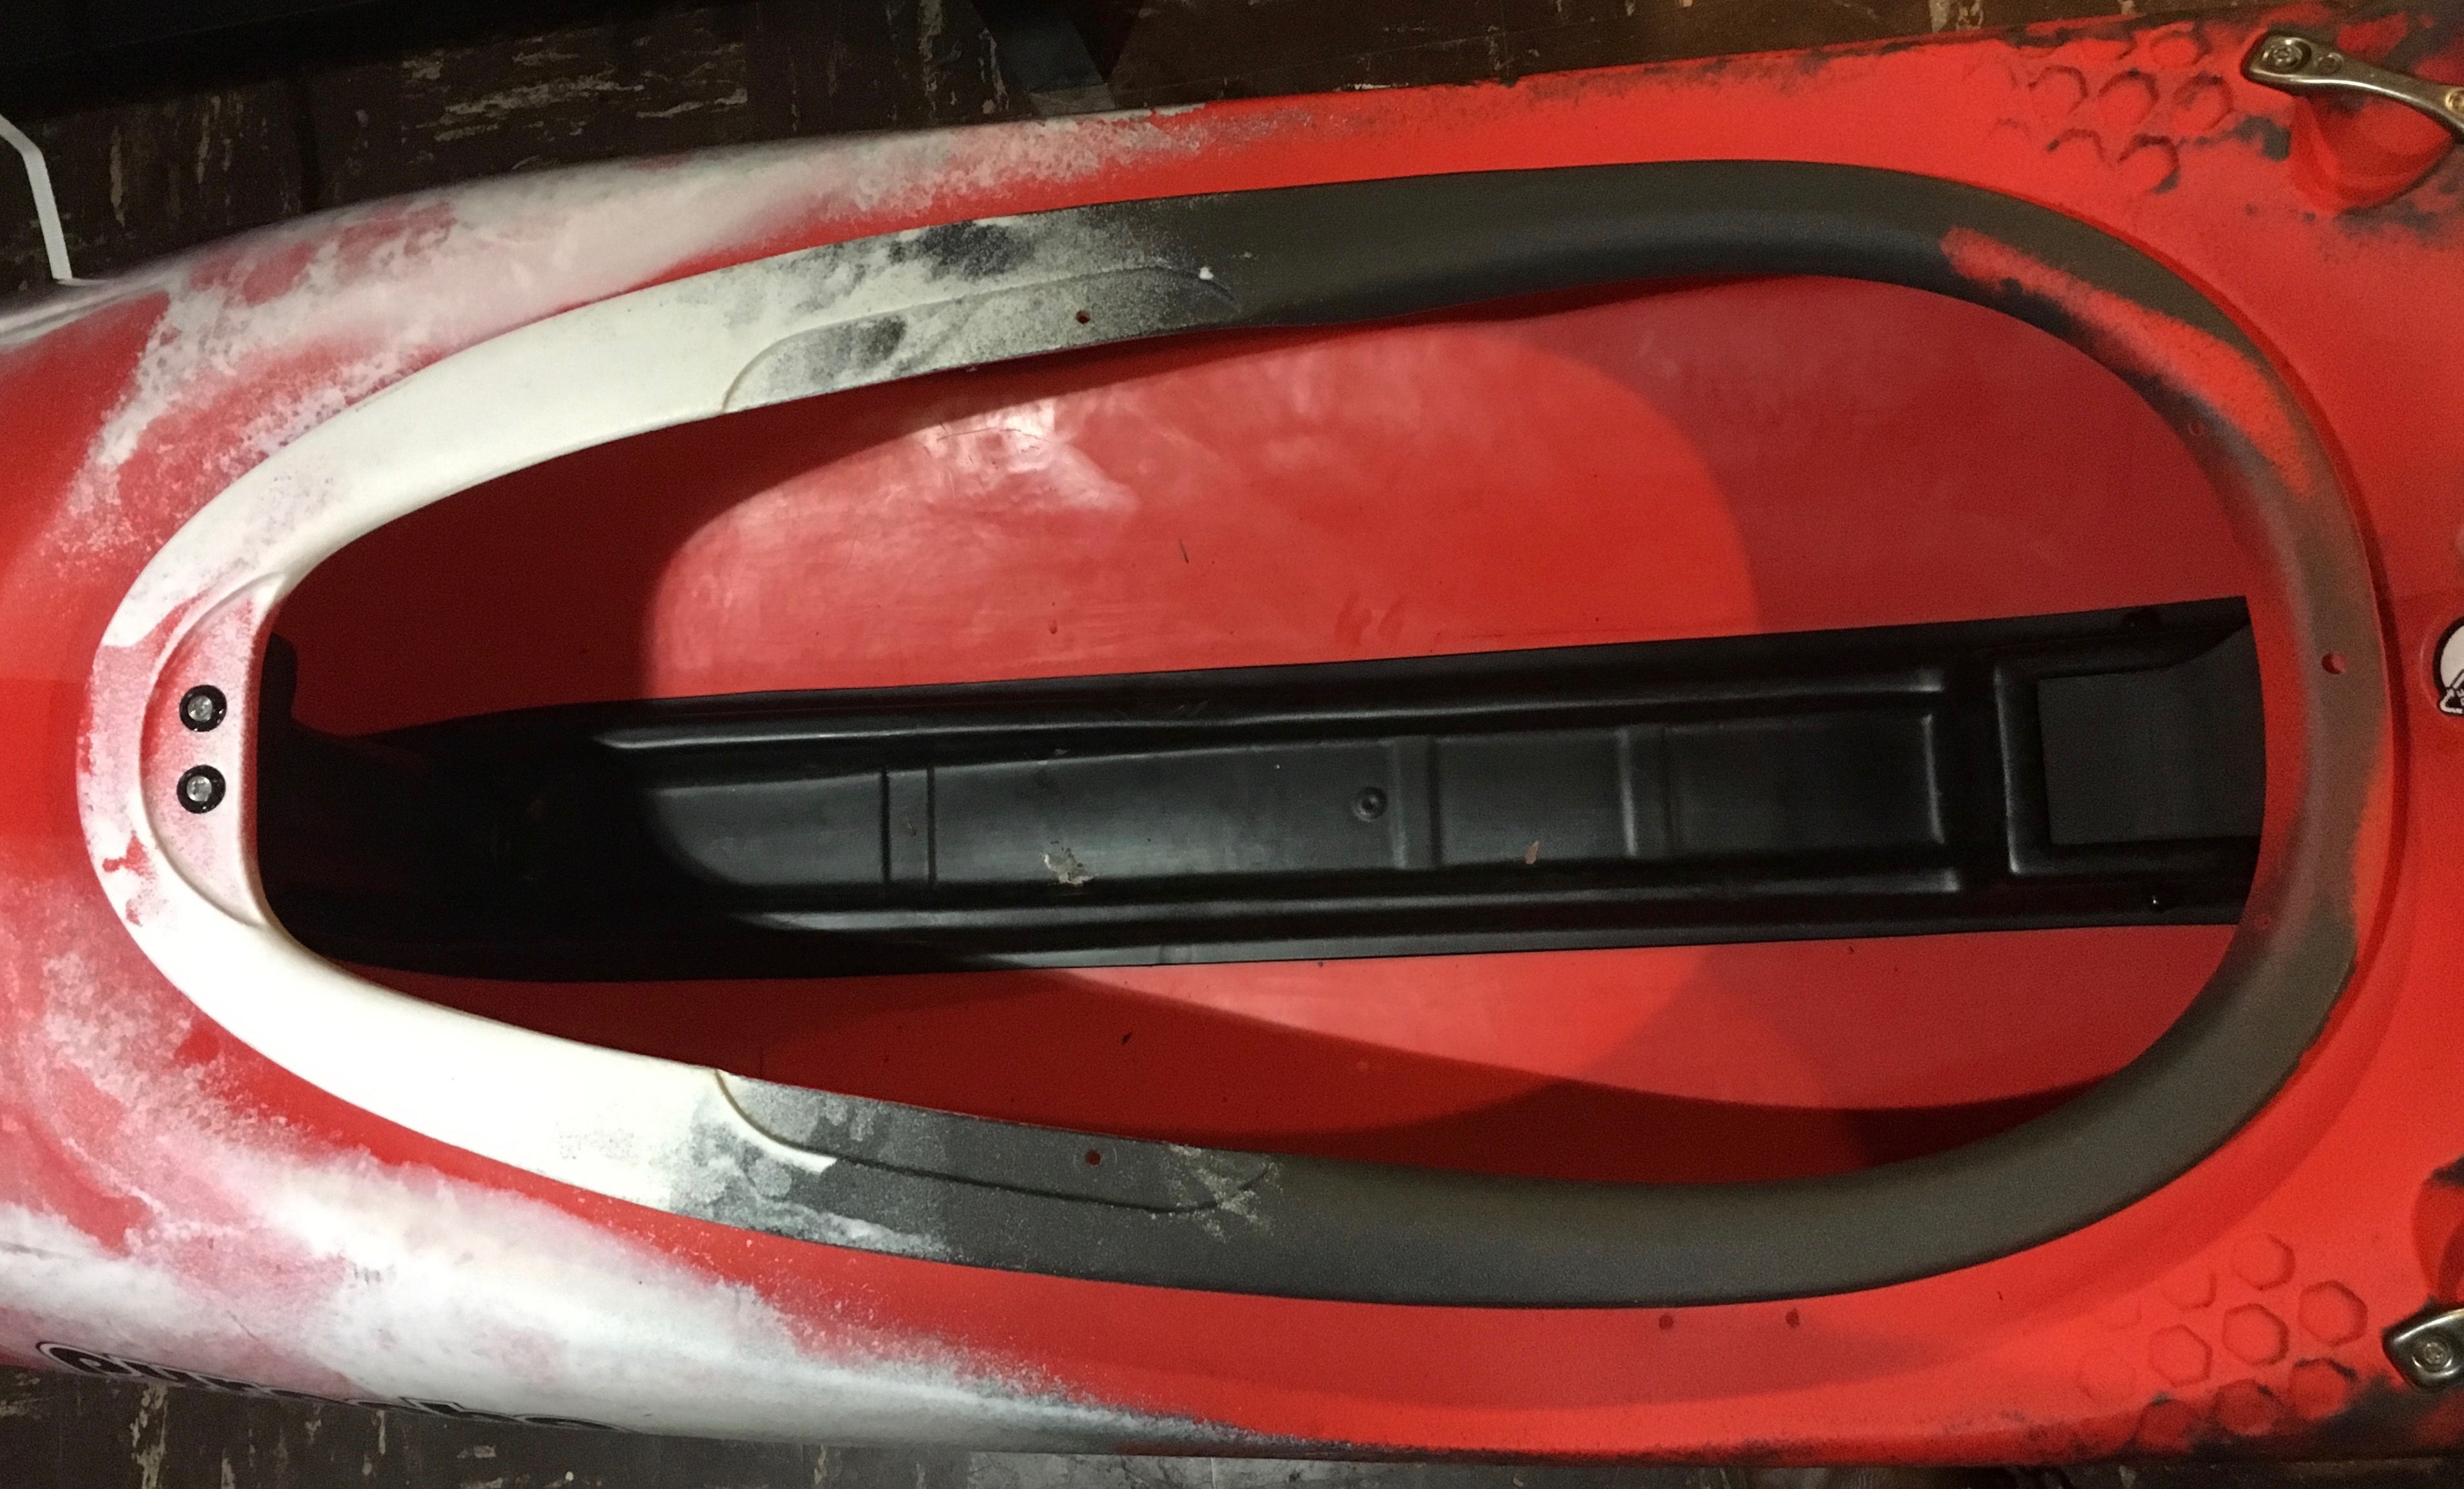
Rip It All Out!
The first step is not very glamorous. Everything has to come out. This I did not even bother to document much. The only difficult part was getting one of the seat screws out as the previous owner had almost completely stripped the Phillips head.
This brings up a good point. I have come to hate Phillips head screws in boats. The heads strip too easily, and typically do. Now, I replace all the screws with hex head screws when building my boats. There are more surfaces for torque, and provided you are using the right size hex key, they are nearly impossible to strip!
Gear Loops
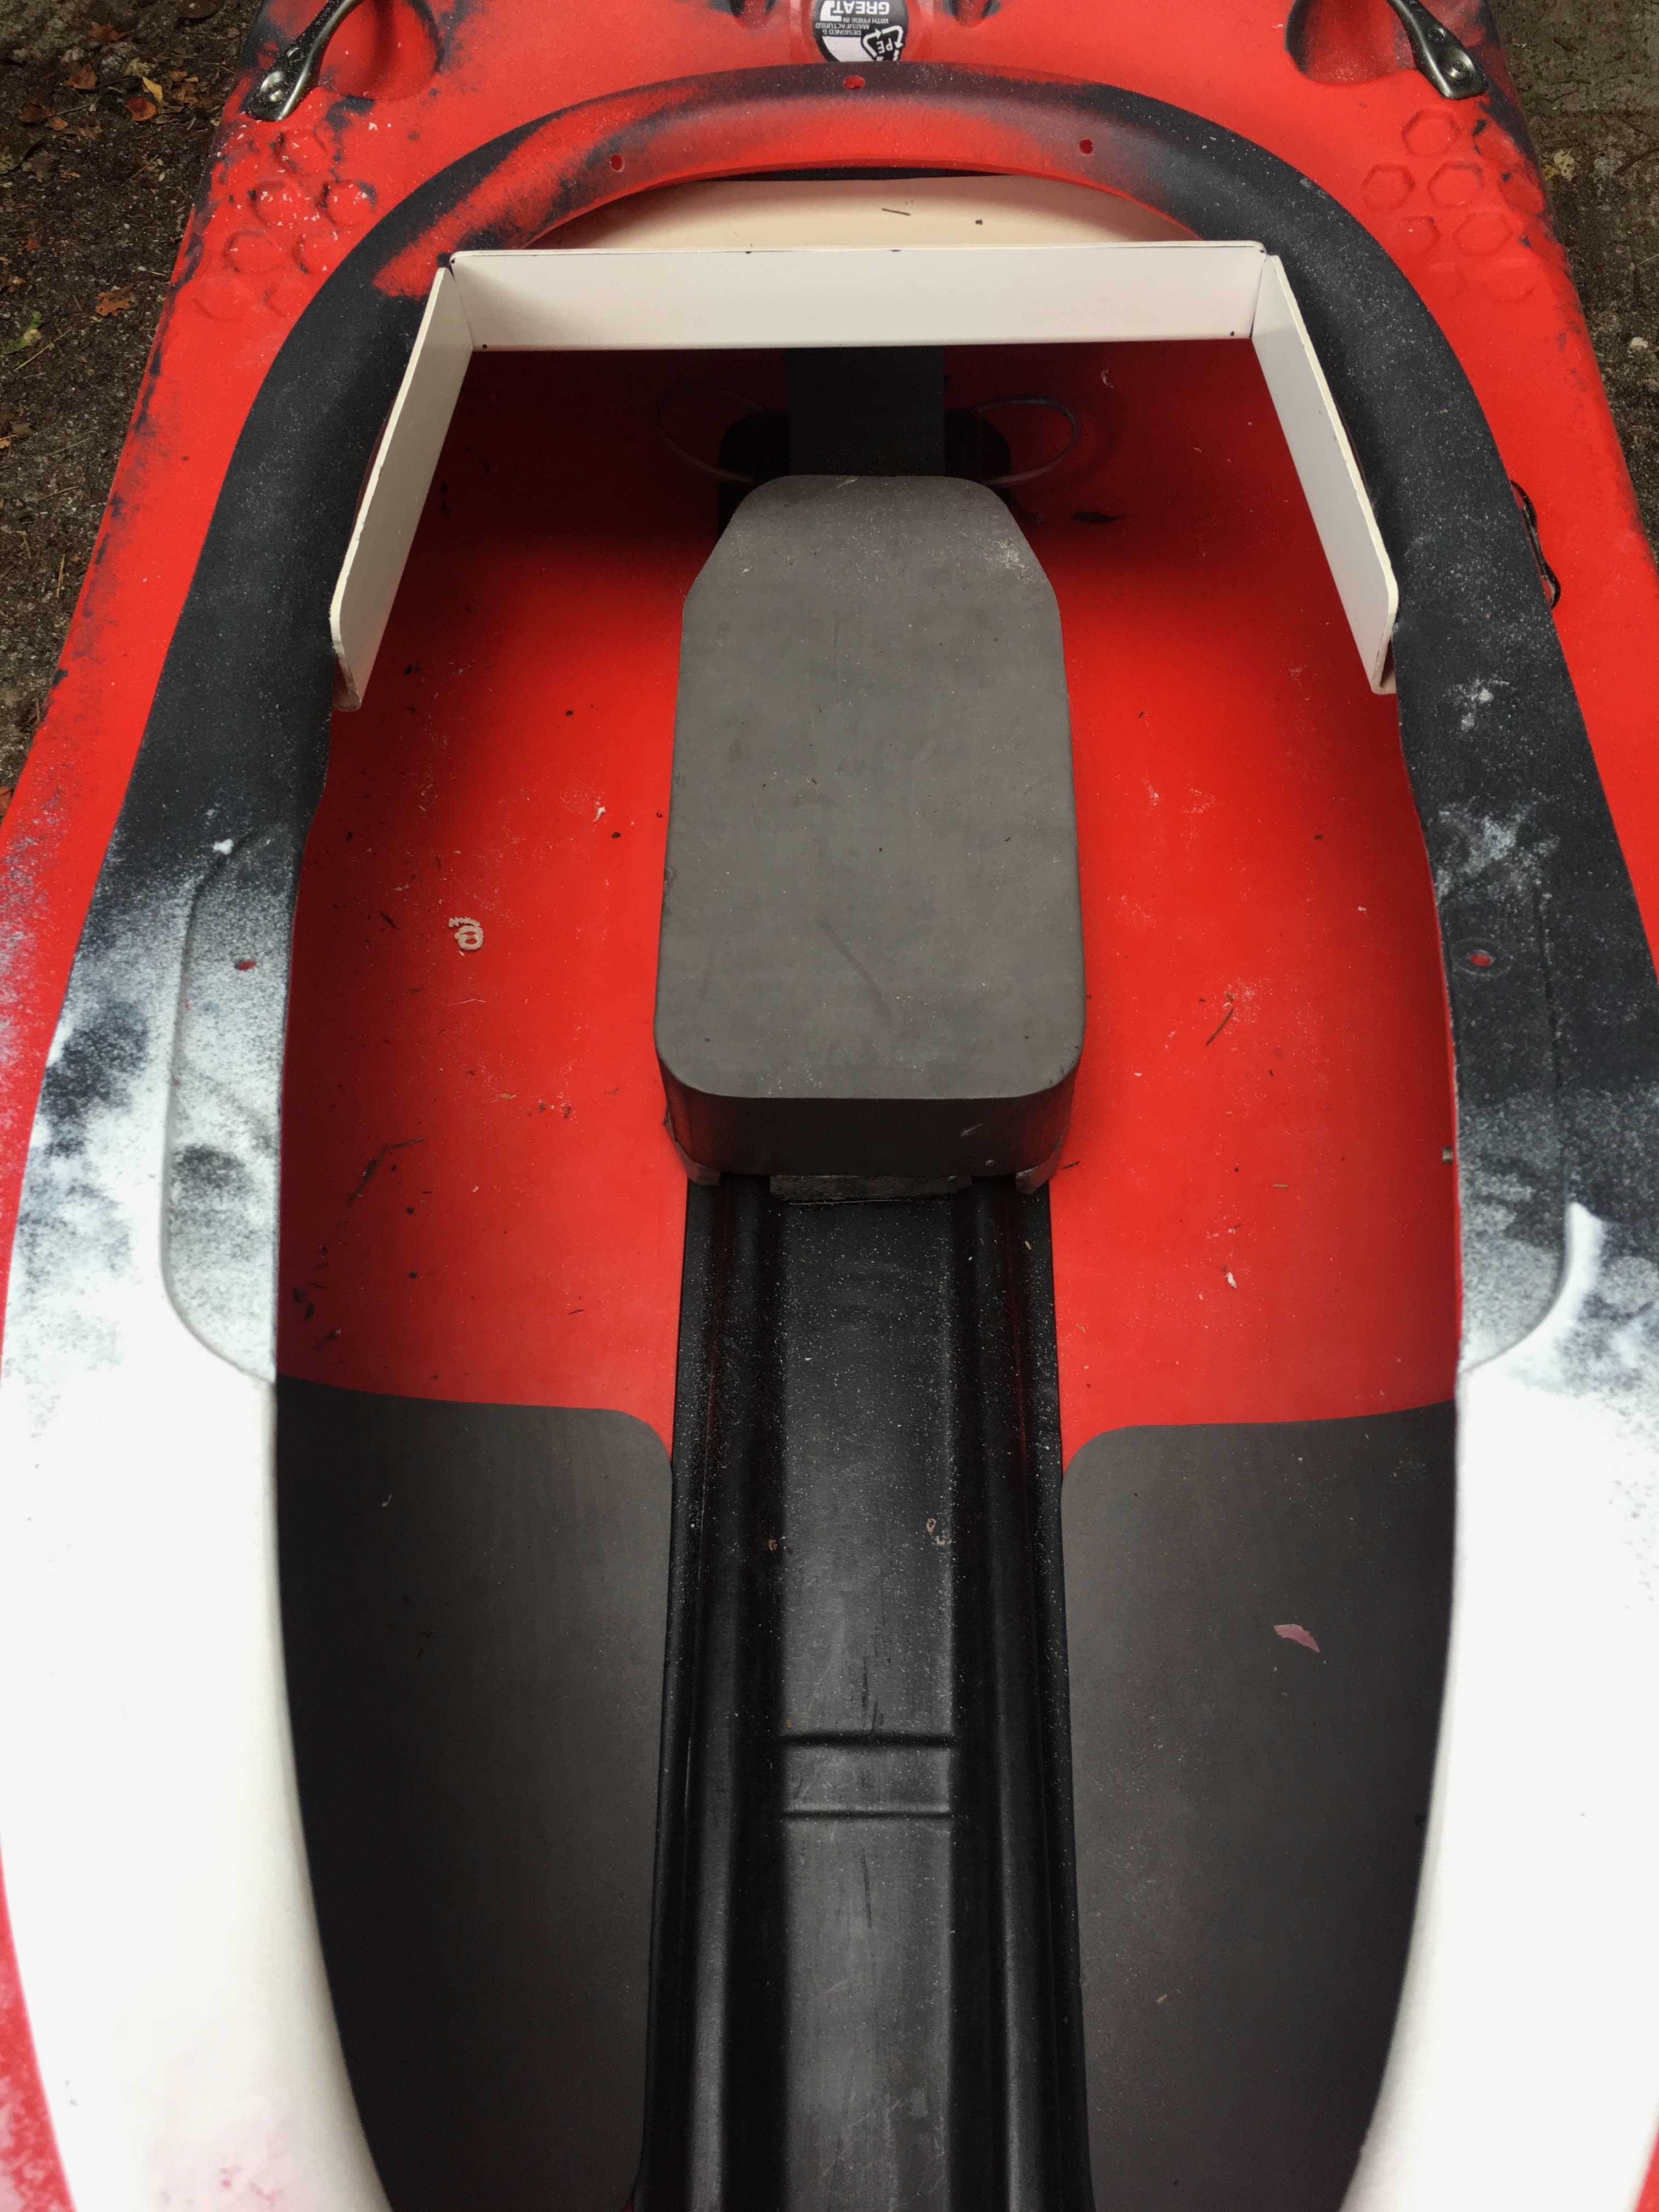
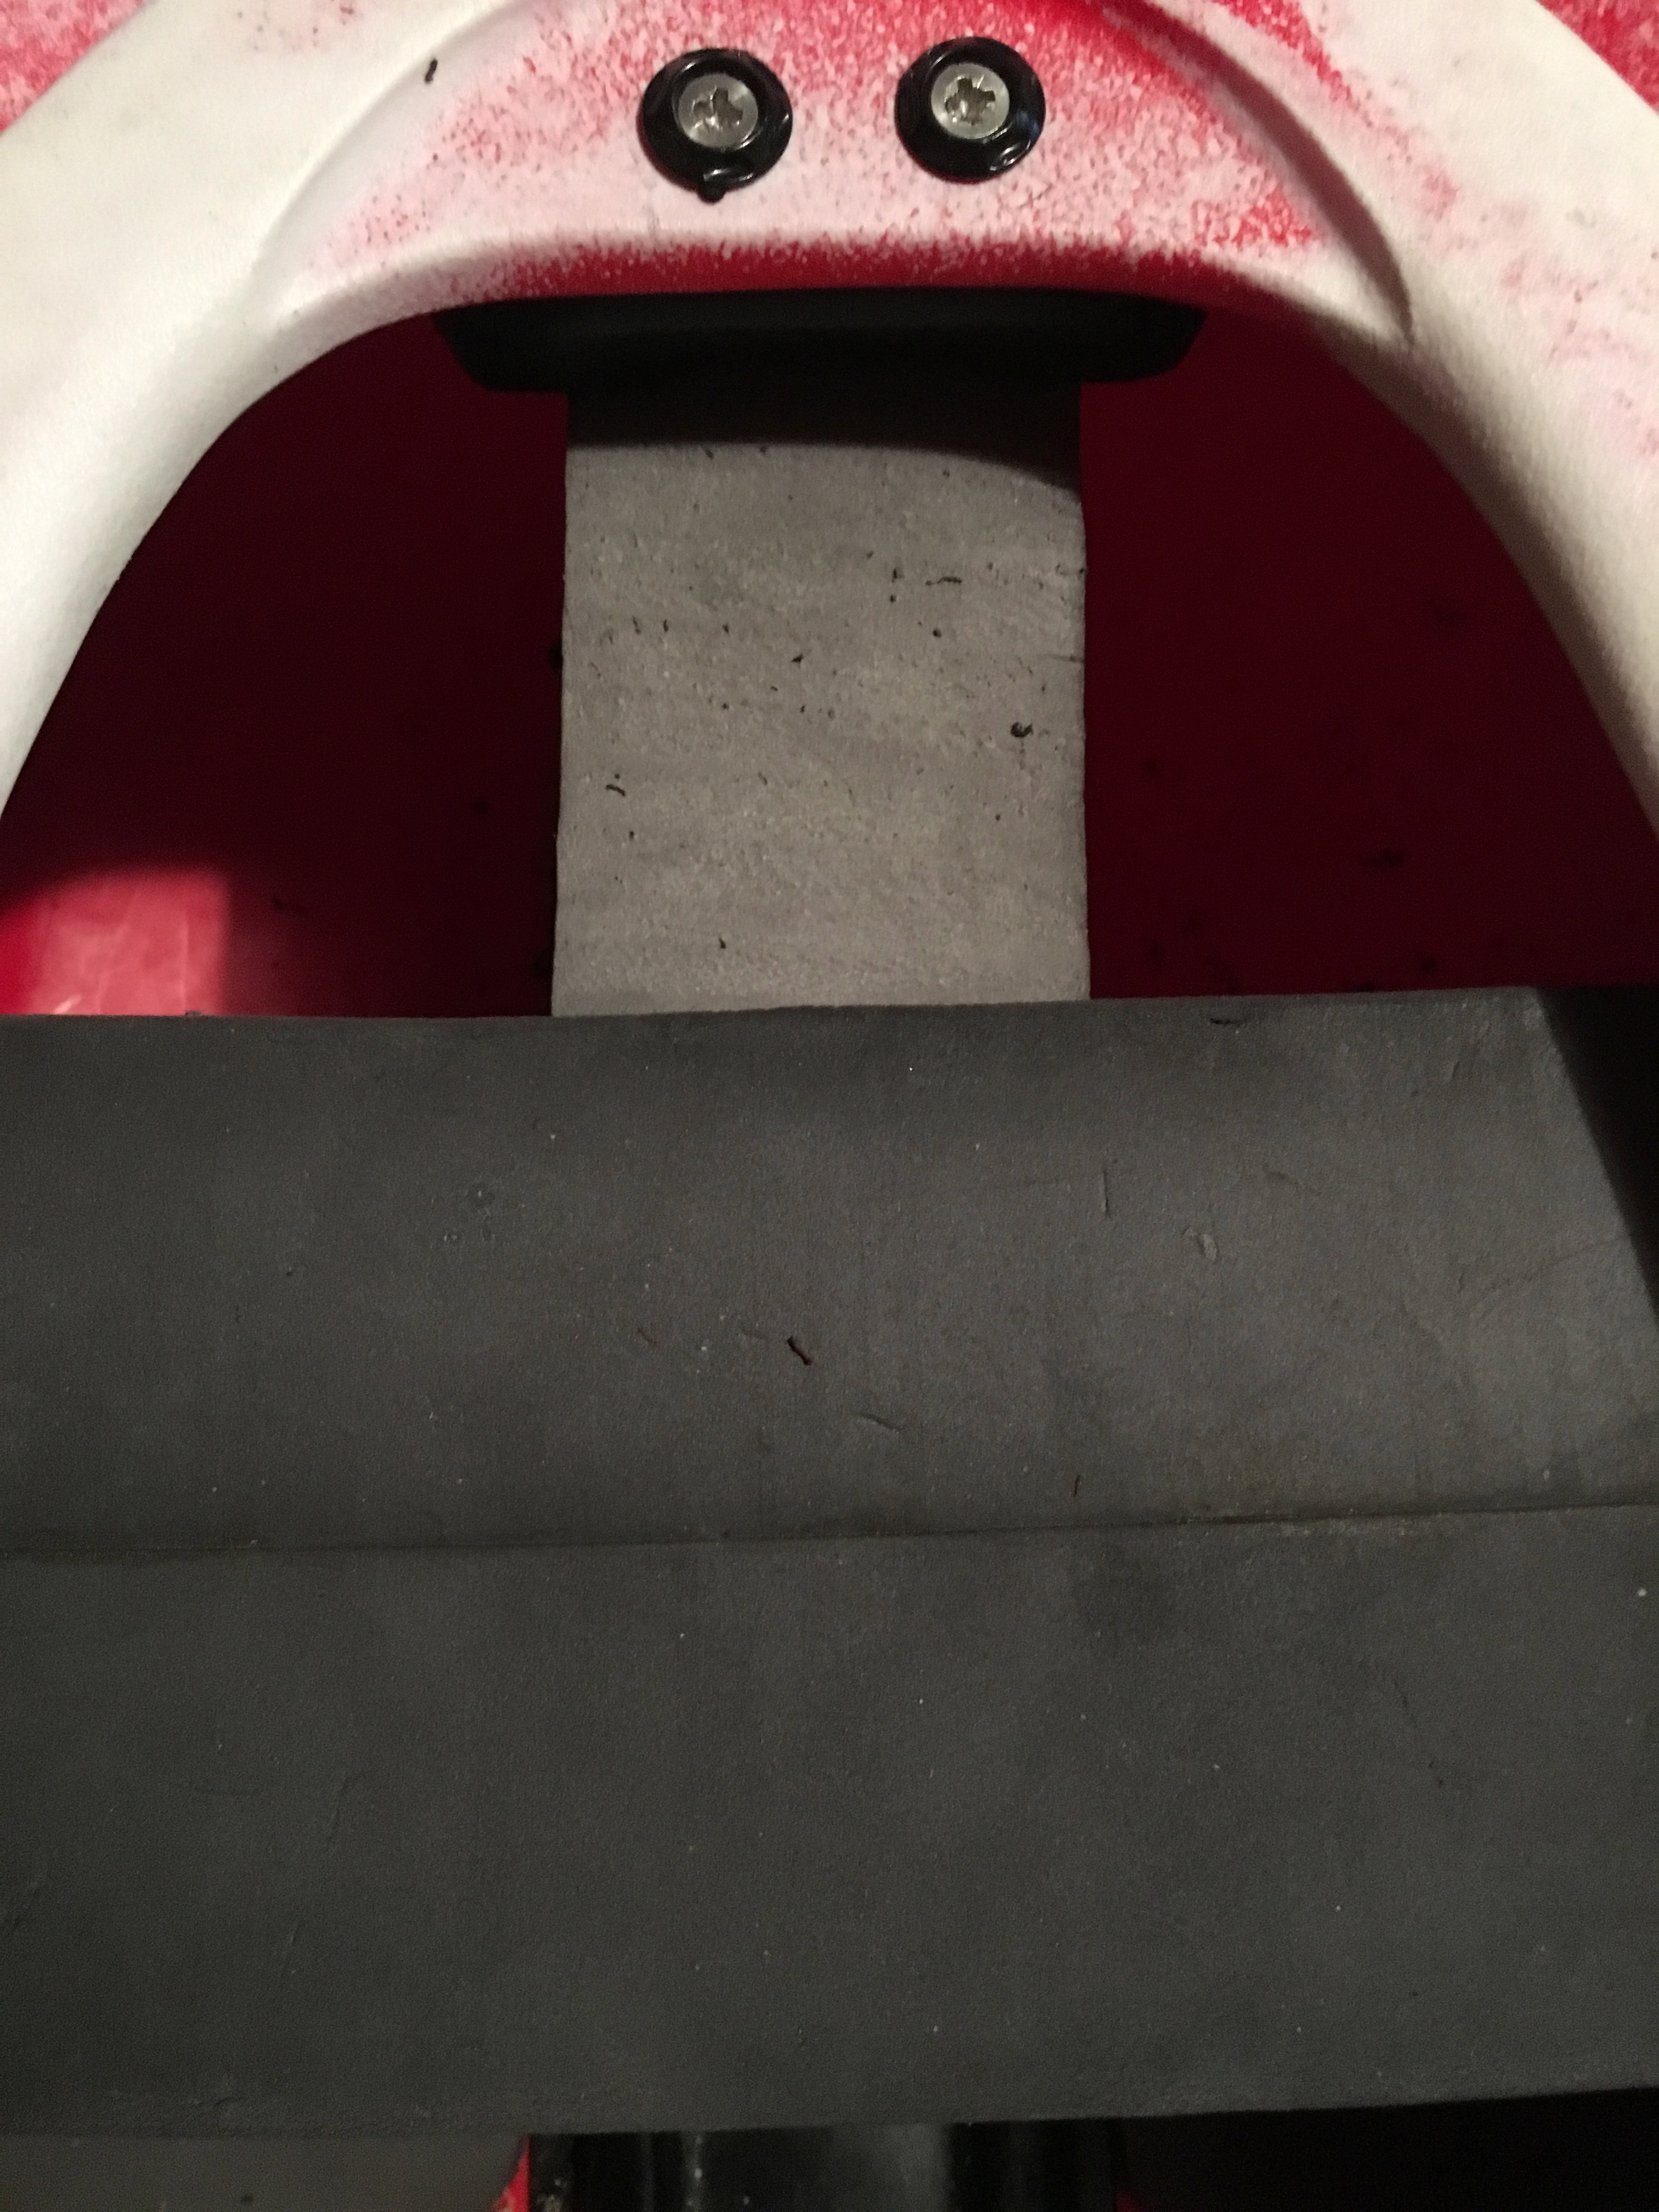
As you can see almost everything is out. I do leave the plastic rib in connecting the front and rear pillars. It adds stability to the boat. Incidentally, I do remove it, and then put it back in, since I move the gear loops from the back of the kayak seat to the back of this rib.
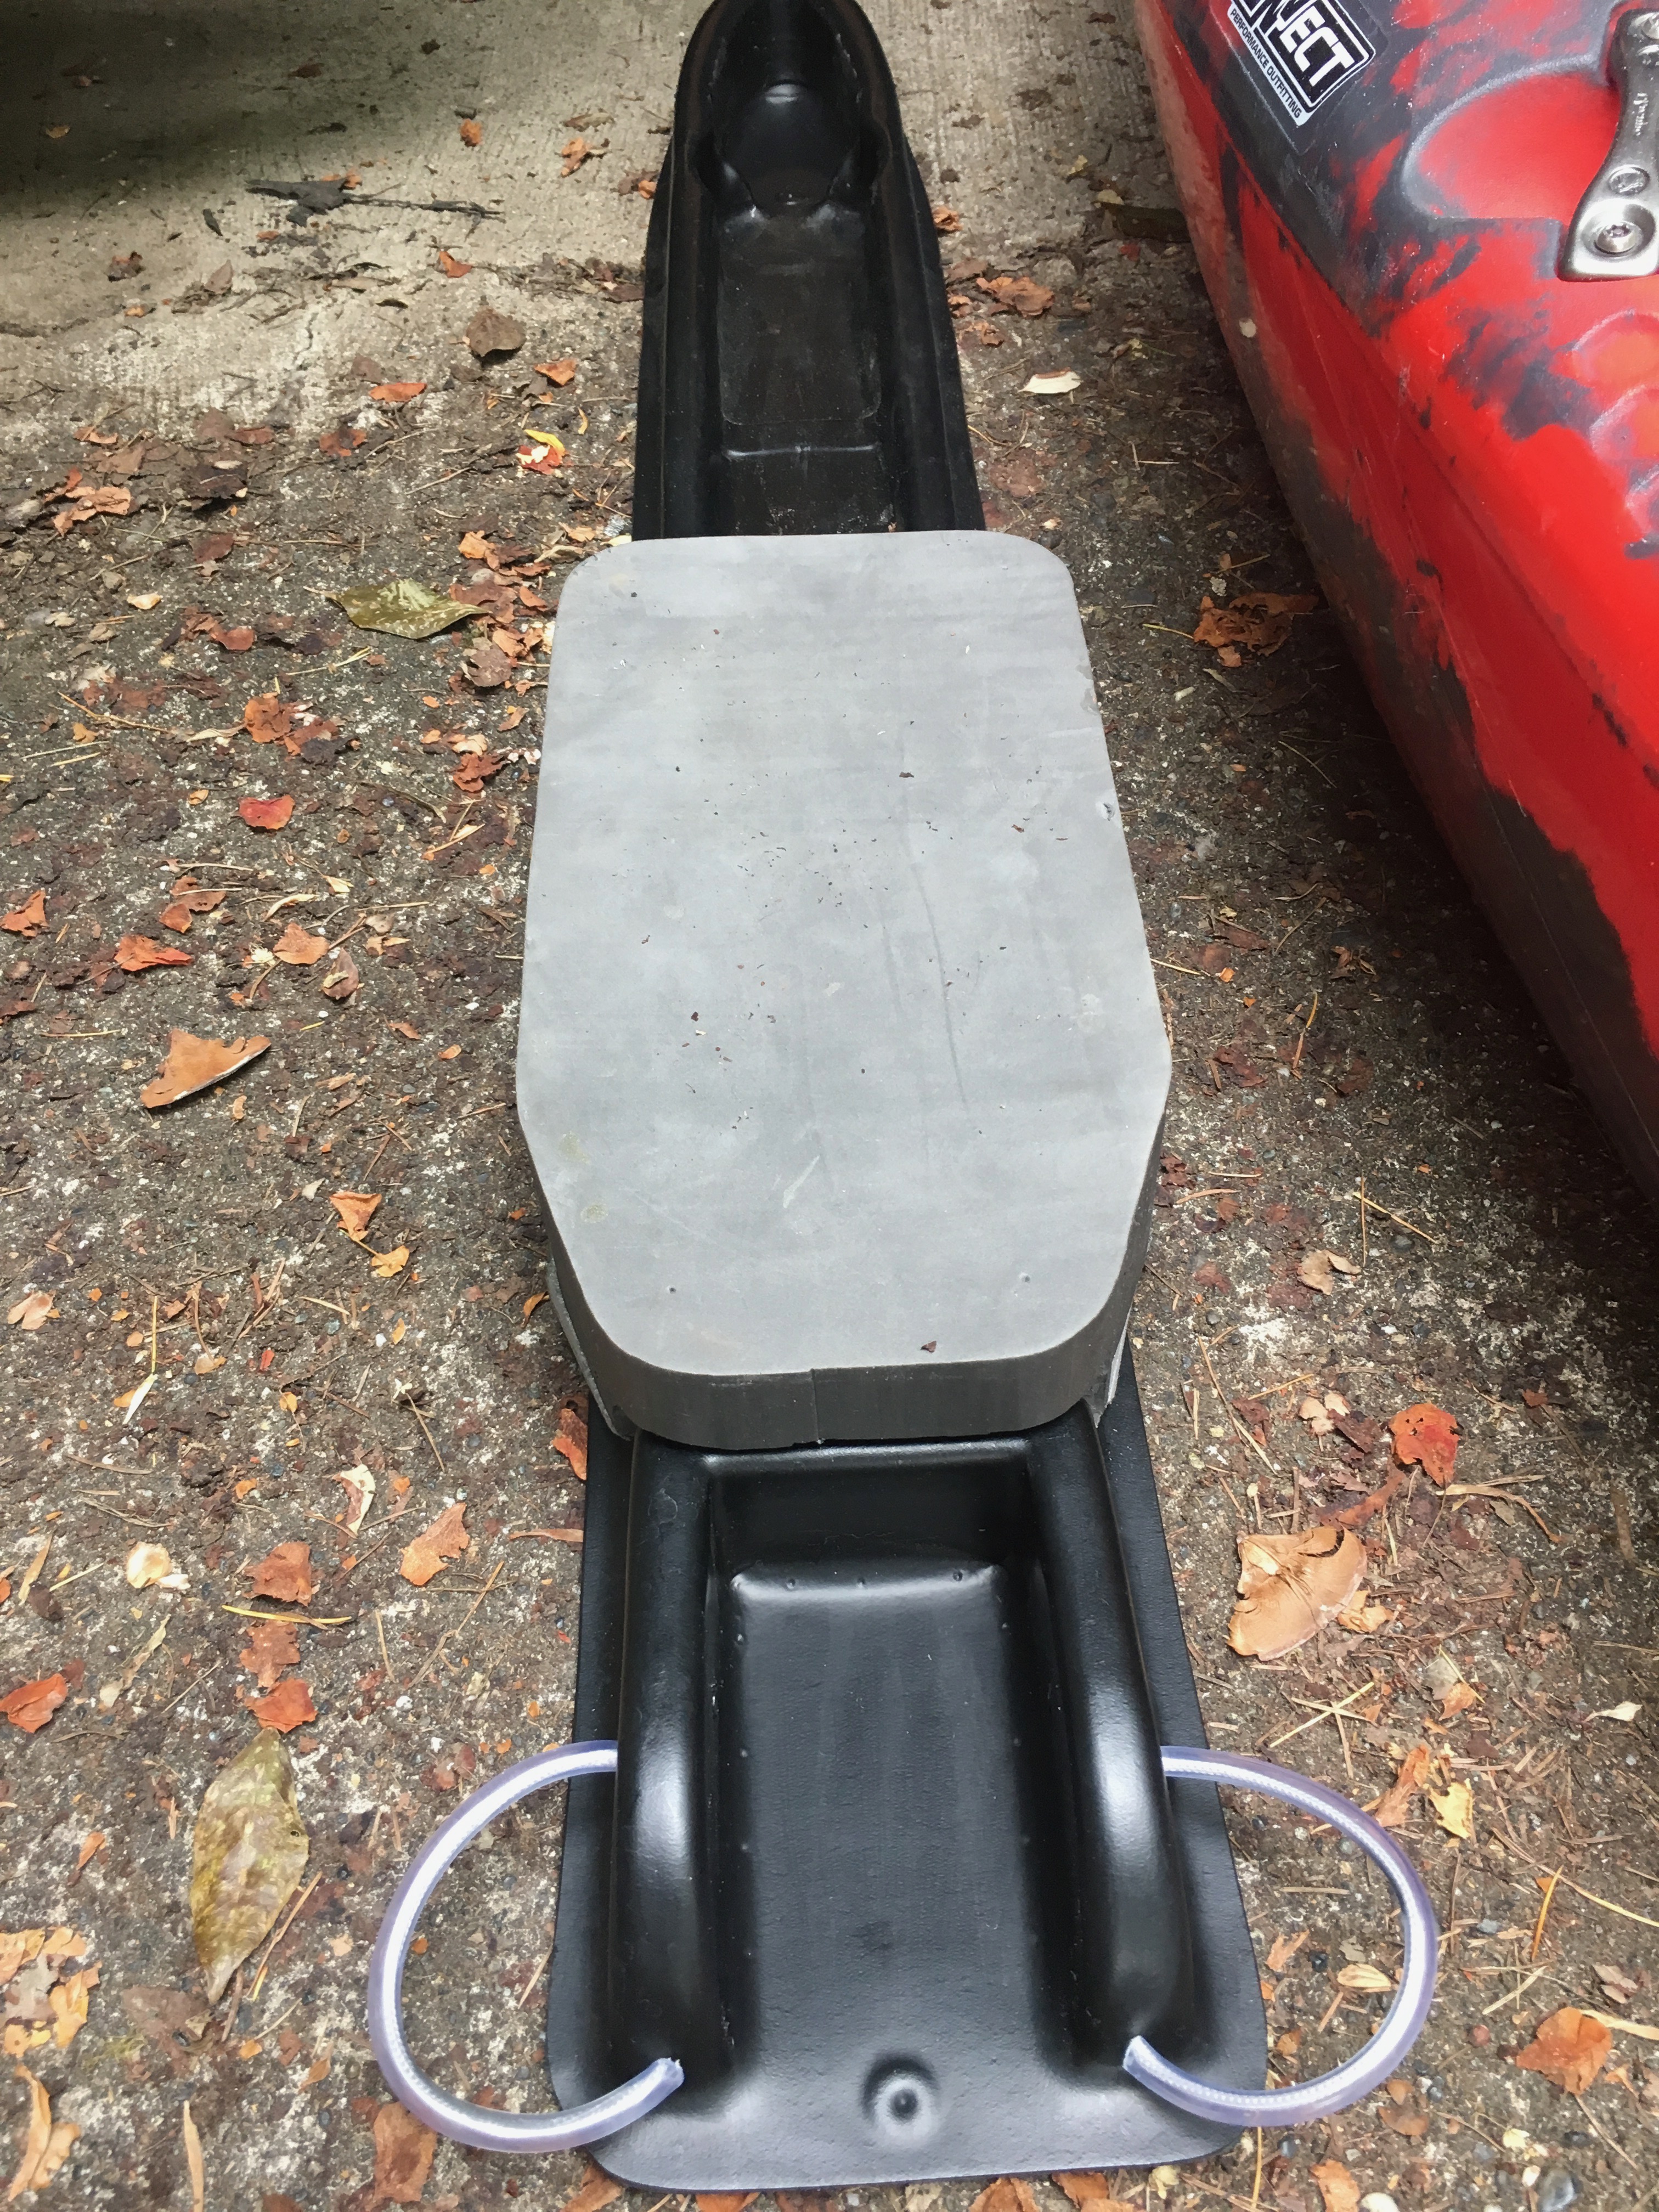
Although the picture above is actually showing the rib after I built the pedestal, it is obvious how the gear loops have been relocated. Even if you do not have these in your original donor boat, I highly recommend making yourself a pair from parachute cord and some clear plastic tubing. They are incredibly handy for securing gear in the boat.
Pedestal
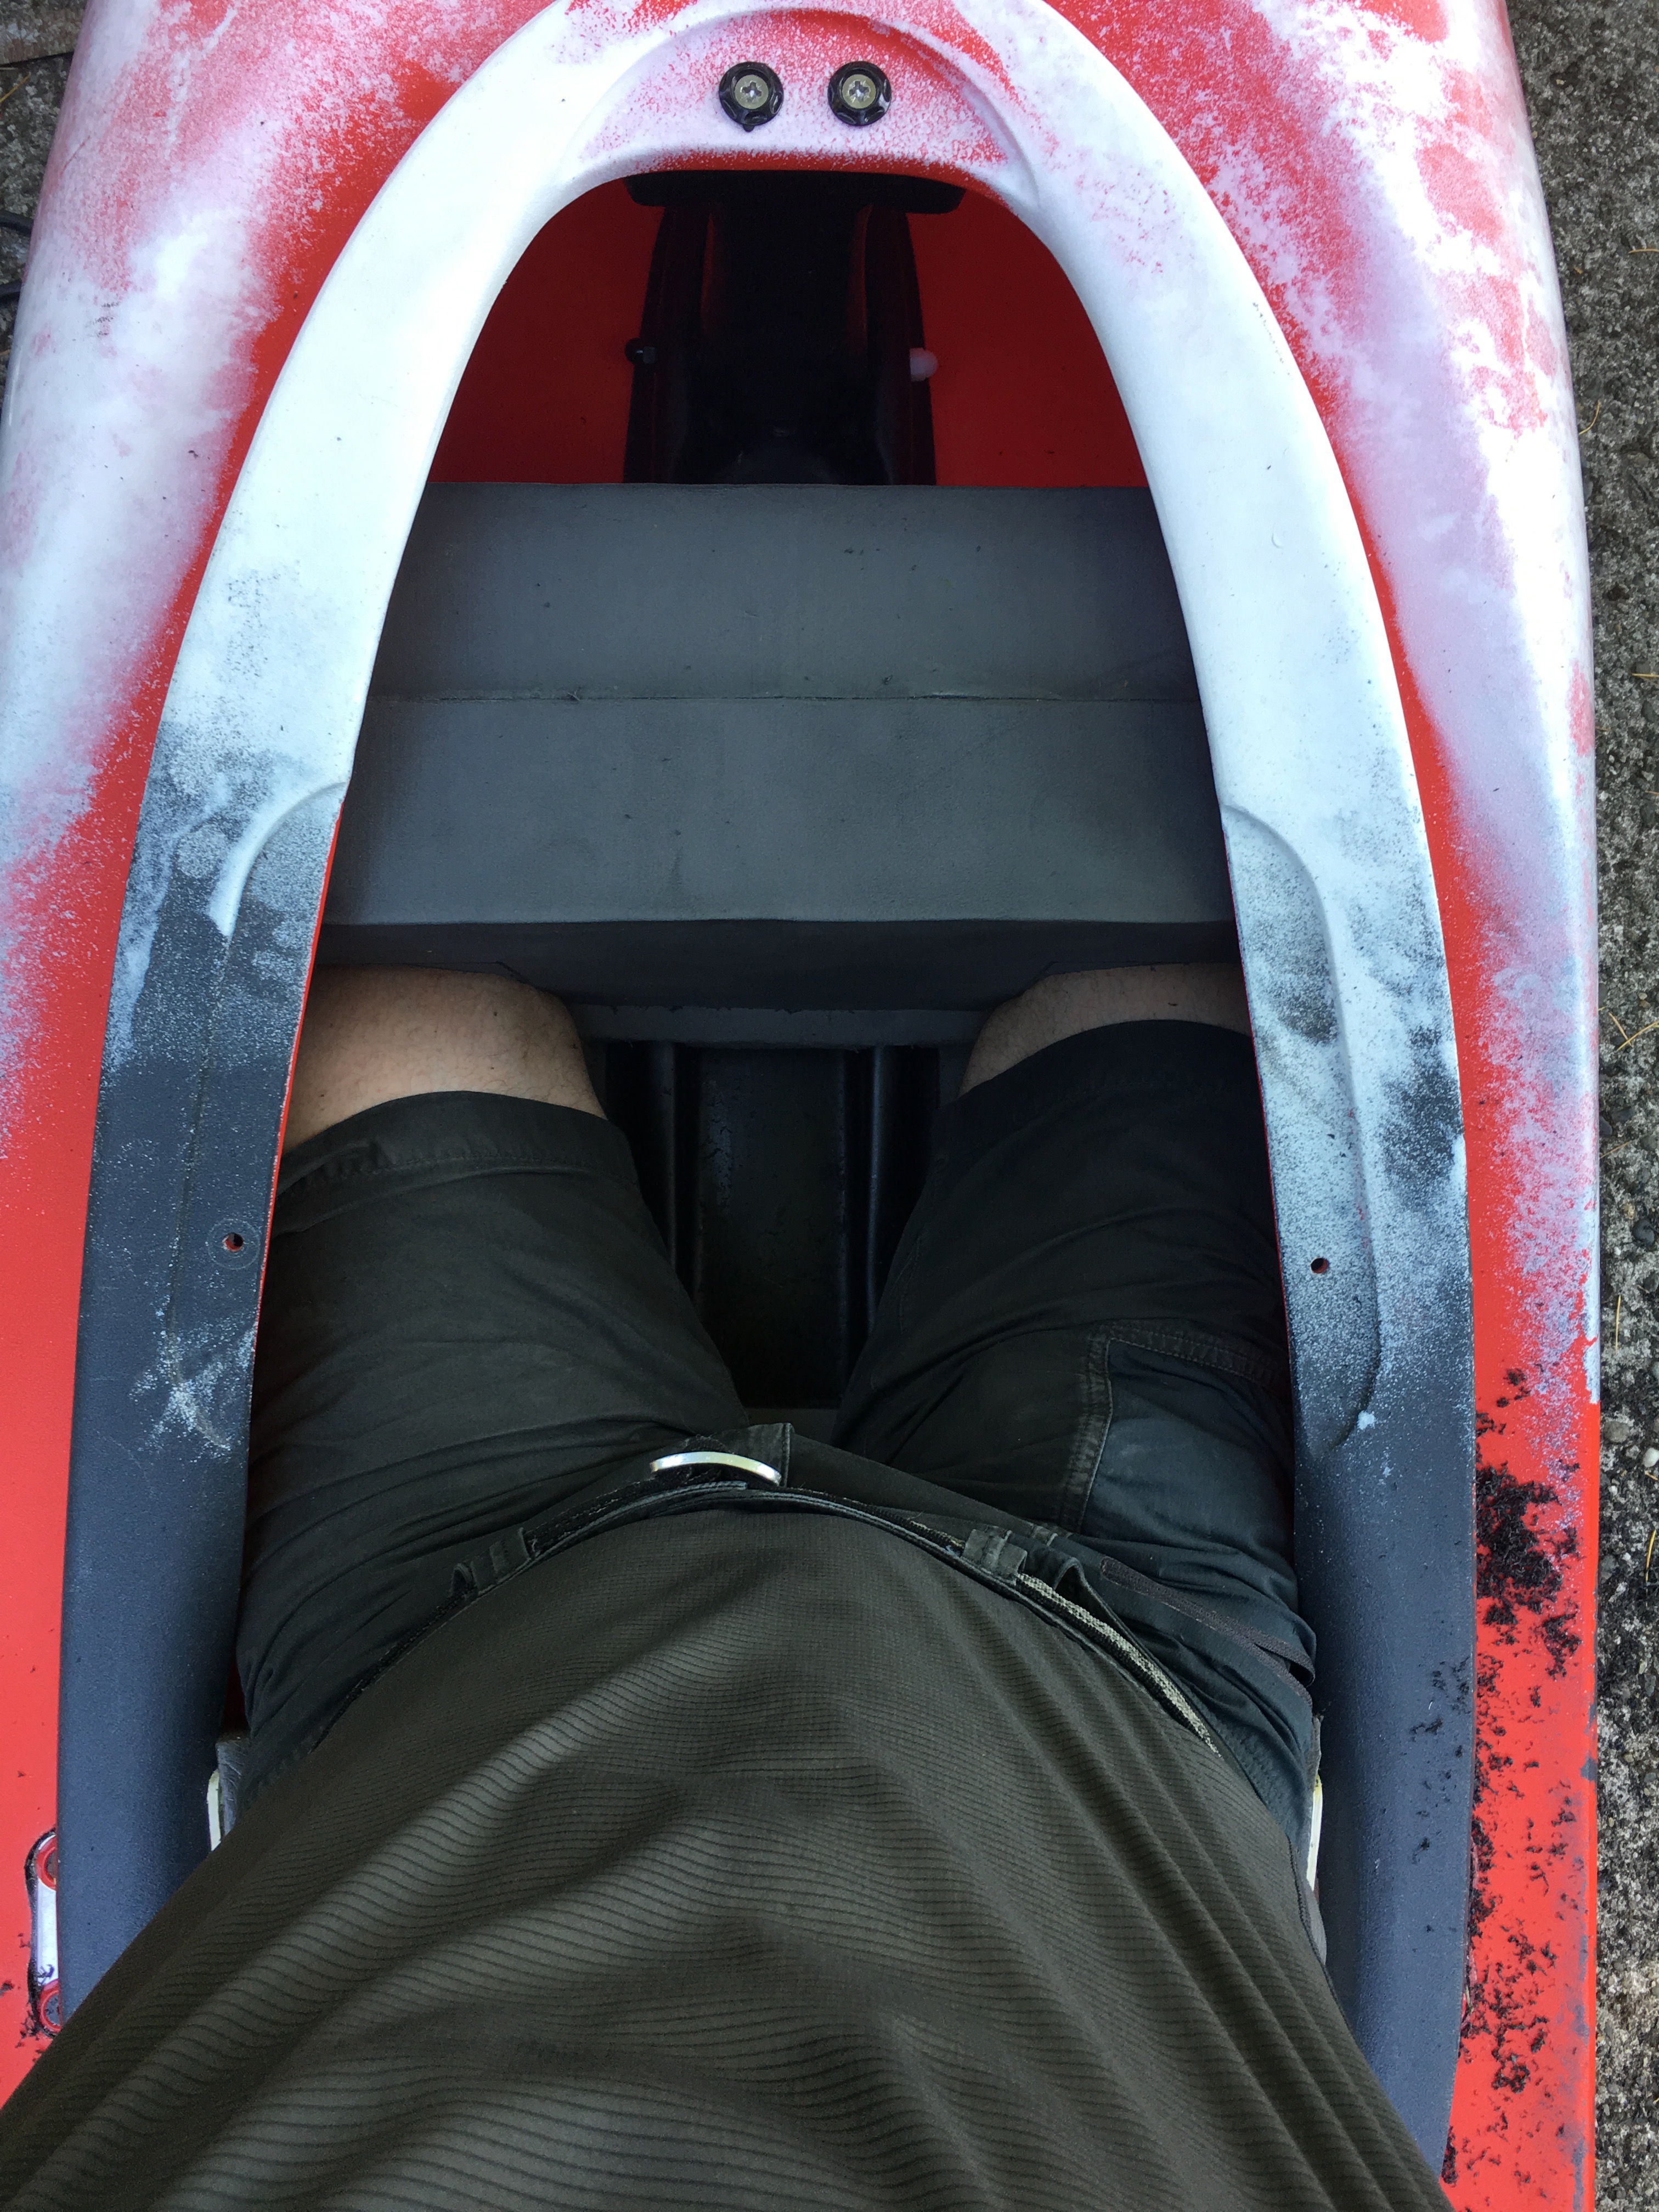
The next topic is the pedestal. Pedestal height is likely the largest point of contention among C-boaters. In my creek boats, I run around a four inch pedestal. It provides the best balance of comfort and stability. This is based on experience including my current favorite outfitted boat, a LiquidLogic Stinger, which is one of the narrowest boats around.
There are a variety of ways to shape the foam around the ridges in the rib, but since foam typically is three inches, I usually use some scraps to crate a double channel around these ridges to produce a height off the hull right at four inches.
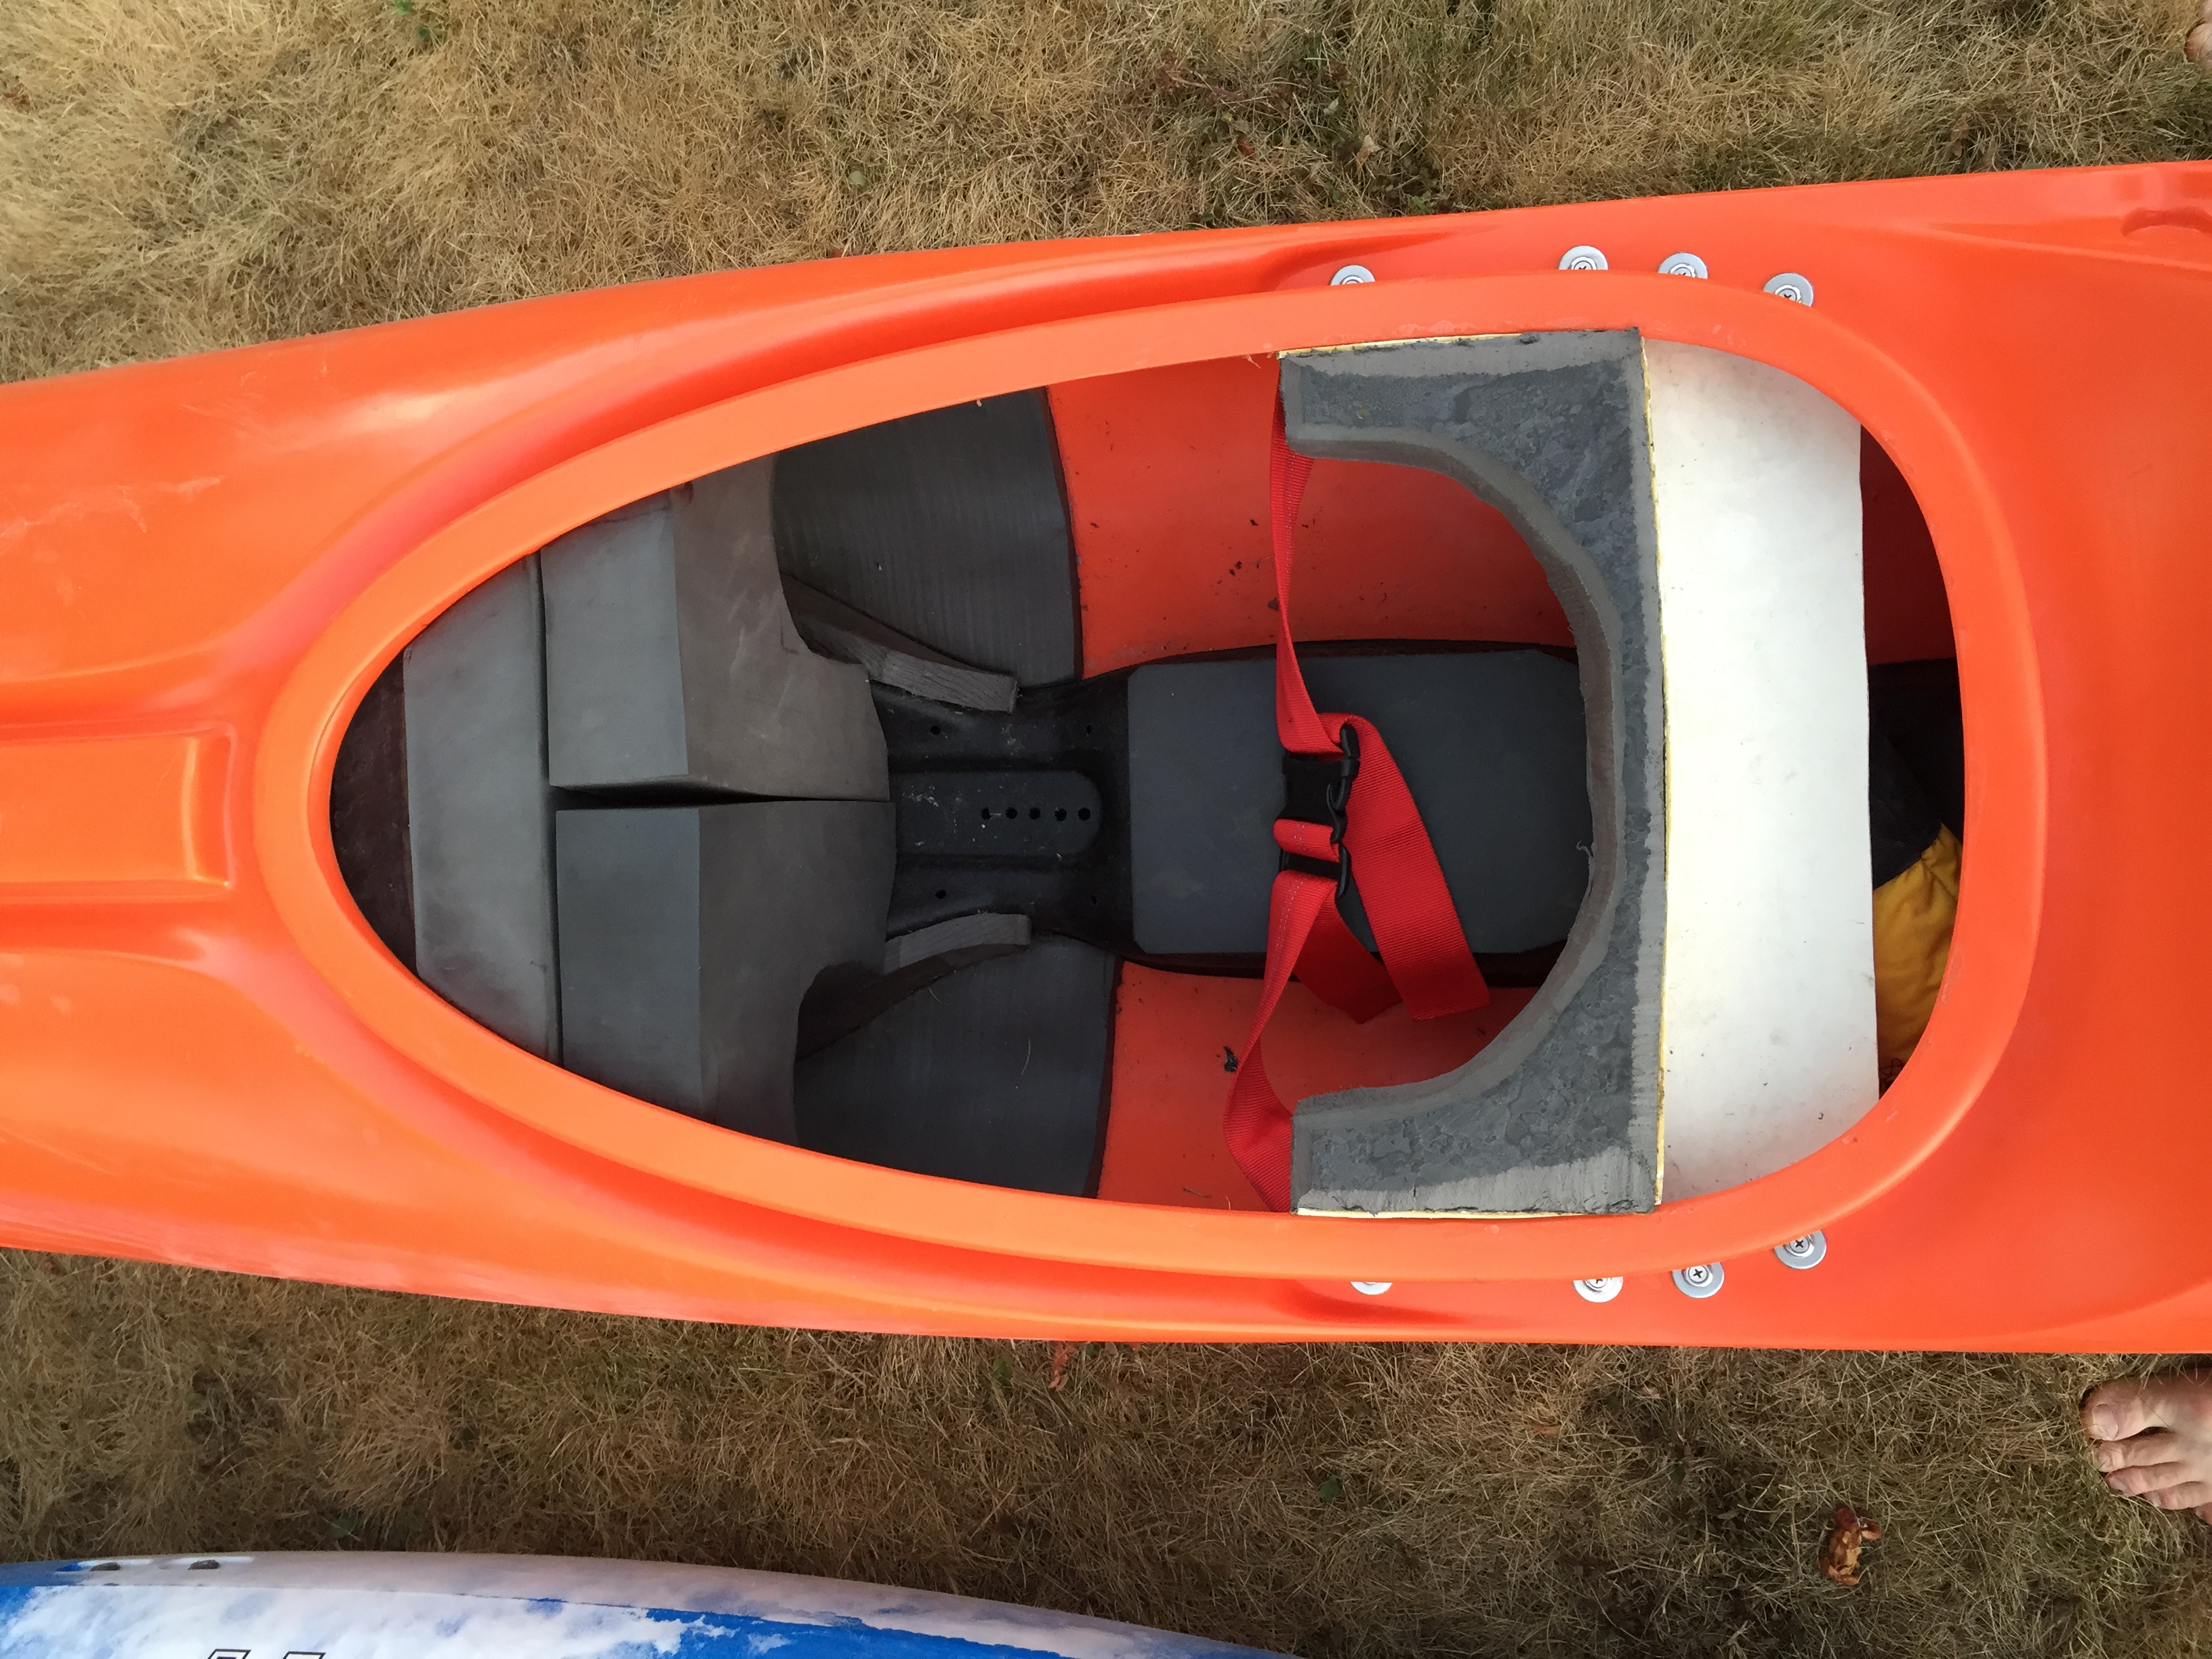
Hip Hugger
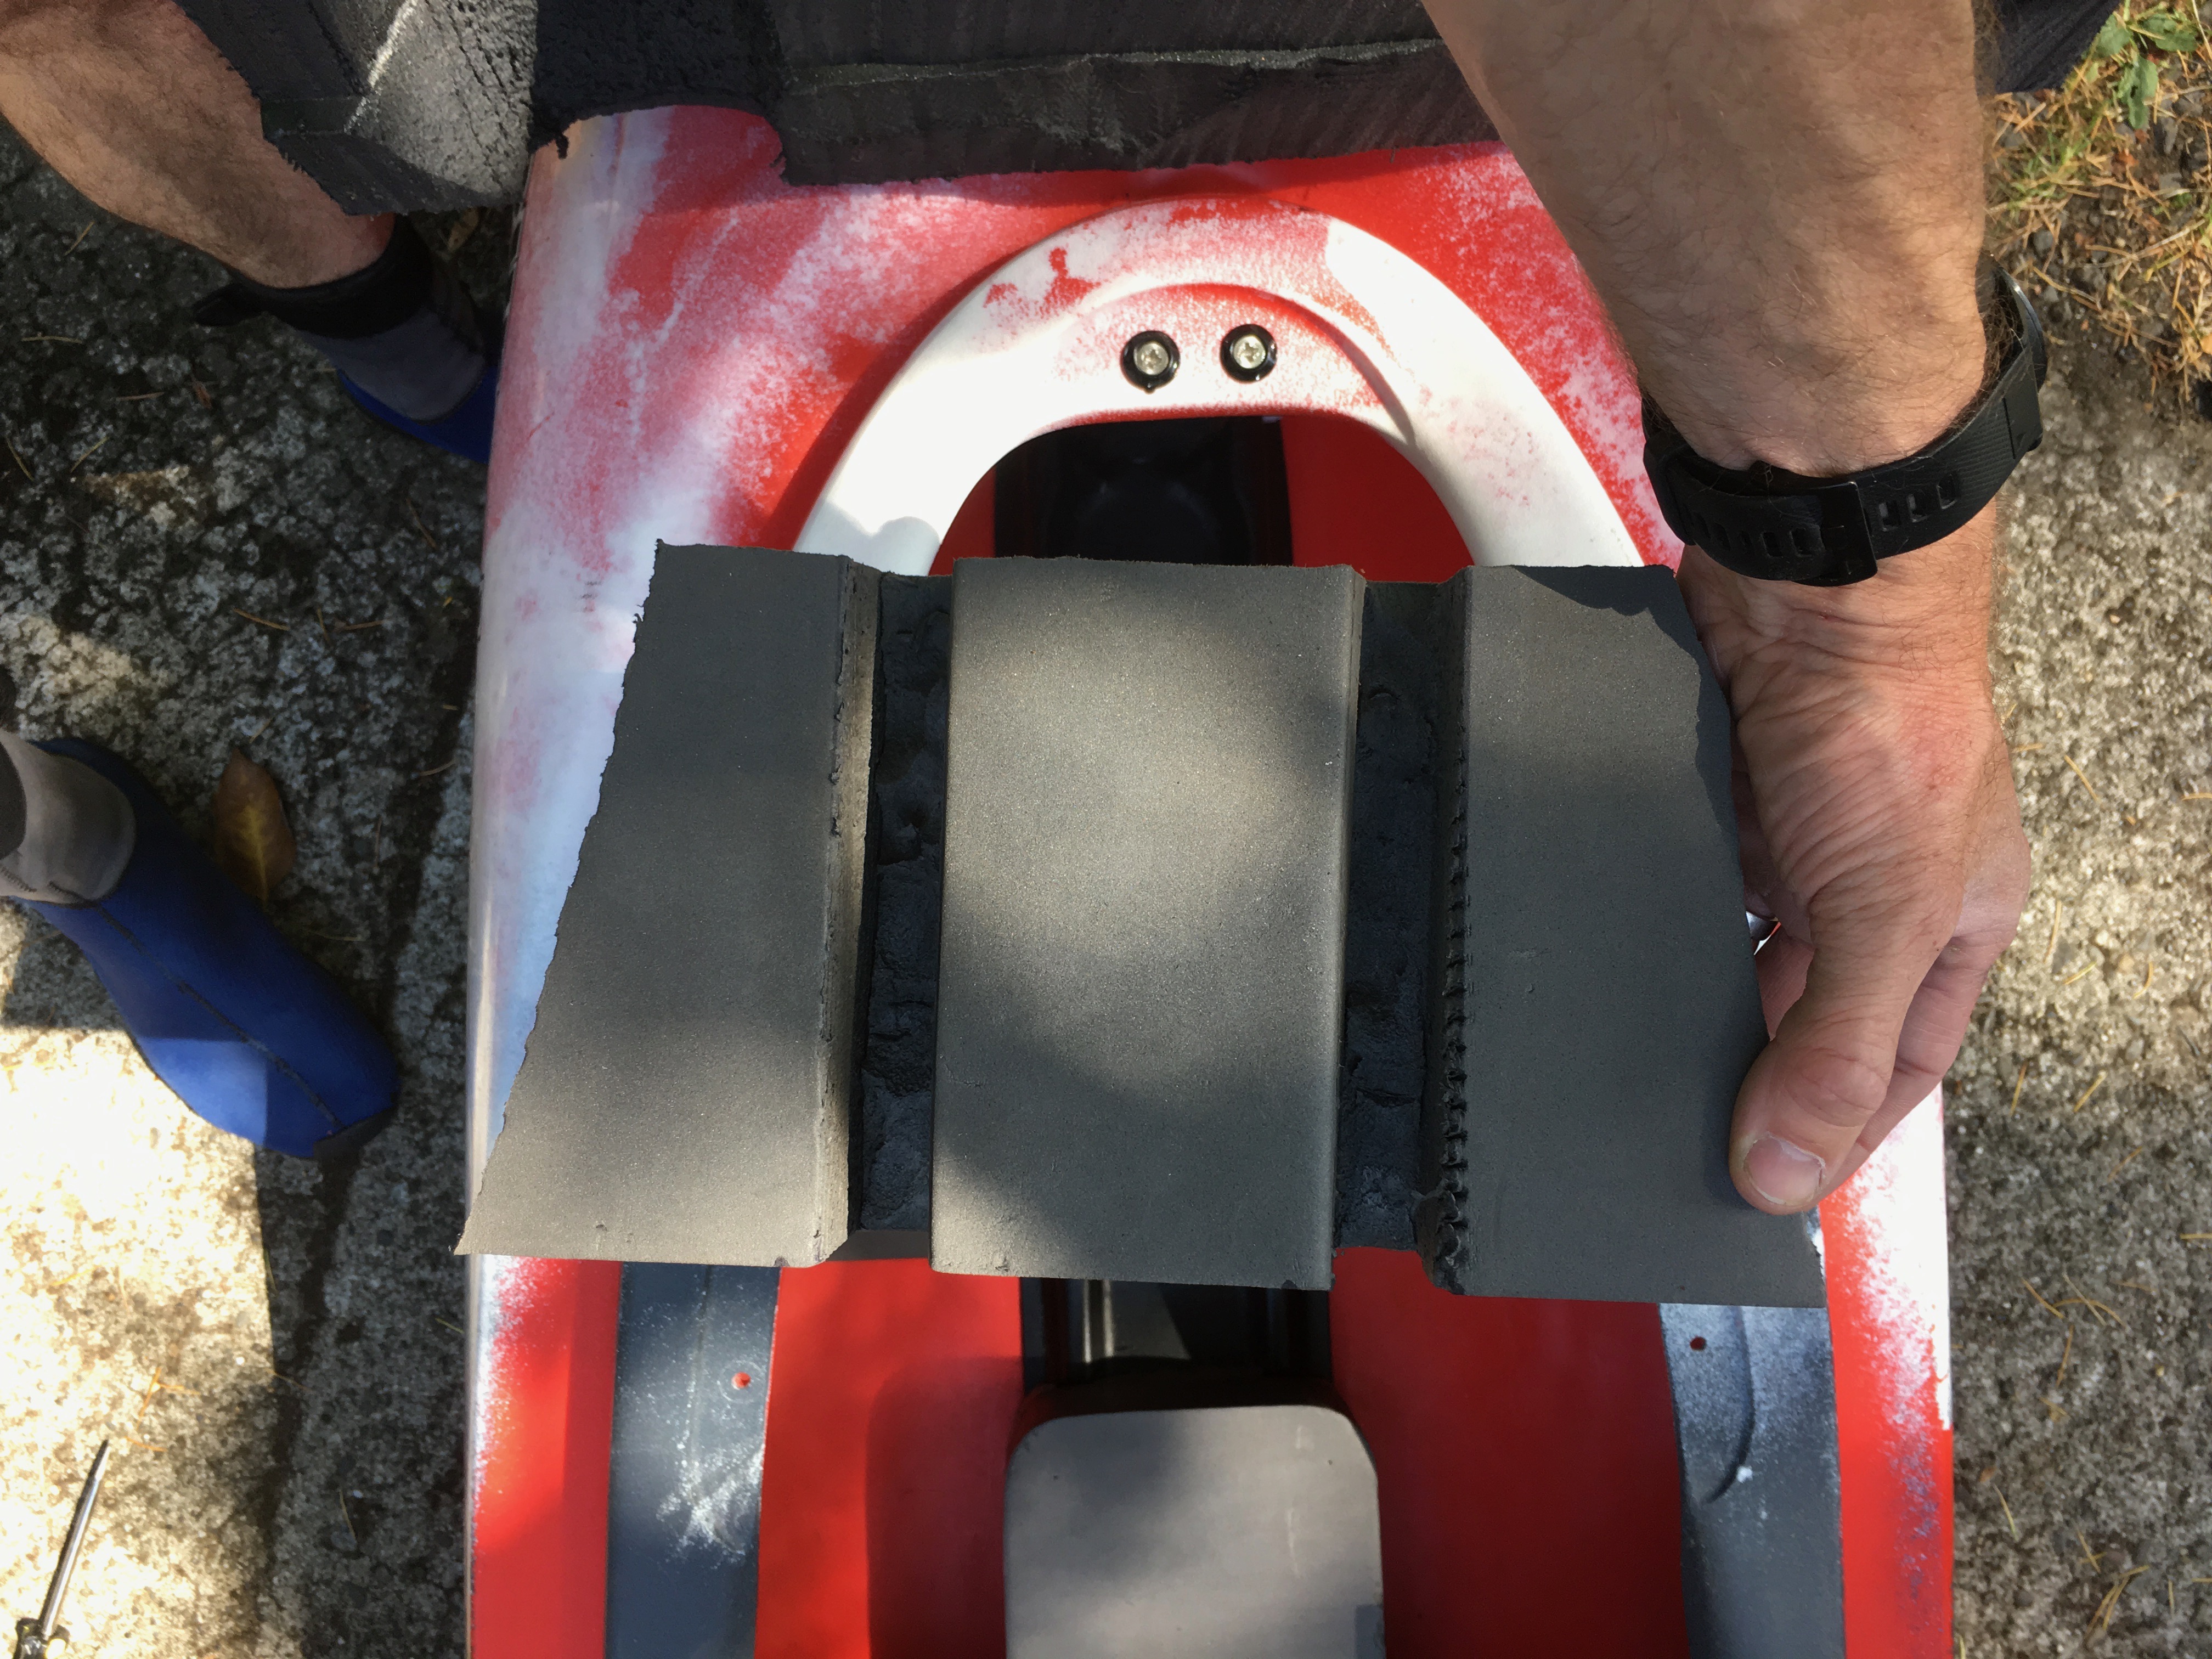
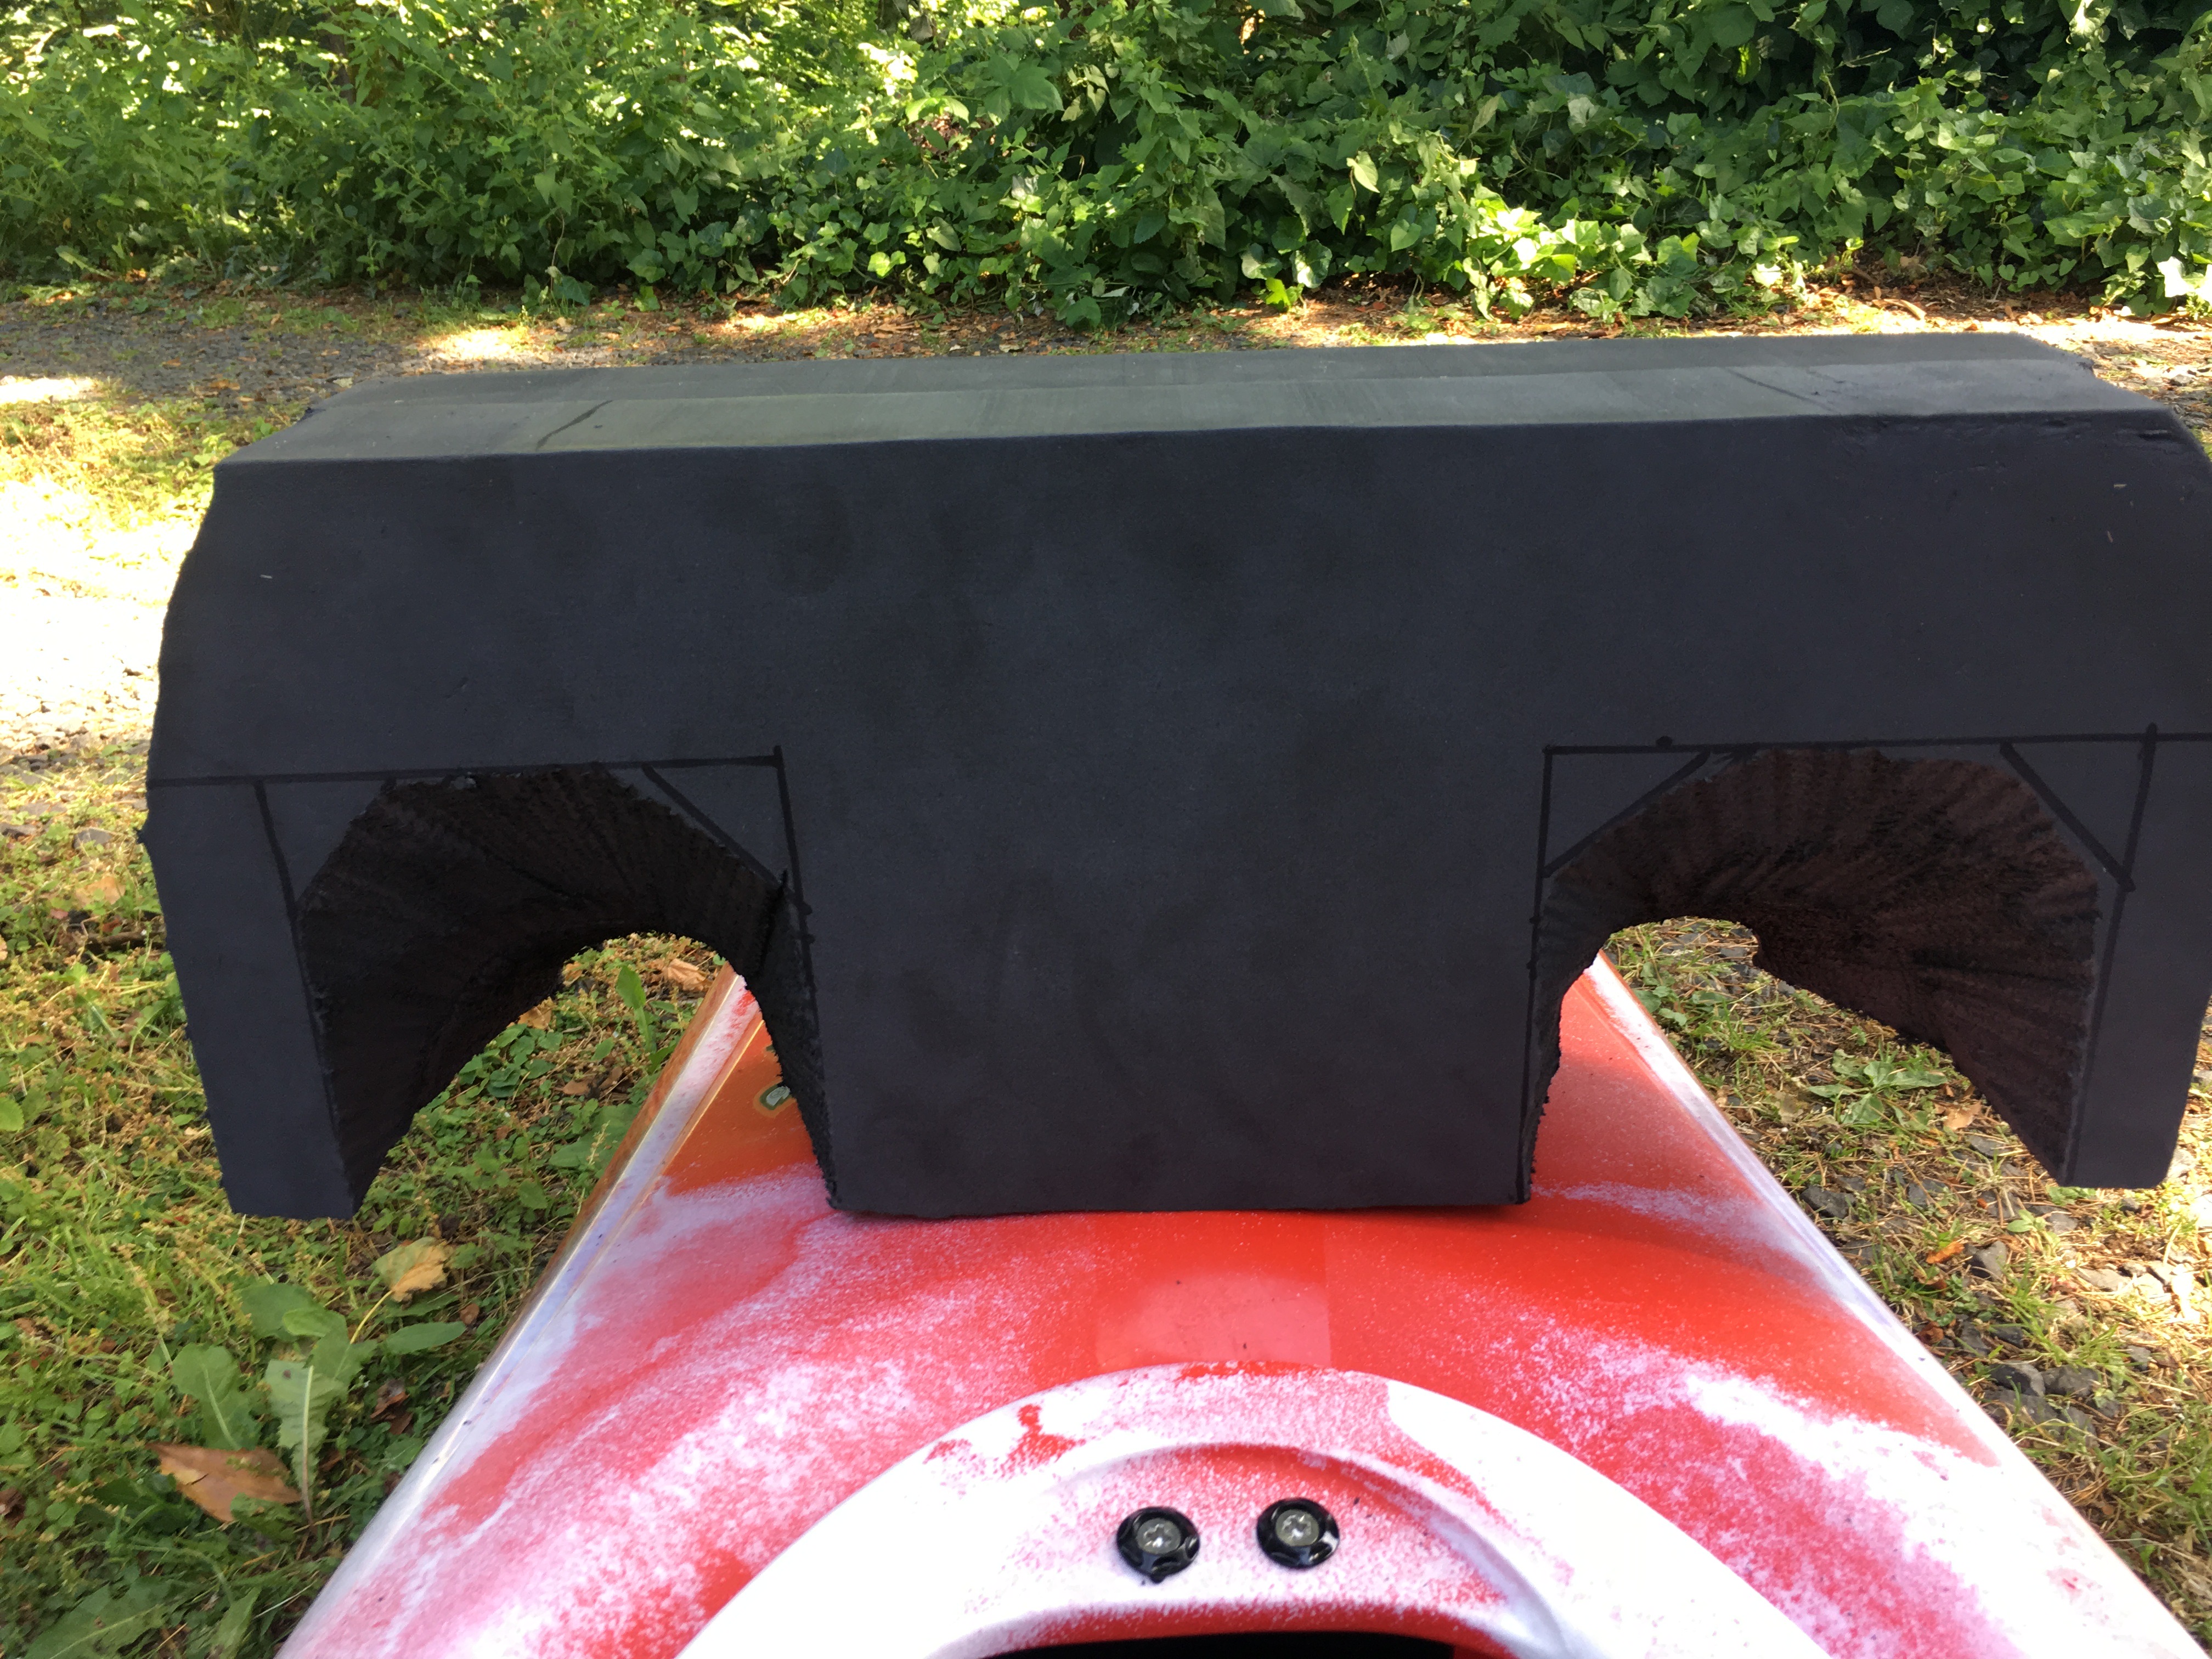
Coming from a slalom background I really like to be well connected to the boat. As a result, I set up the boat with a full 180 degree wrap-around hip hugger. The challenge with this type of setup is securely attaching it to the boat. I accomplish this by crafting flat surfaces to glue foam to around the back of the cockpit using sections cut from a PVC fence post.

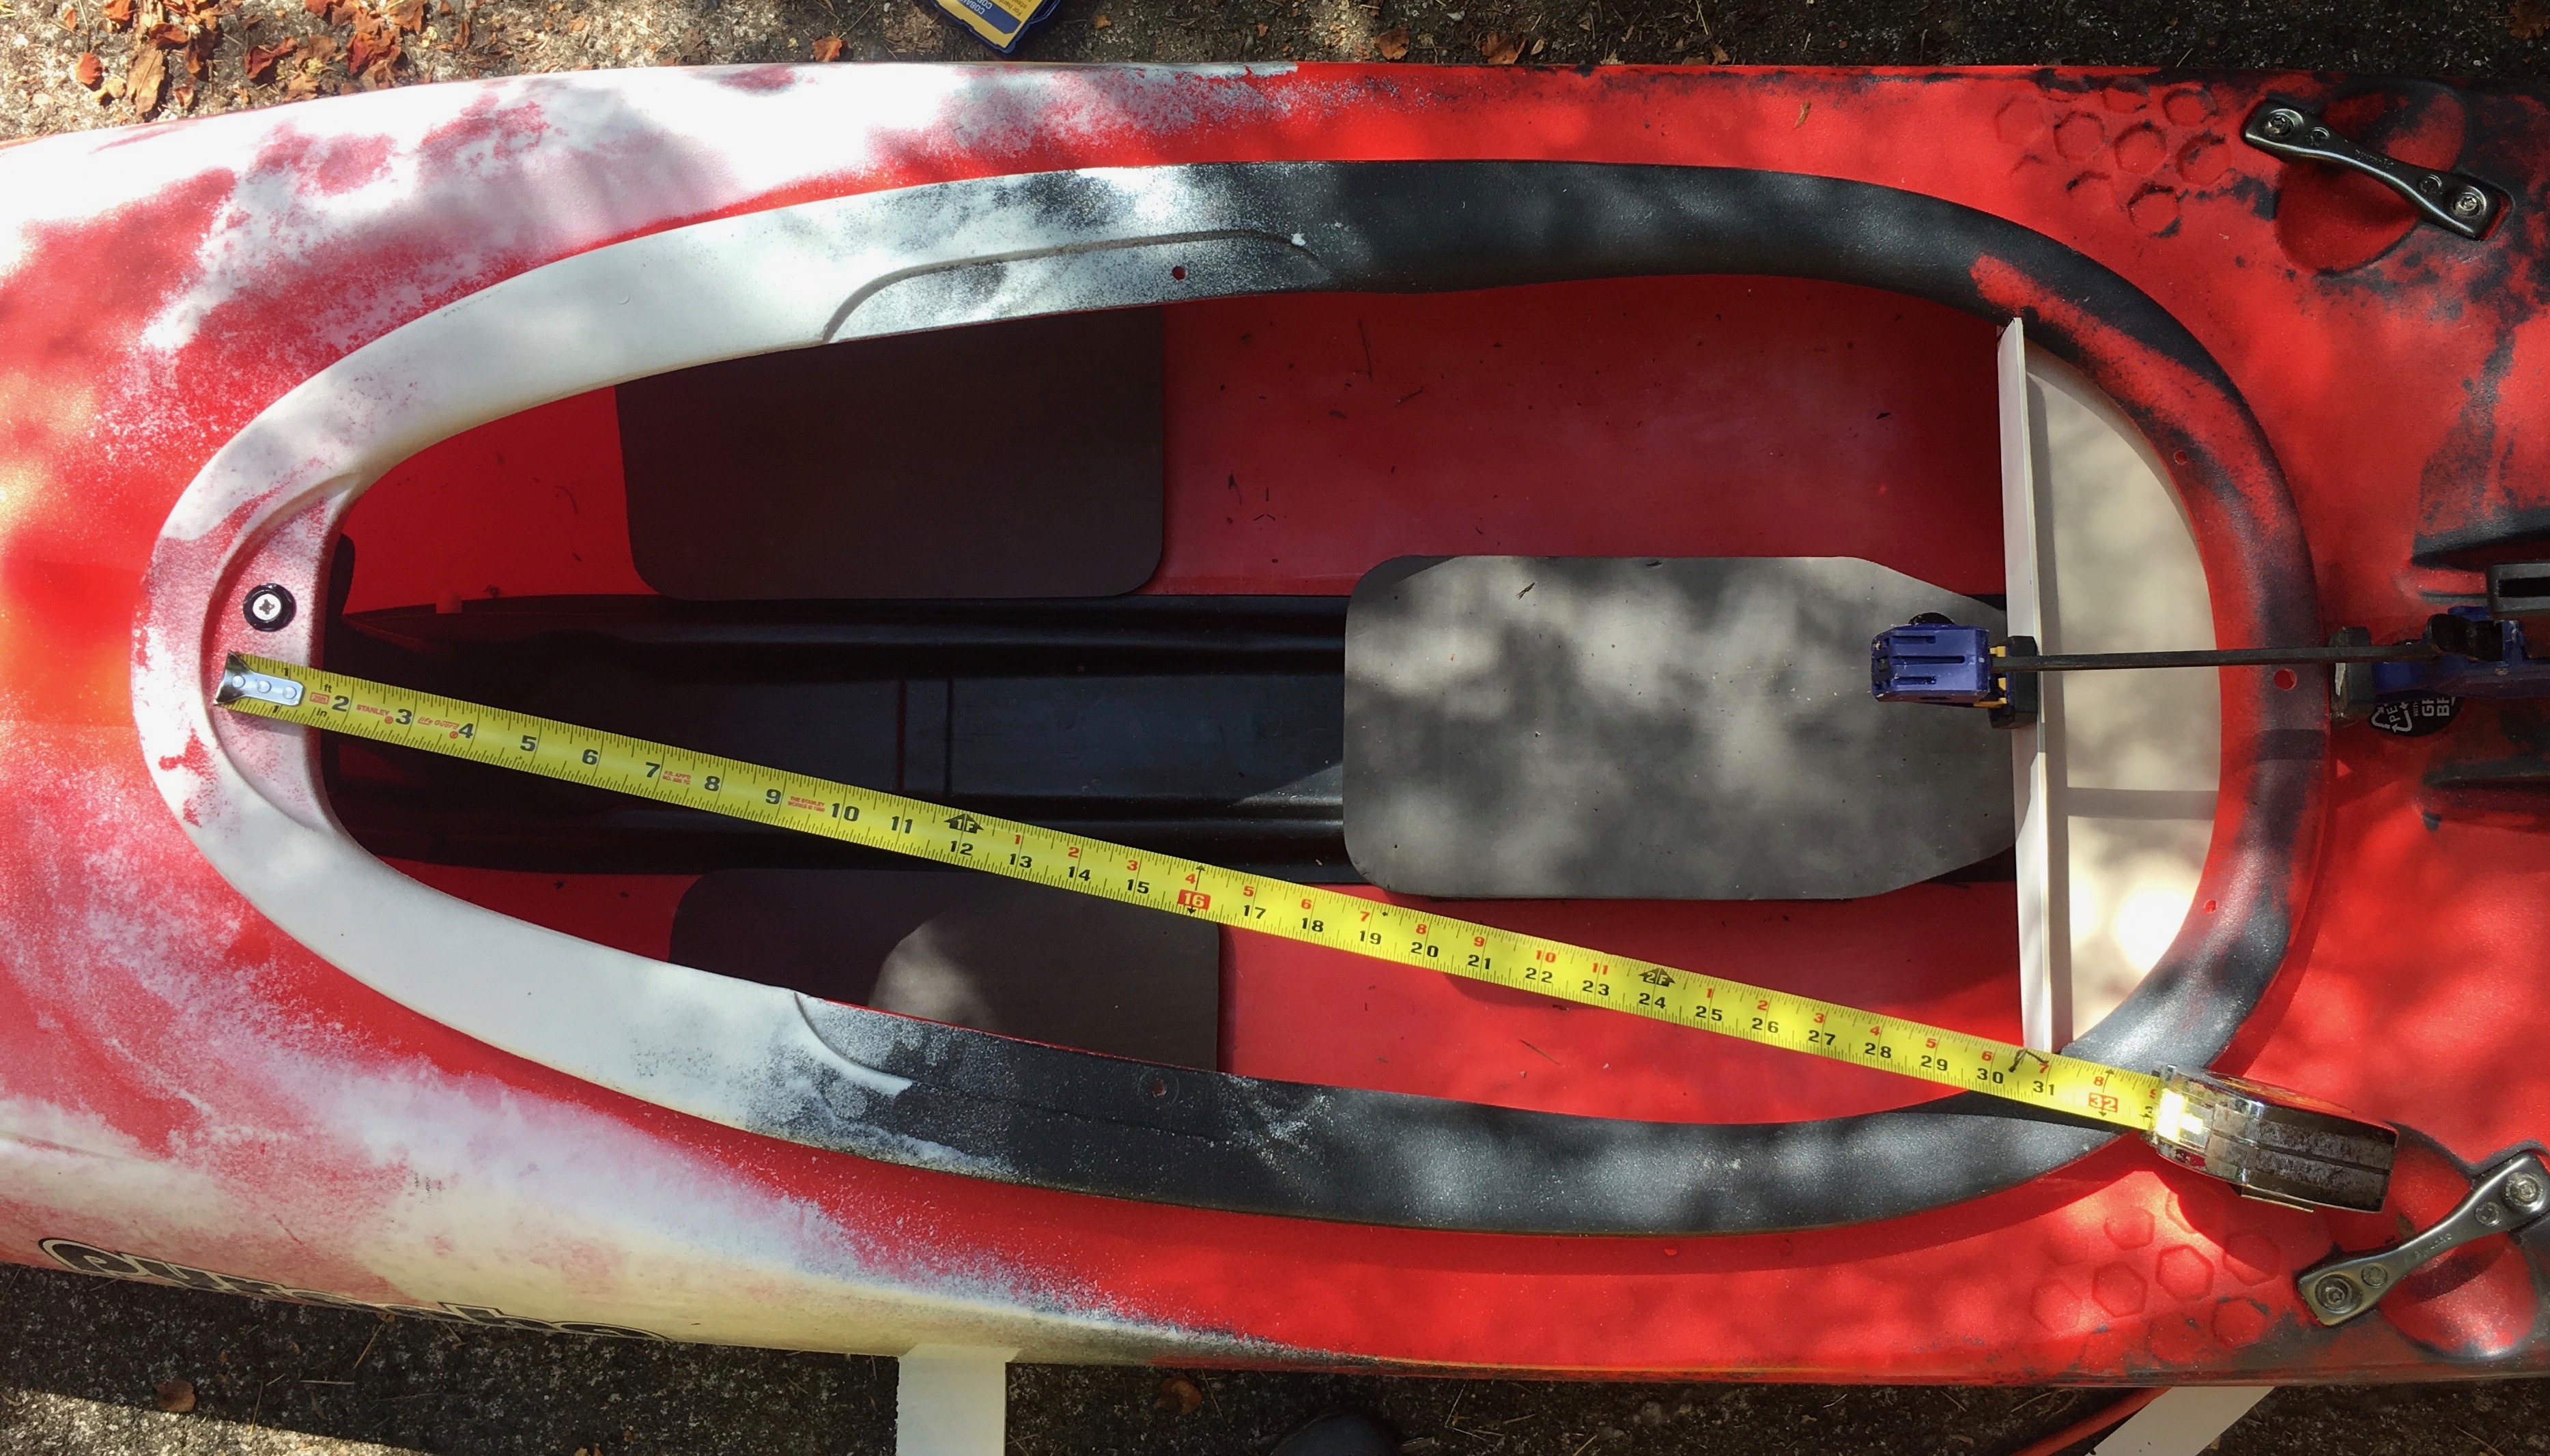
Getting the back straight across is a bit of a trick. With the pedestal in the boat, I have found I like to sit with my hips usually pretty even with the seat bolt points since I paddle leaning quite a bit forward due to my slalom background. Based on this I like to give myself a little more than an inch to pad with foam in front of the PVC.
Once I have figured out where this is with a tape measure behind my butt while sitting in the boat, I get out and measure the width of the cockpit at this point. From there I cut a section out of the PVC fence post wide enough to reach the surfaces in the hull so I can bolt it in. Then, I trim off the upright part to the width of the cockpit, so it will stick up.
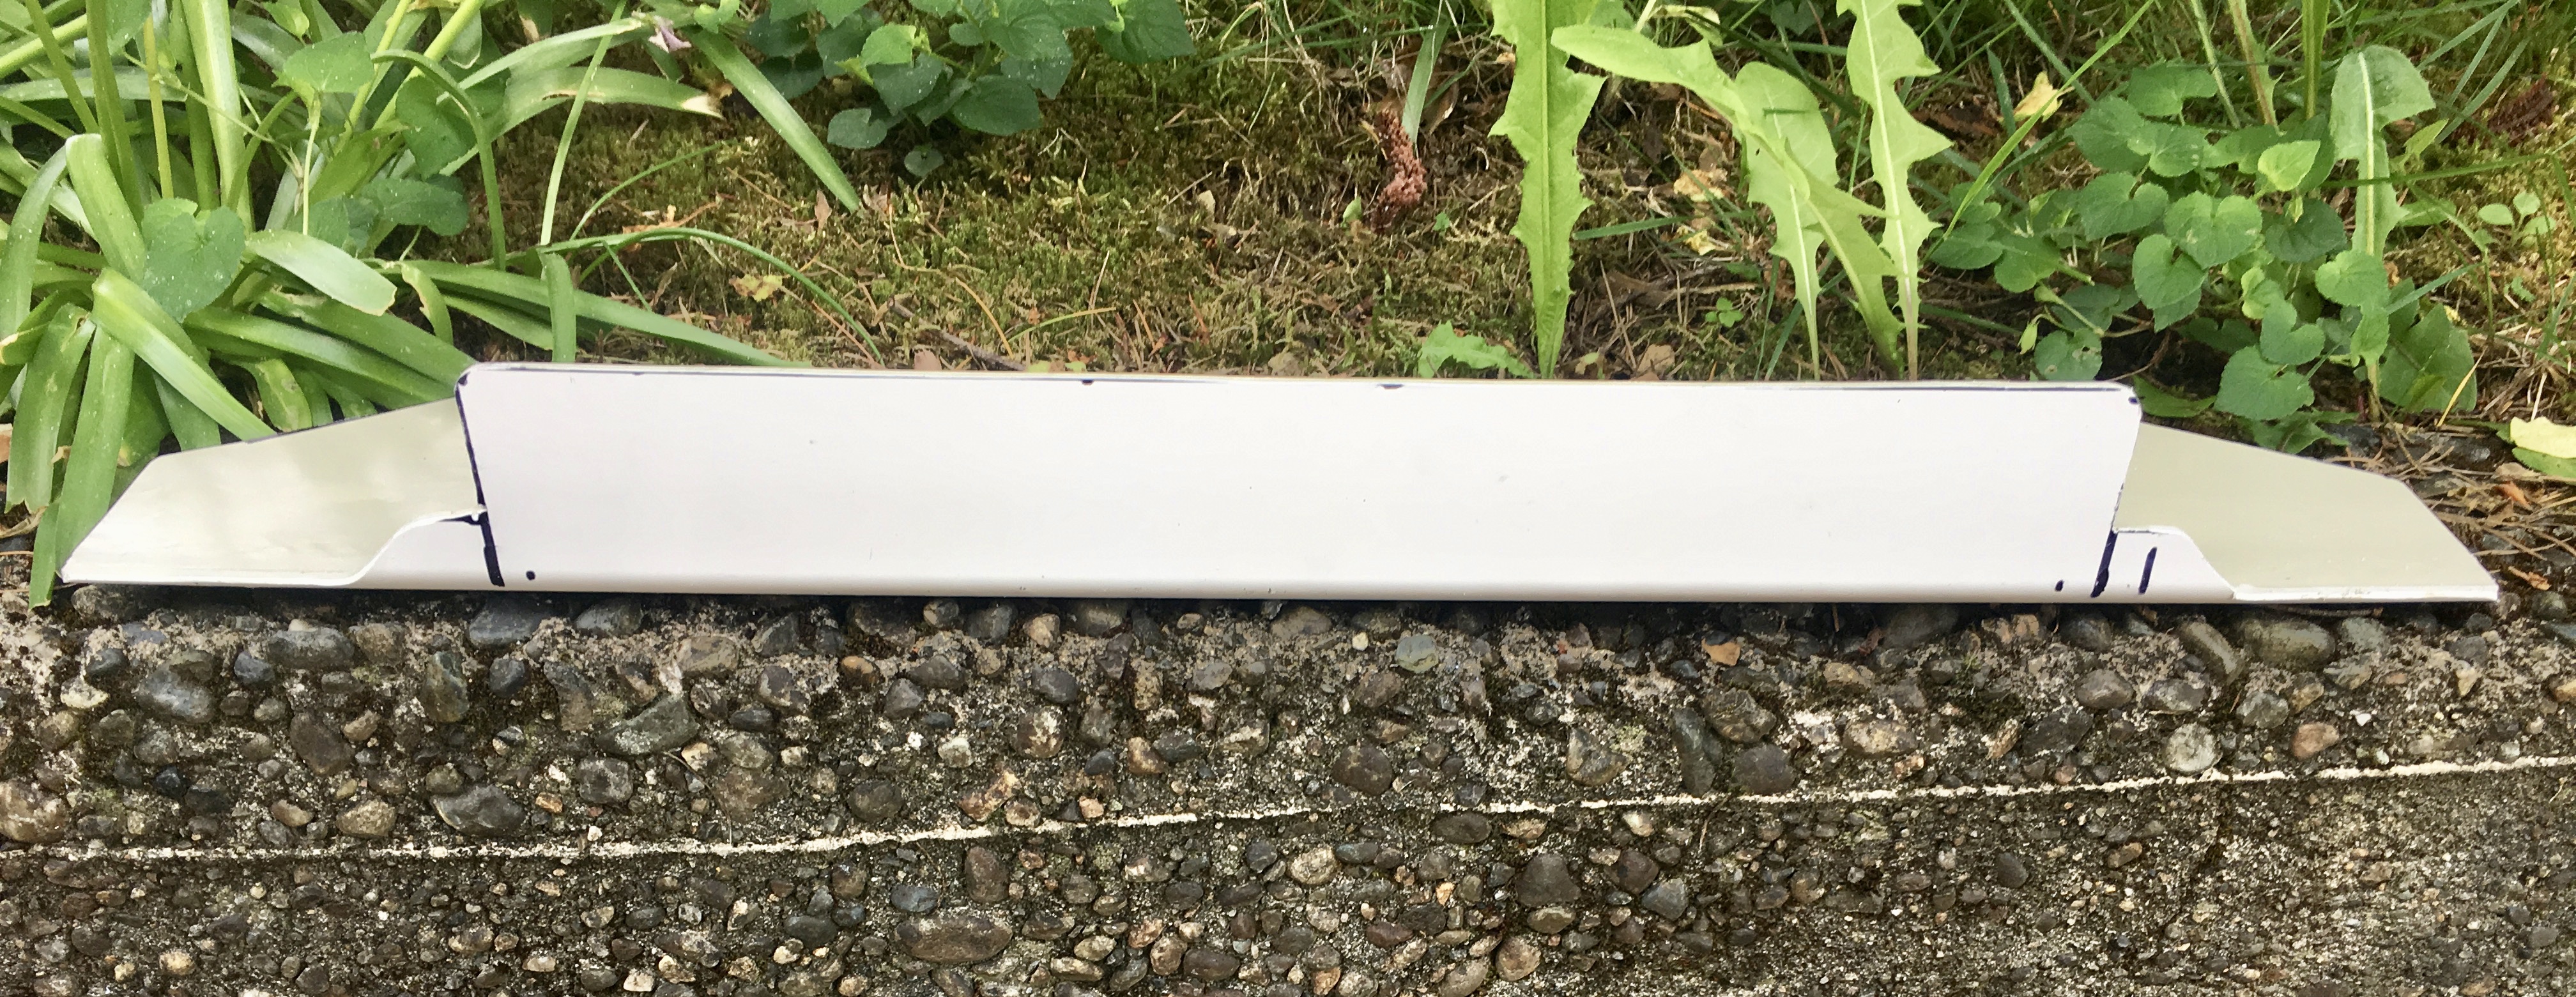
I then almost always leave only two inches sticking up. This is close to the height of the top of the cockpit, and with three inch foam, only leaves about an inch below the cockpit. This is almost perfect for where I like it to contact me for support, but also not hinder exit when necessary.
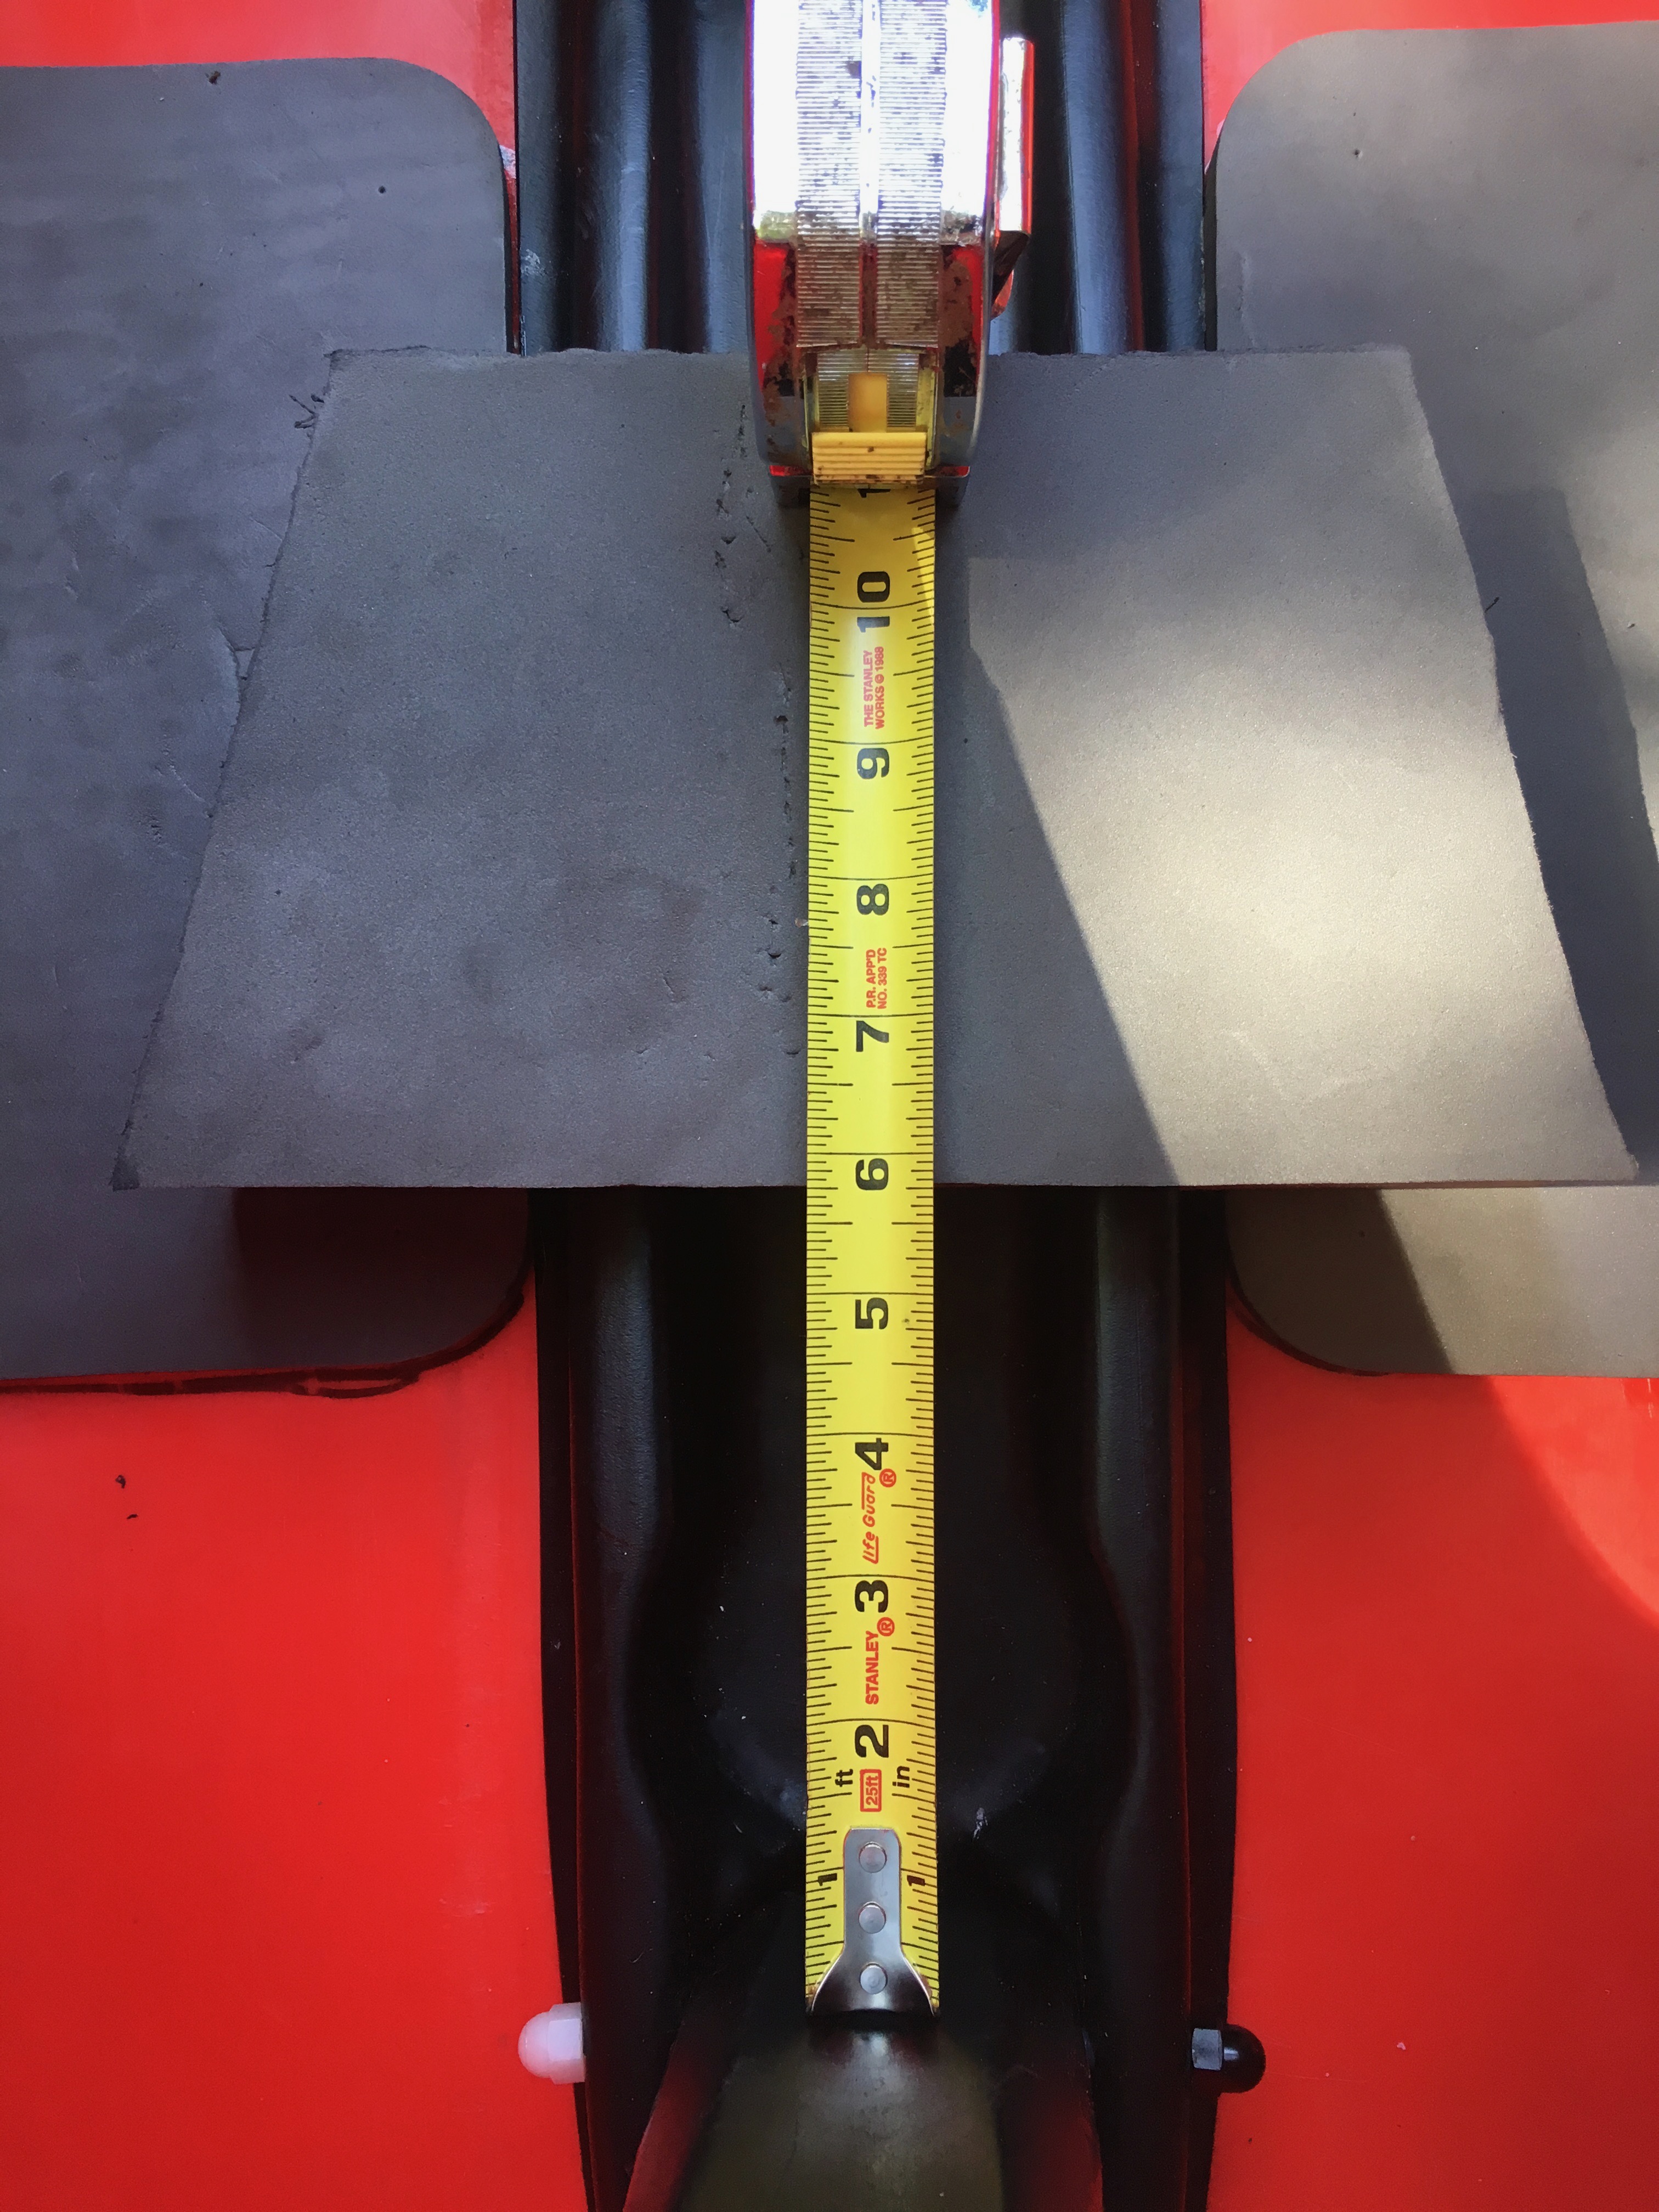
Getting the back straight across at 90 degrees is the trick. Nothing in a kayak is at right angles, so I just measure from some common point, typically a bolt or the center pillar at the front of the cockpit, to make sure the back support is straight across.
Securing the back support is as easy as drilling a couple of holes and bolting it in. No, I do not like leaky boats either, so I use silicone to seal up the bolt holes when doing this, and have bone dry boats.
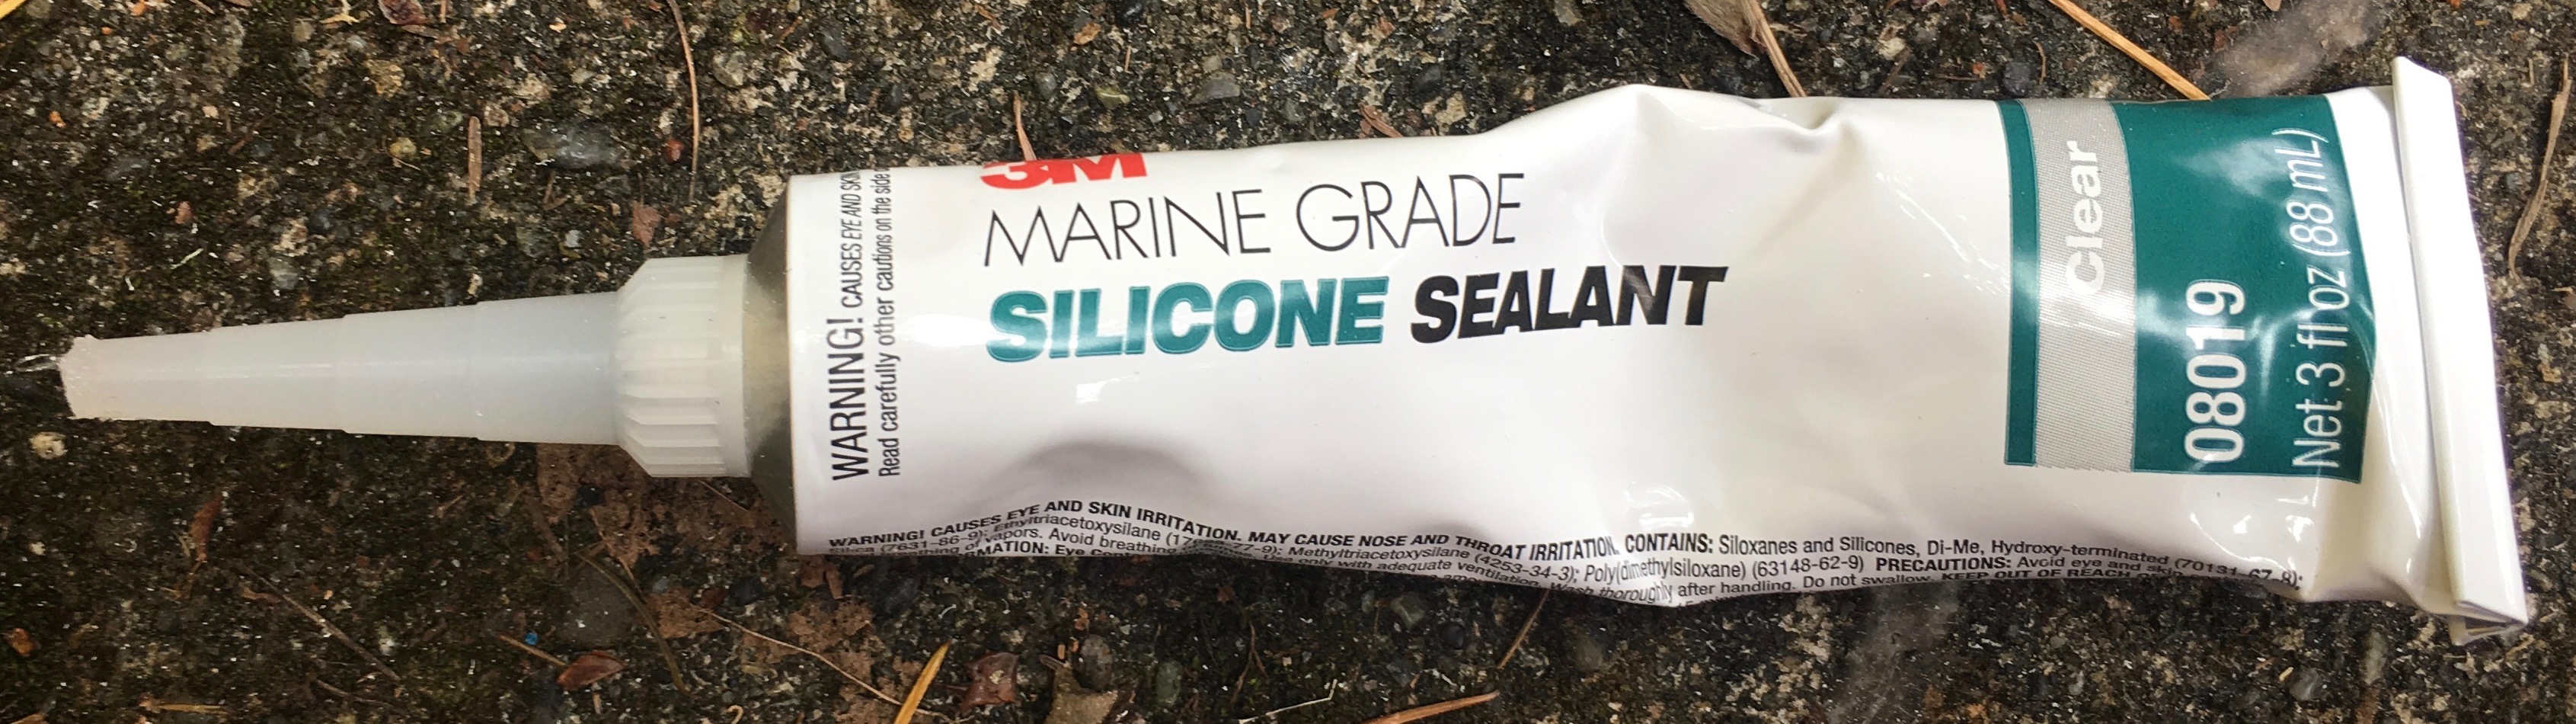
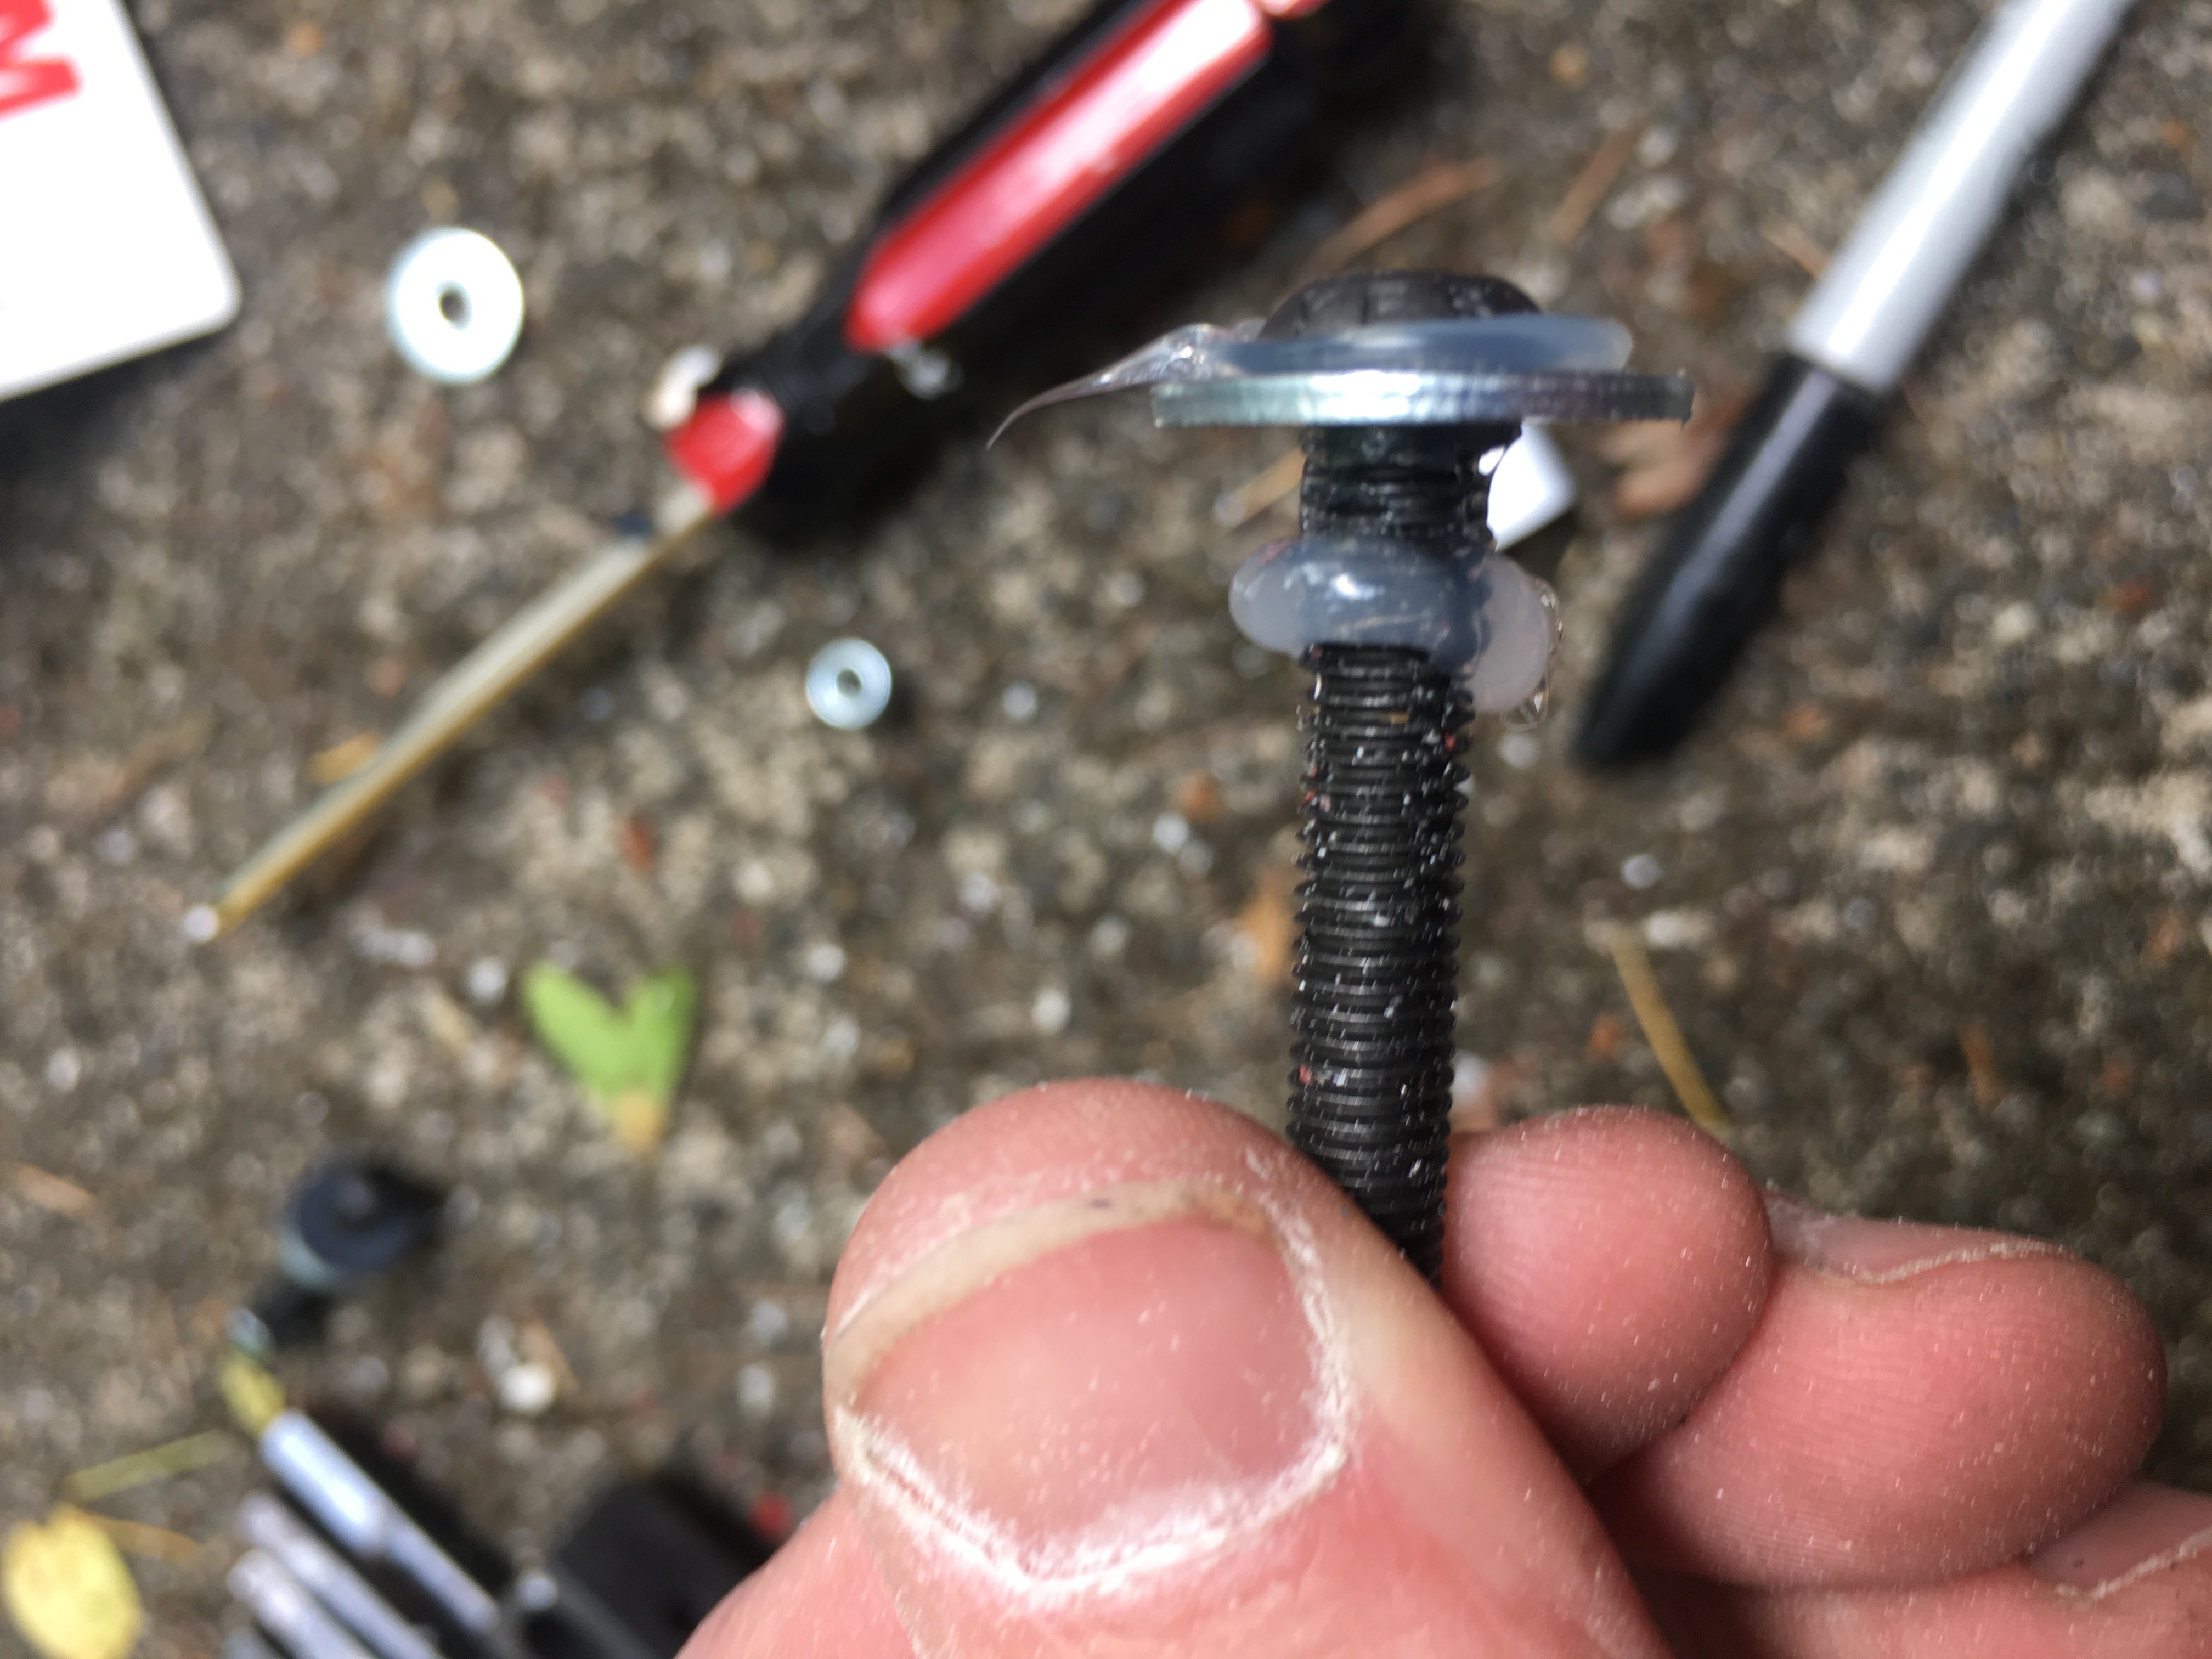
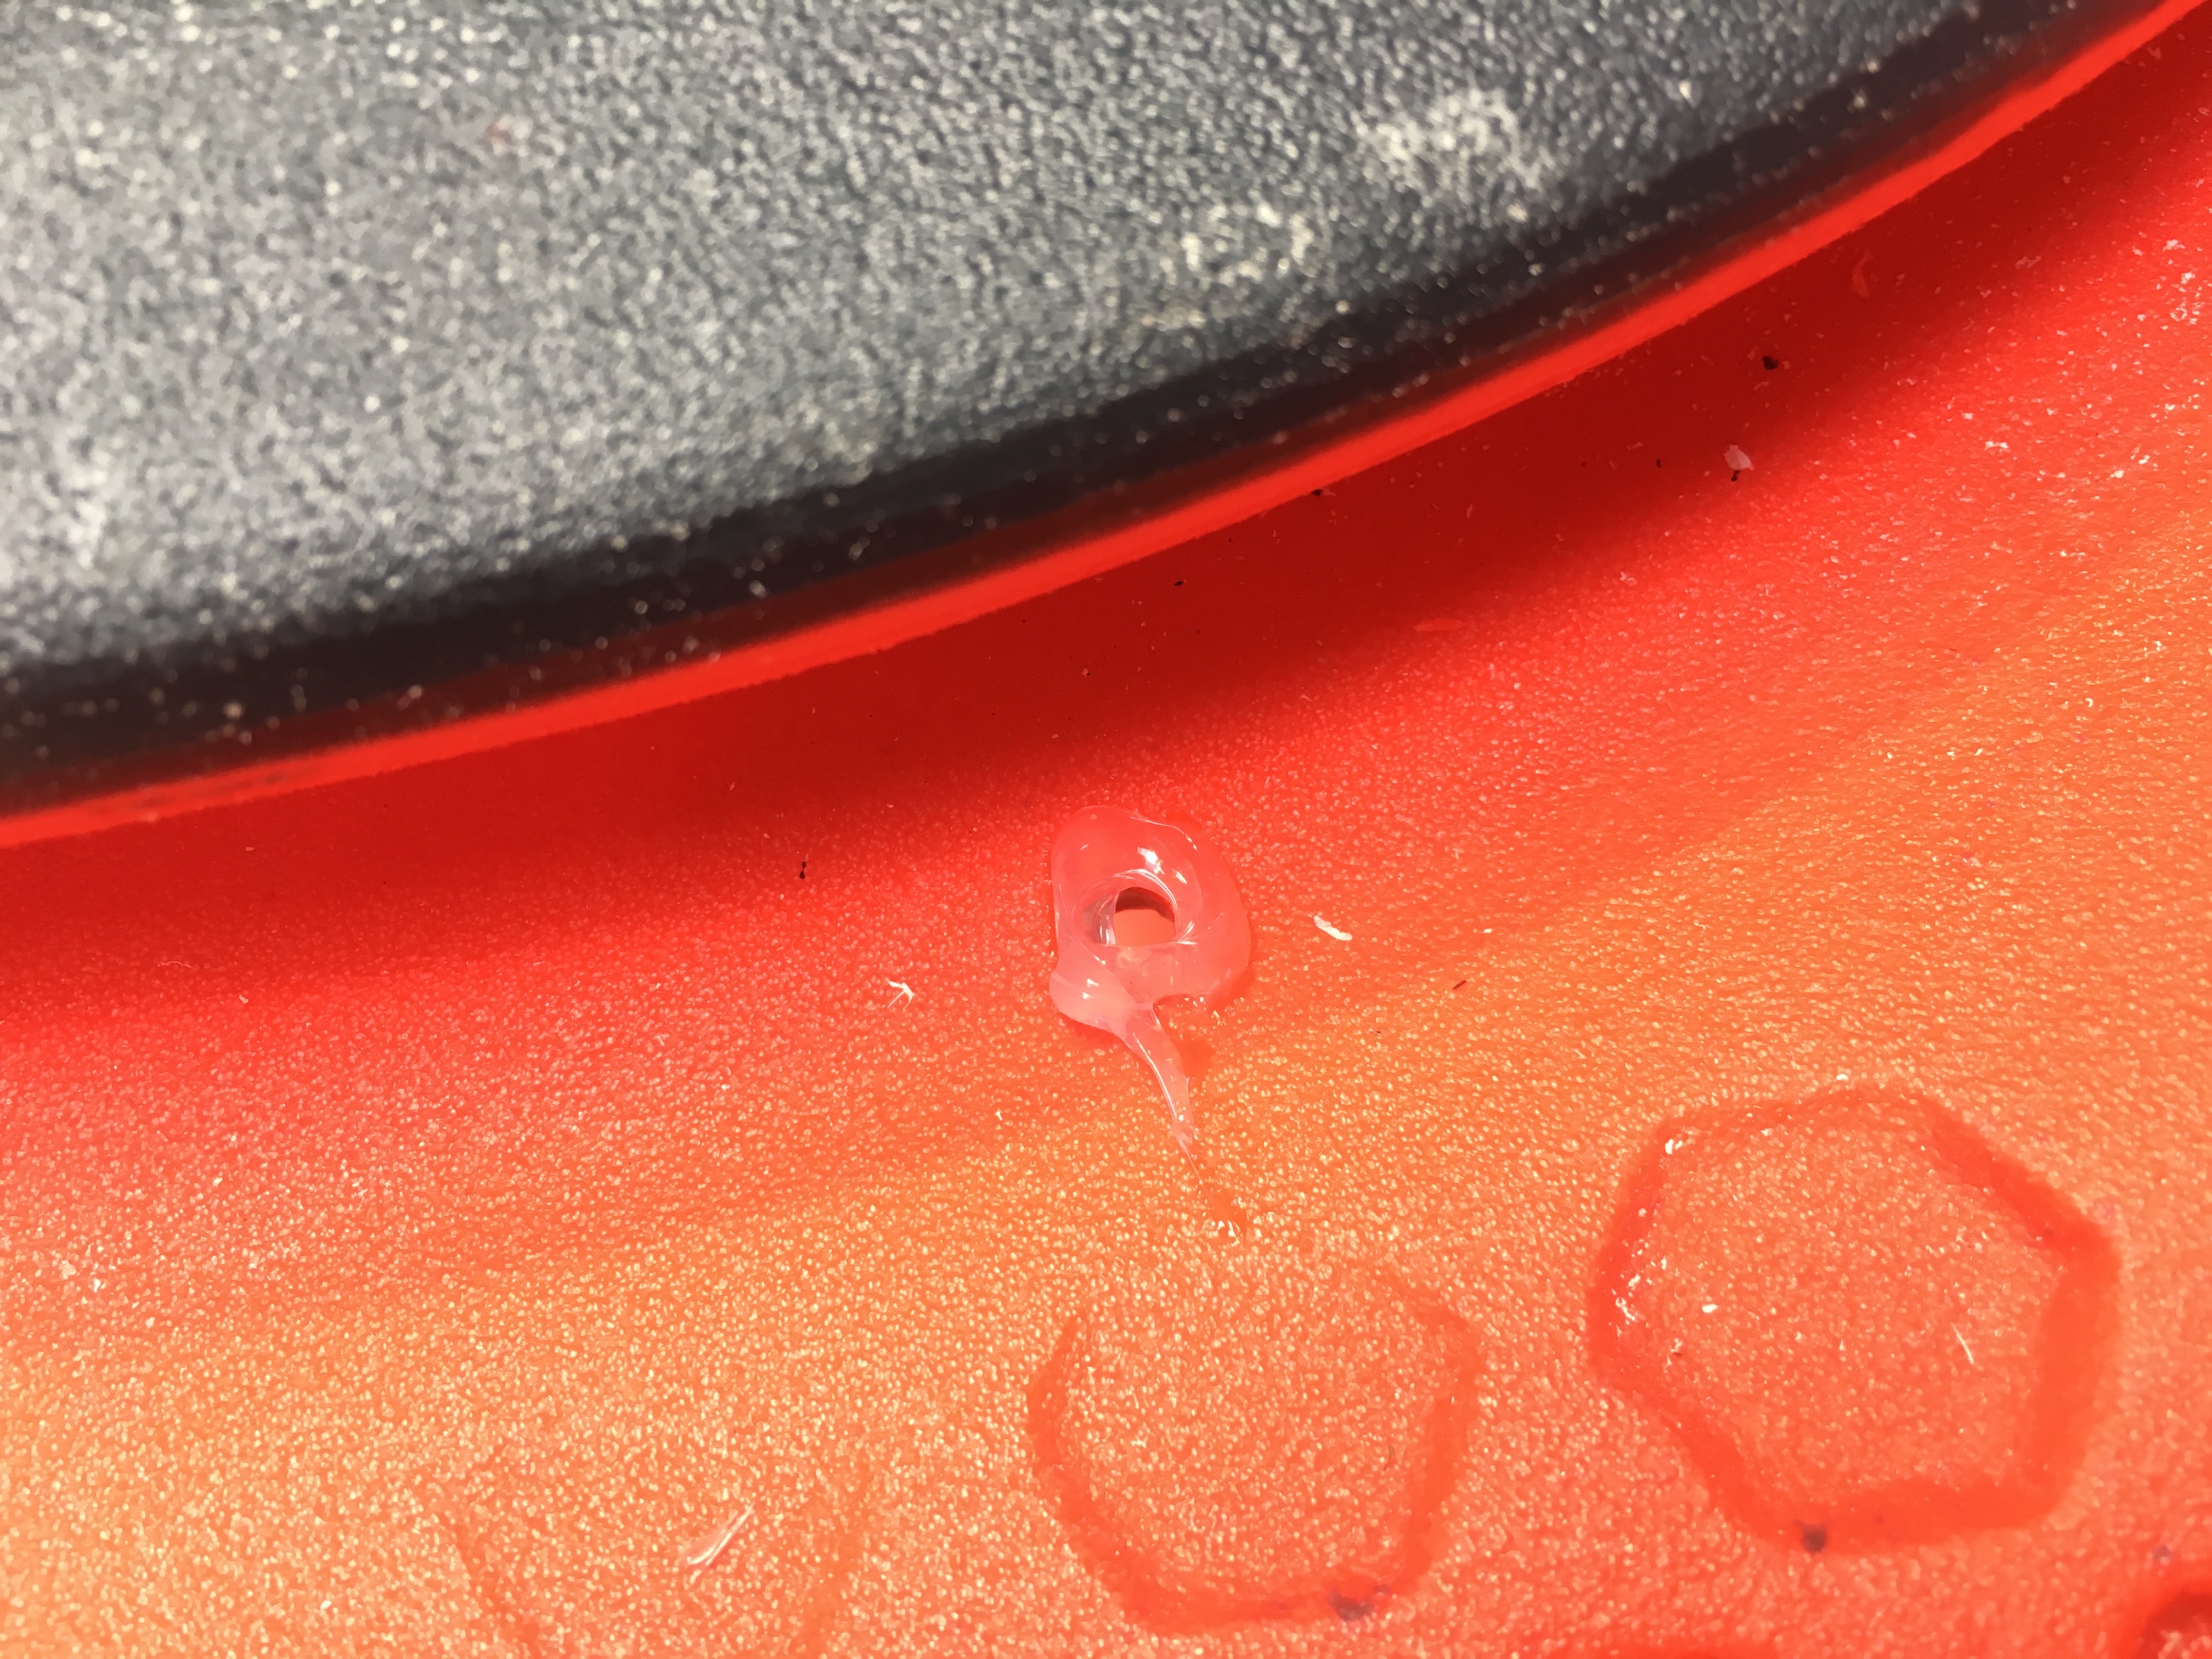
As you can see, I am liberal with the silicone. I put some between the bolt head and the washer, then some more on the bolt threads, and then some around the hole on the hull. Once the bolt is inserted and tight, silicone oozes out, and I just wipe it off with a rag. It ends up really clean, and I have a dry boat as well! If you paddle an original Dagger RPM as a C1 or a kayak, you need to learn how to do seal up bolts like this.
With the PVC installed, the next step is getting a chunk of foam glued into the area over the pedestal filling in the area bounded by the PVC. First, I measured the square dimensions the PVC bounded area encompasses, added about an inch to each direction, and cut out a square piece of foam to these dimensions.
Next, I just held this up to the bottom of the cockpit under the area bounded by PVC, and traced the shape onto the foam. Then, I used an electric bread knife to cut the foam to the right shape. Since the cuts were not exactly vertical, from there I used a drywall rasp to tweak the foam shape to fit flush against the PVC.
From there, I just glued in the foam as a single block using some clamps to hold it snugly in place, and shimmed the side PVC with some foam shavings to keep a little extra pressure on the sides until the contact cement dried.
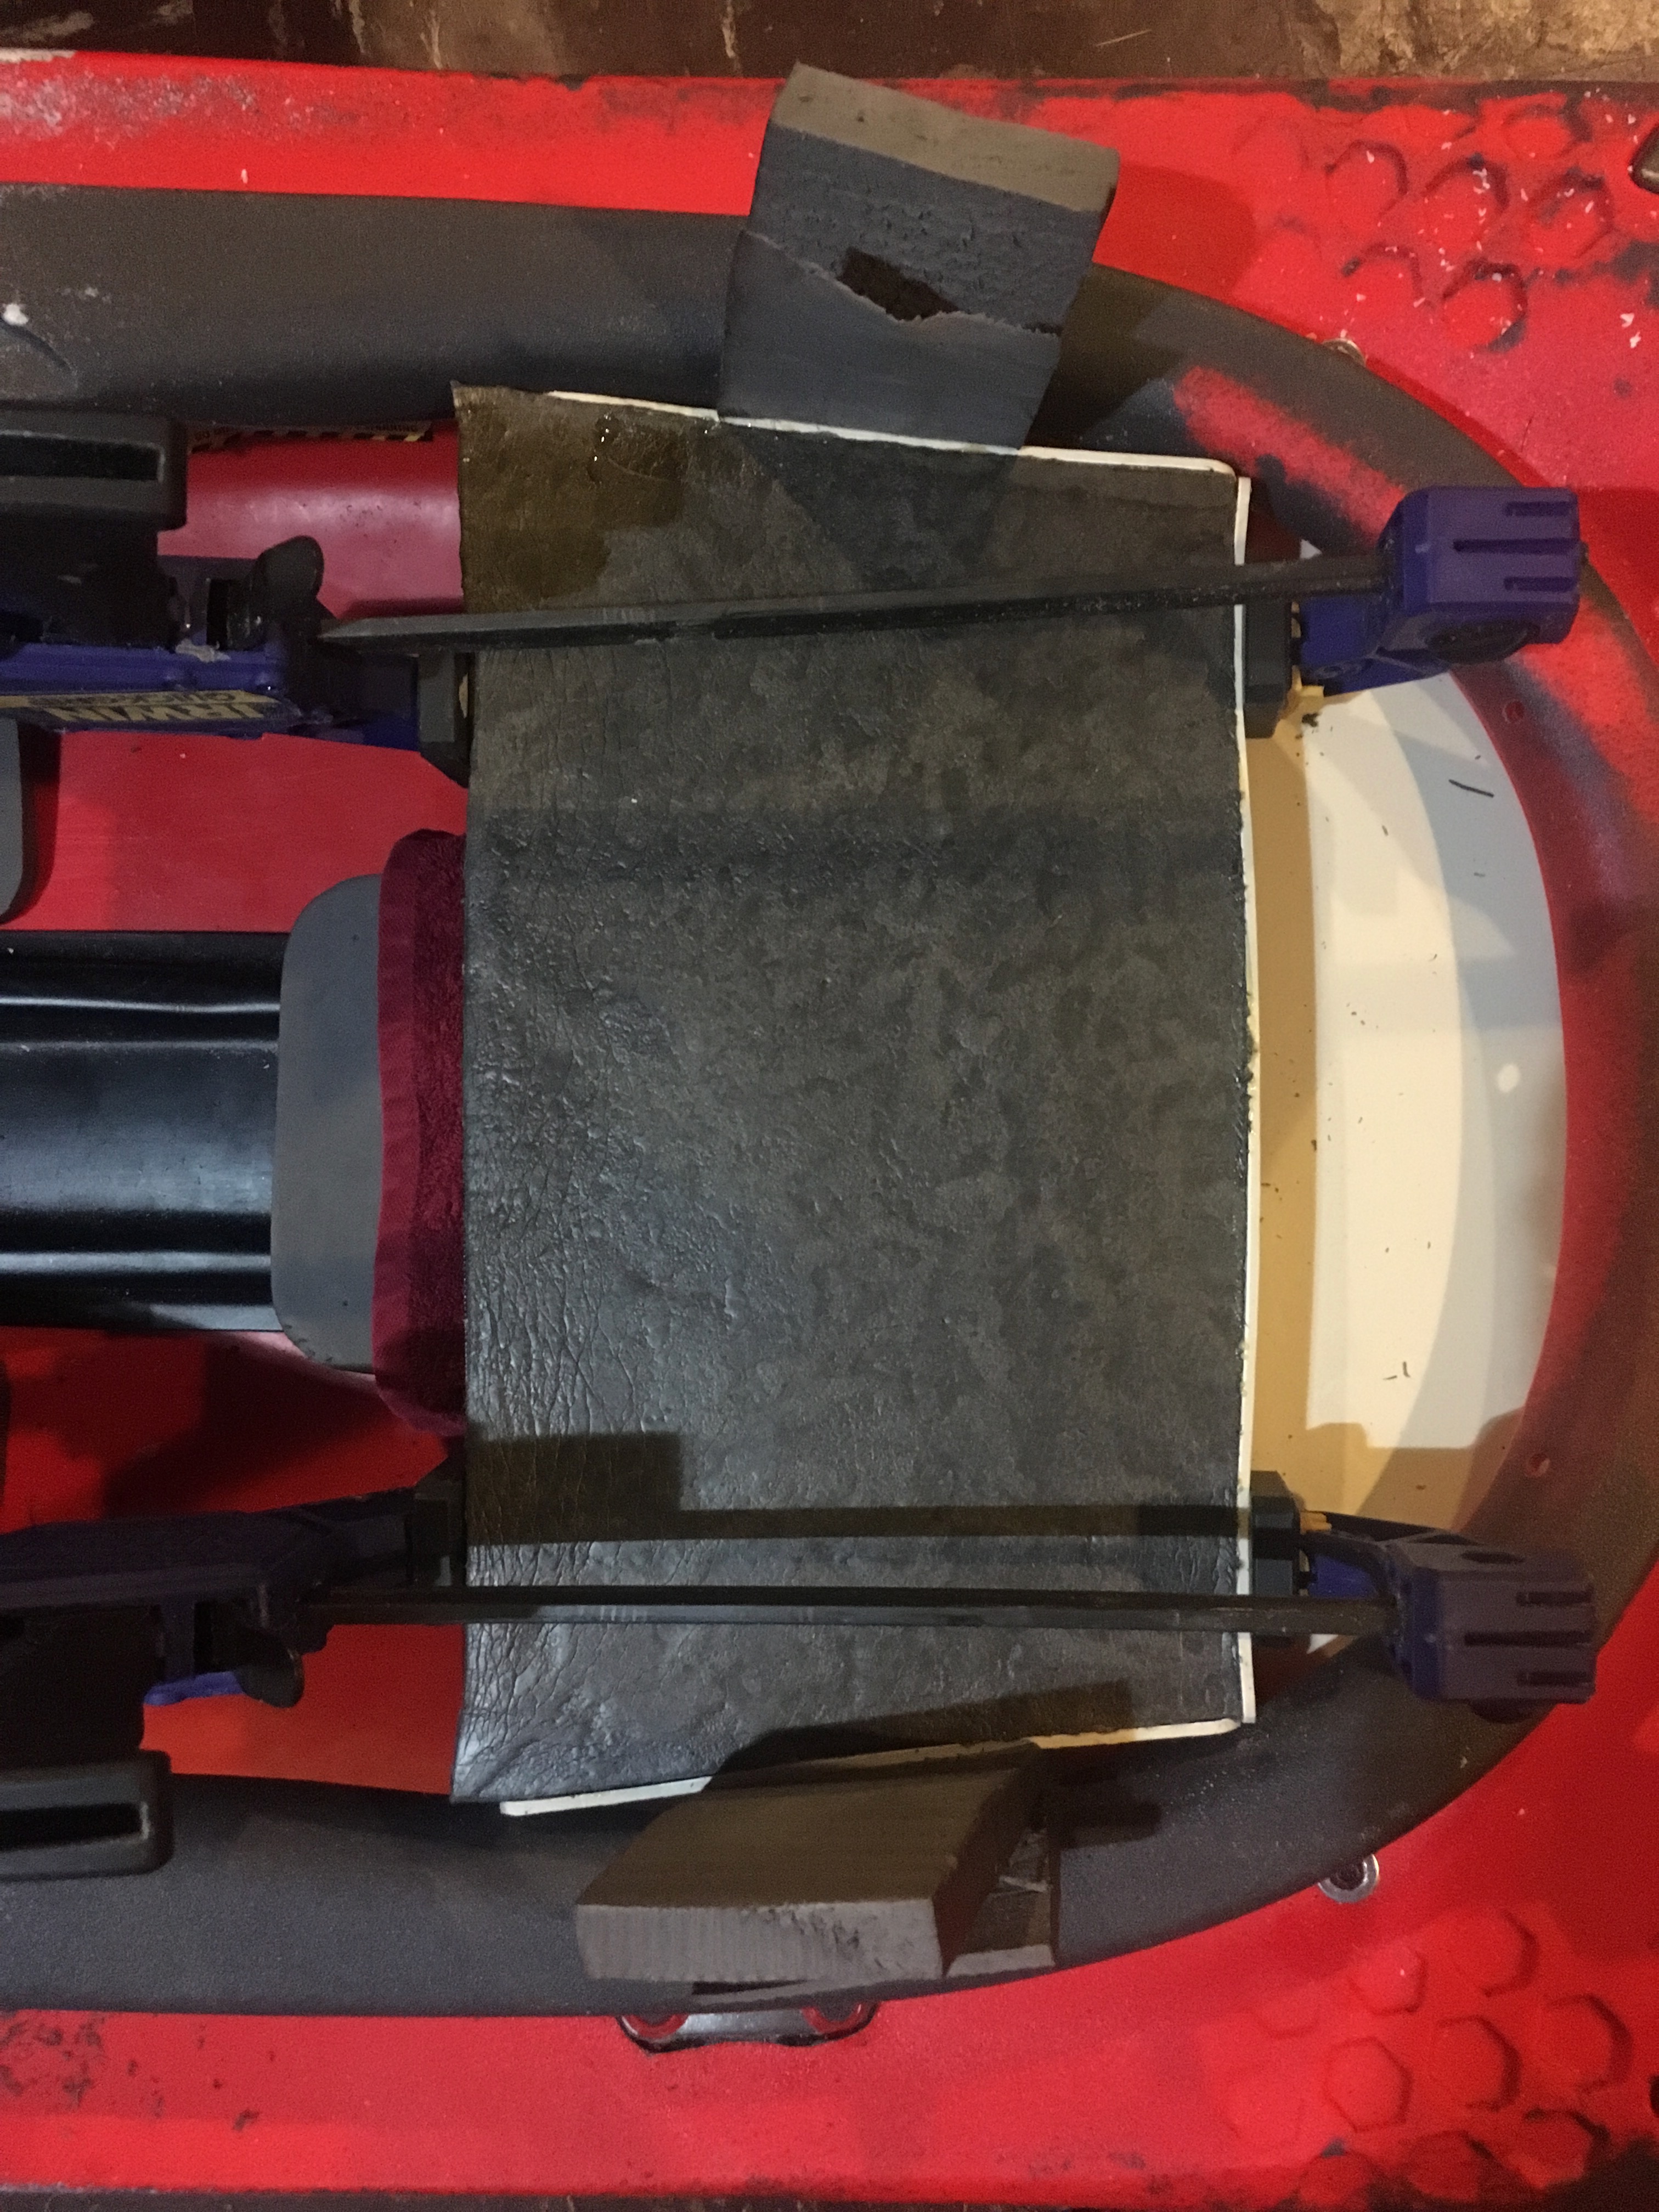
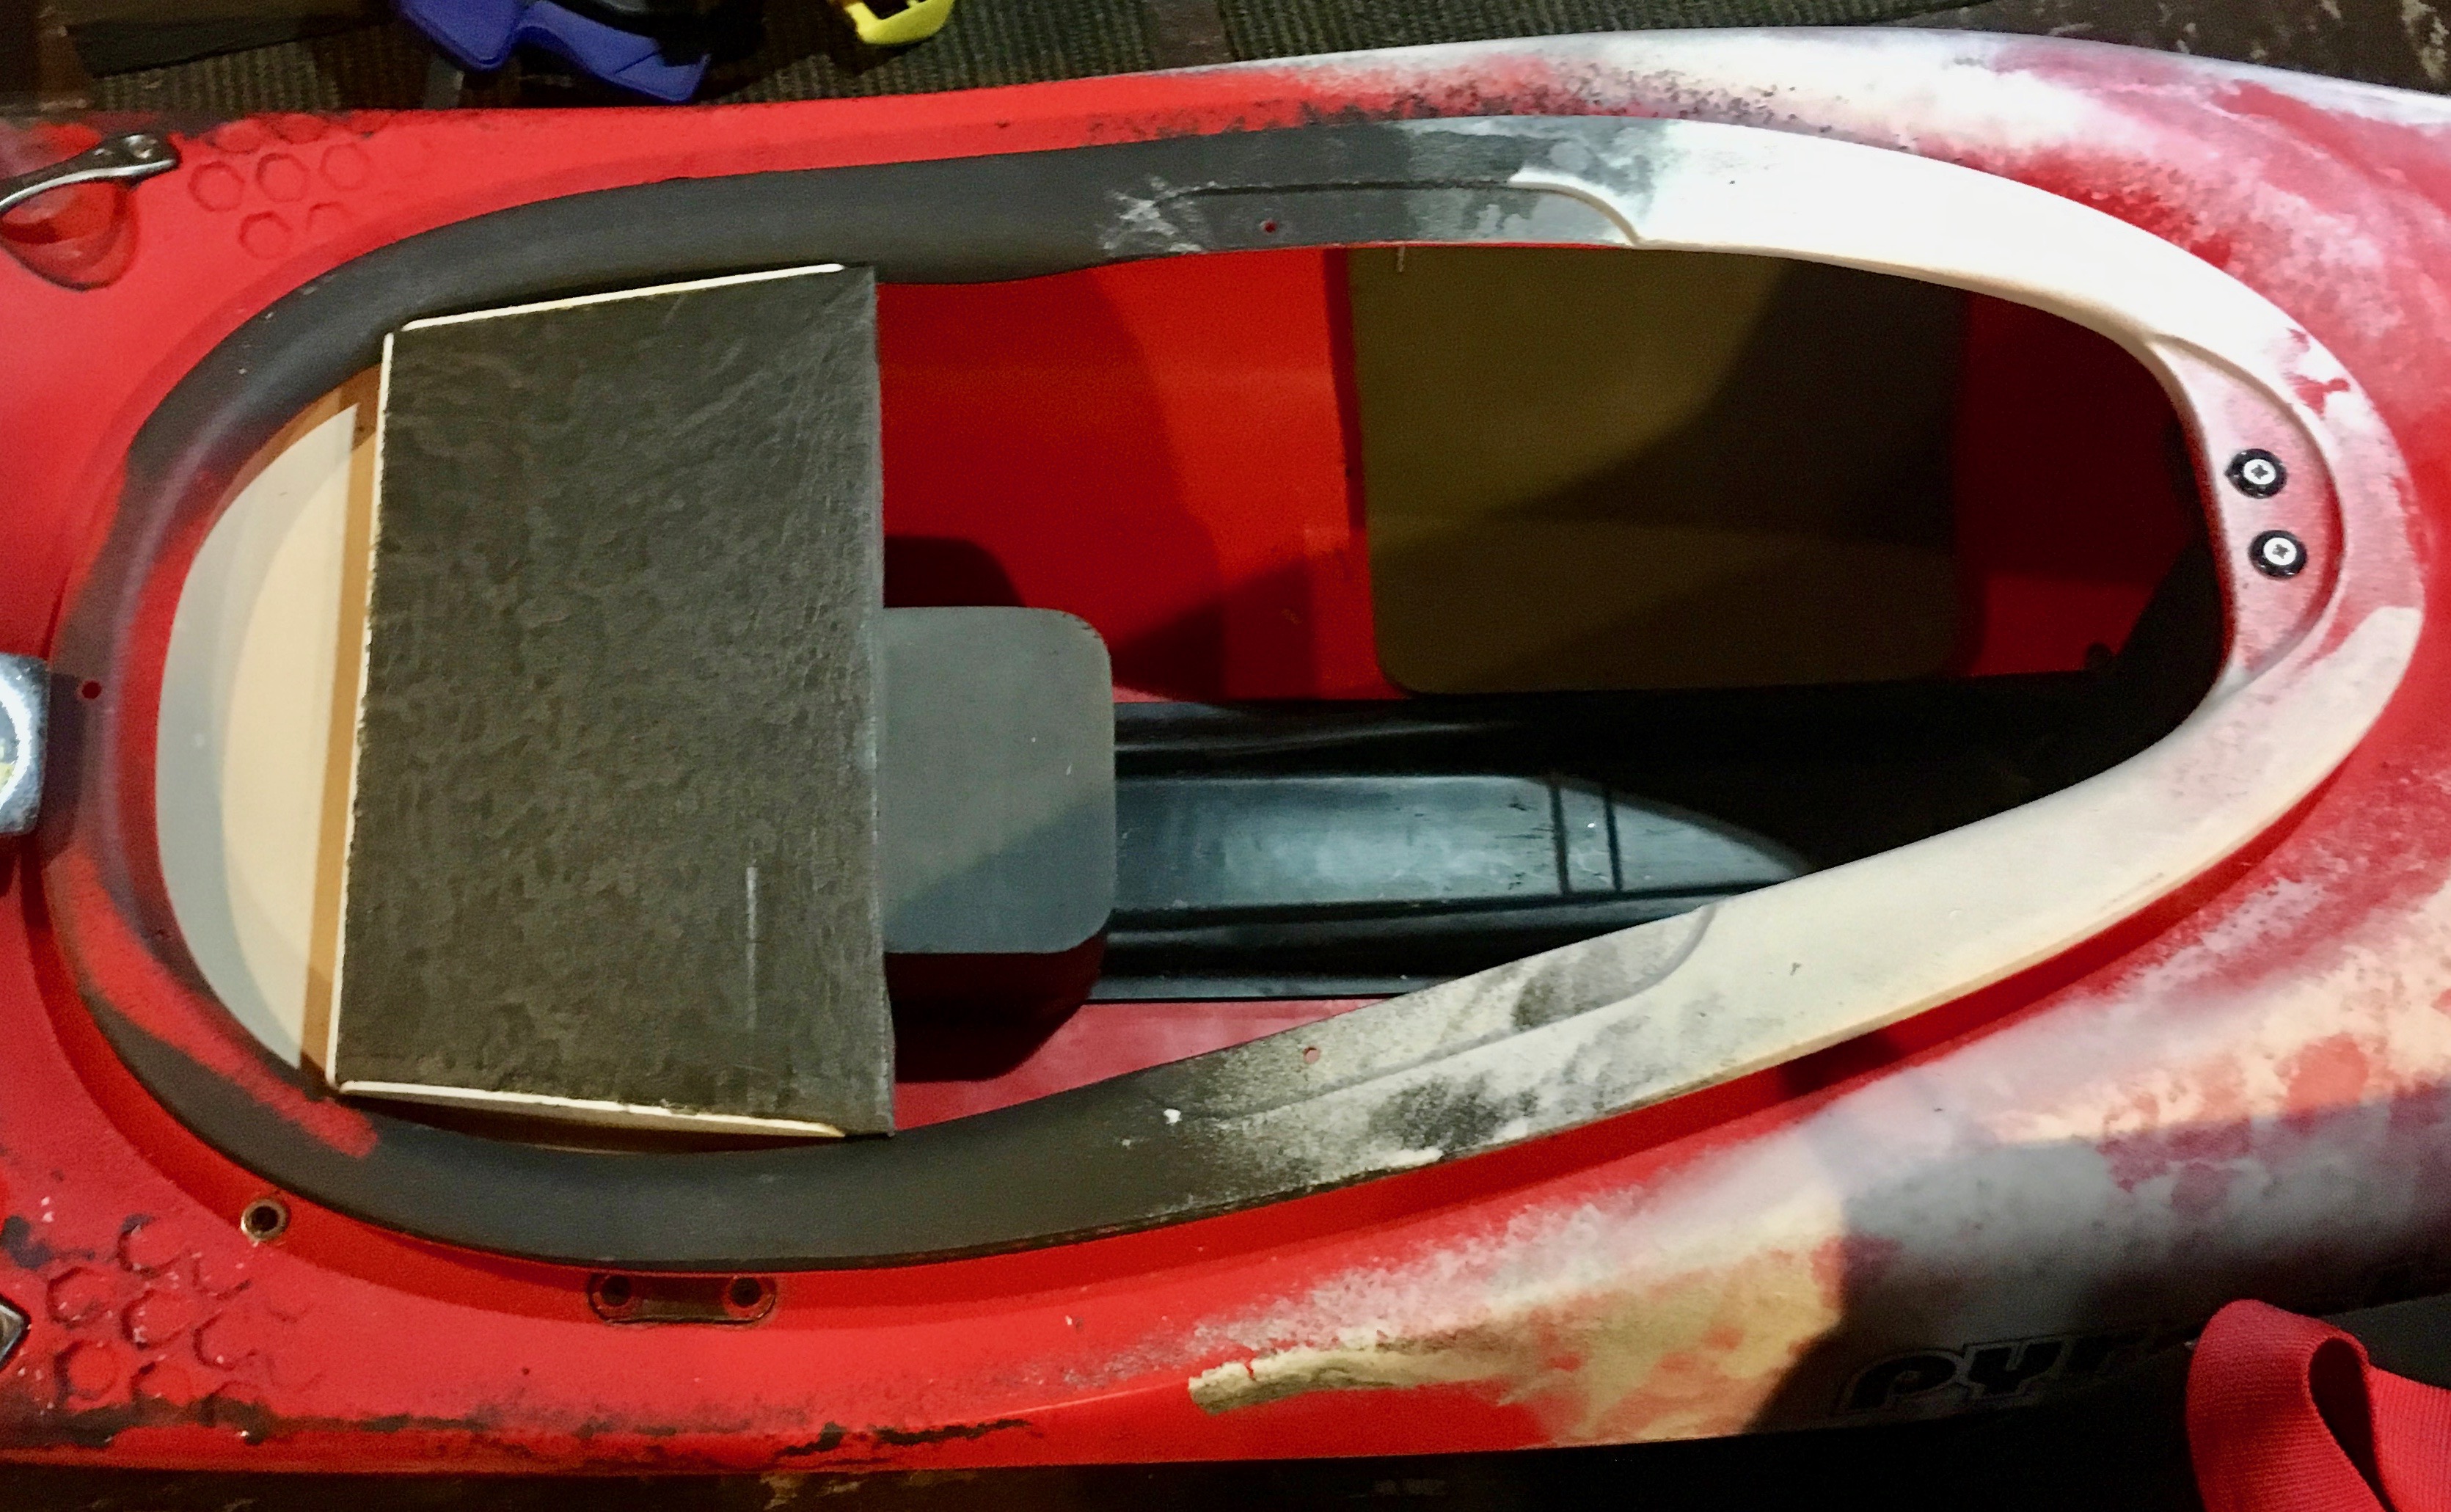
Front Bulkhead
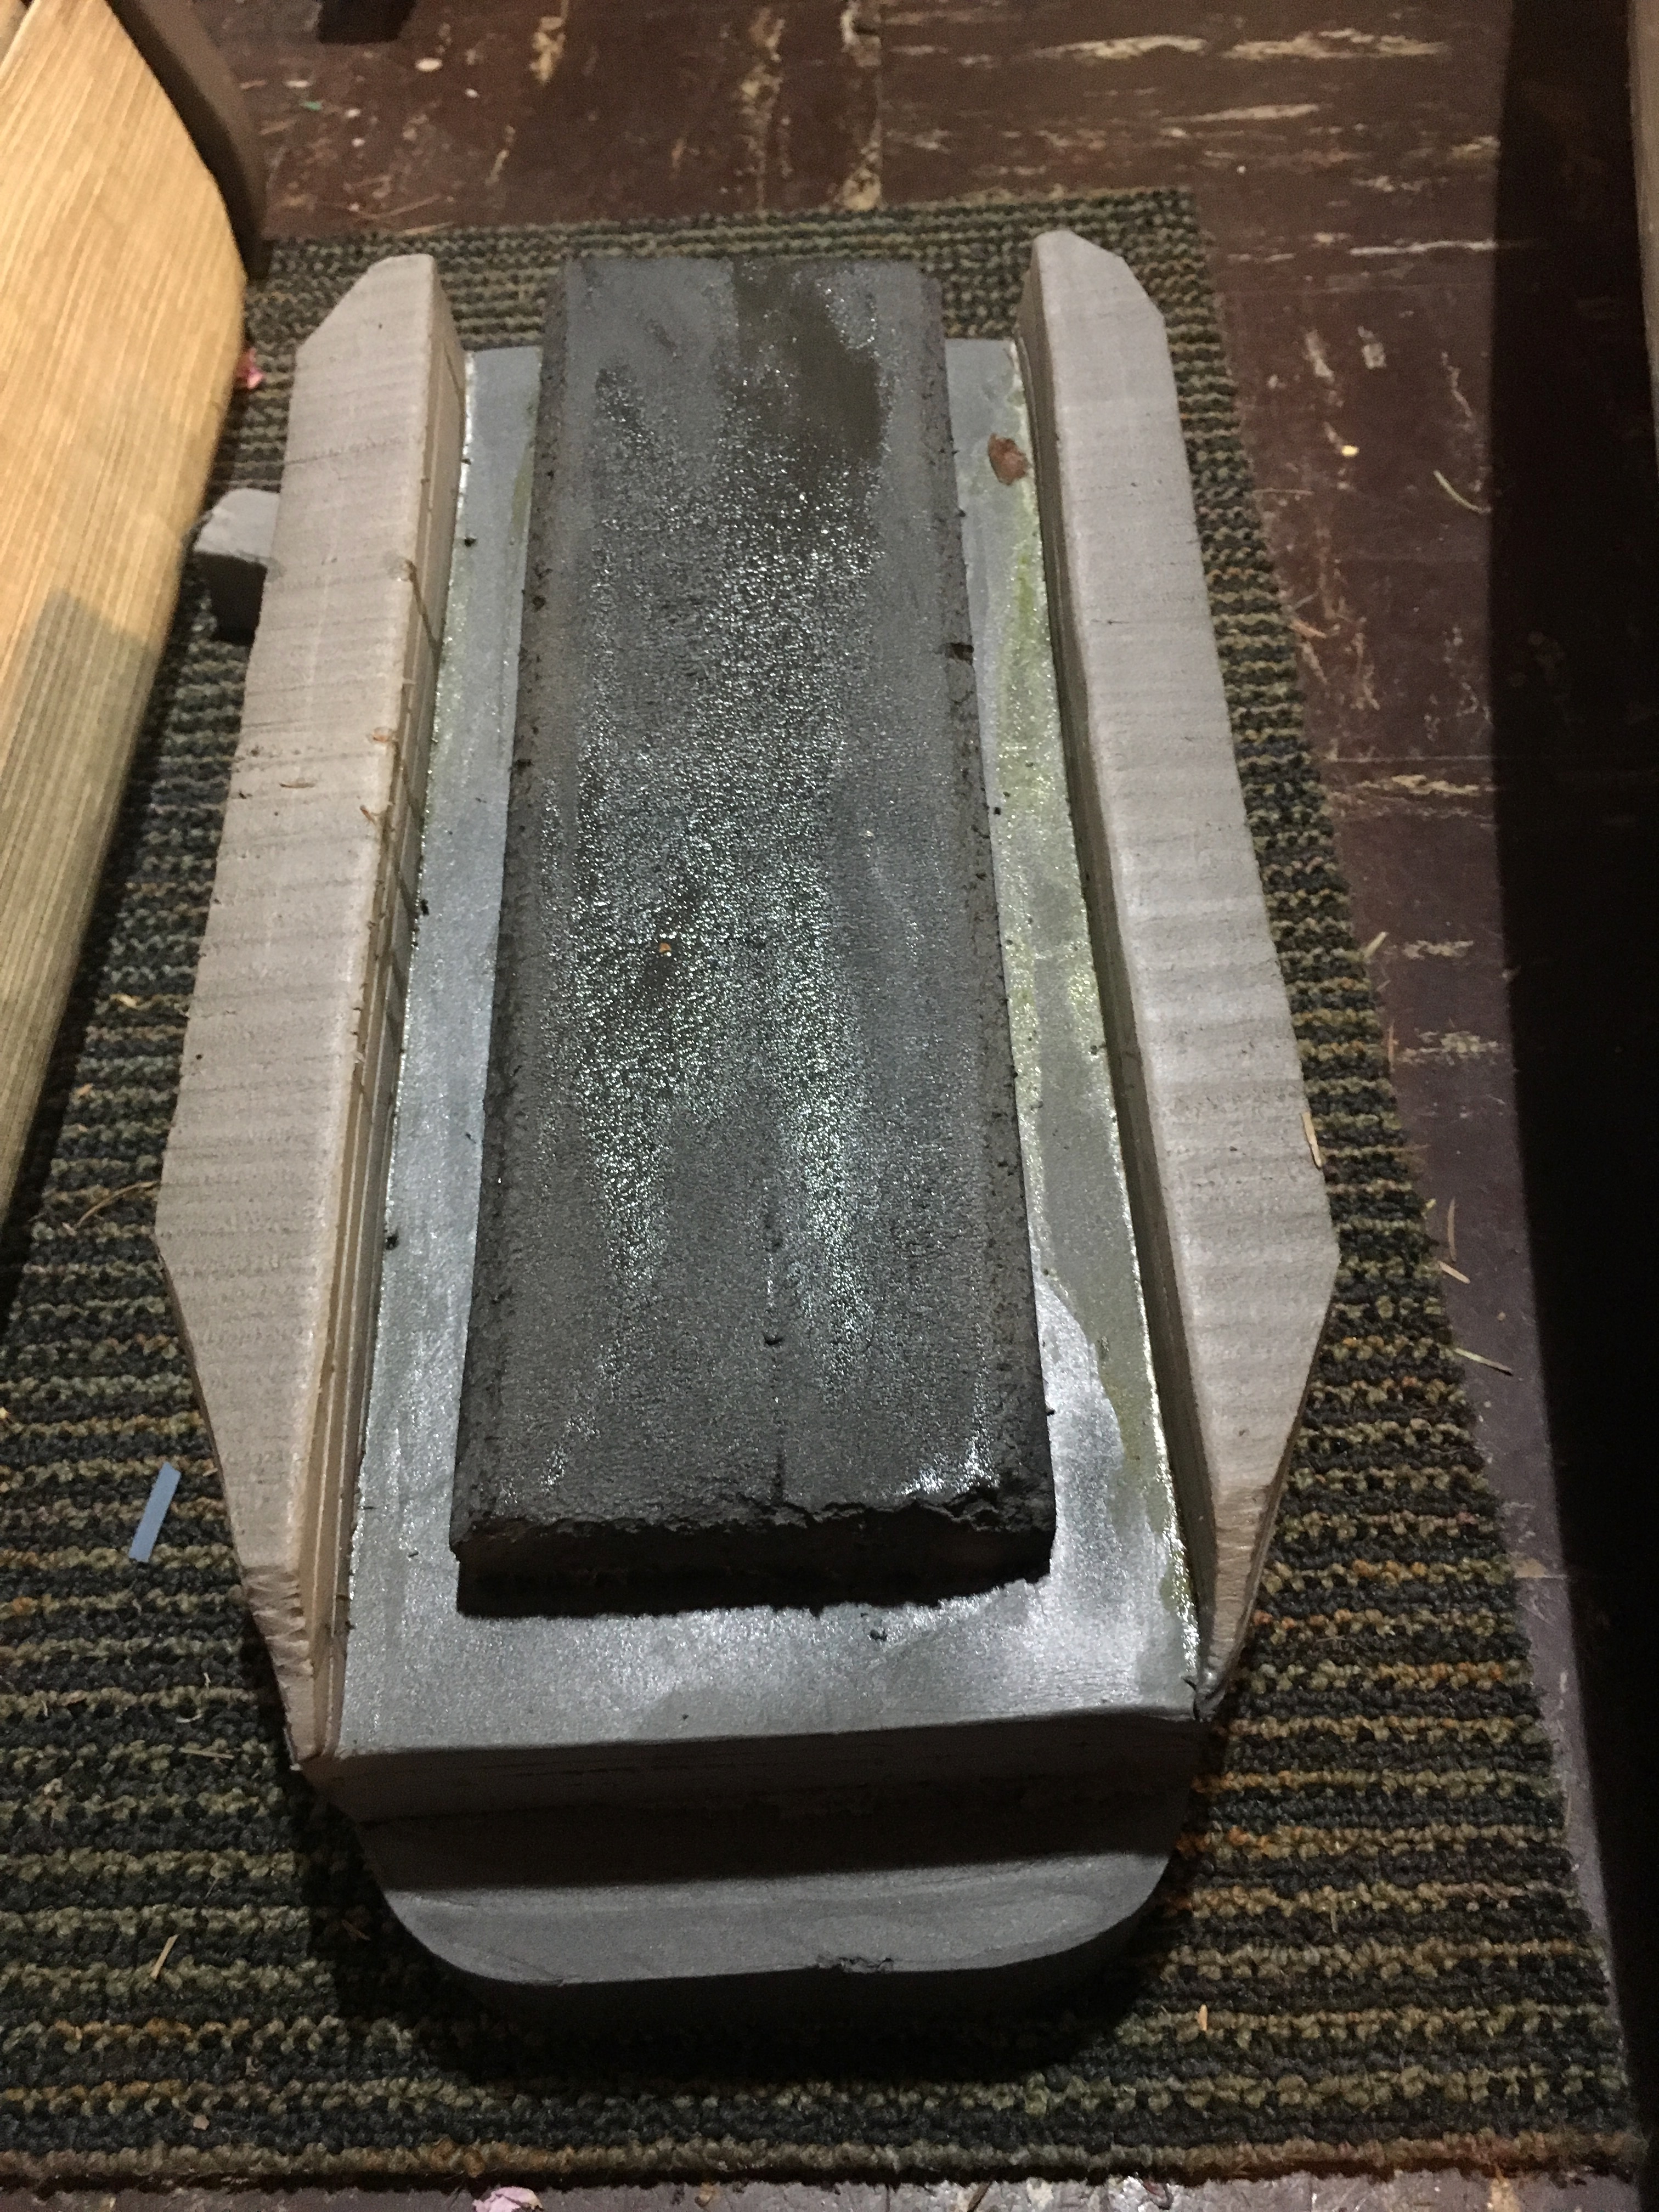
This part, although typically the part raising the most questions, is also the part I got the fewest pictures of. My advice on this process is to build the bulkhead in three pieces after you glue in foam for knee pads.
The bottom part is a single sheet of foam to spread your knees. Get this at the correct angles, and also get it notched to mate up to the center rib left over from the kayak outfitting. Do not glue this in, though. It will be glued to the bottom of the other two vertical pieces of foam comprising the bulkhead.
On top of the knee wedge, I craft two pieces of foam fitting very tightly into place to hold my knees. First I simply get them shaped to fit tightly against the top of the hull. Since it is, after all curved, and there is a cockpit rim to contend with, this takes quite a bit of trial and error.
Next, I rough in the shape for my legs into the foam. Deliberately keeping it too tight, I get it close. Once close, I glue the knee wedge and the two pieces of foam all together, and then do my finish work with it all put together.
Then, as a final touch to keep it all tight, I also craft a piece of foam to fit between the front pillar (plastic in a Pyranha 9R), and the bulkhead. This keeps the bulkhead from pushing forward.
The bulkhead coupled with the hip hugger make for a very connected and responsvie feel without the need to be excessively tight. Even wearing a drysuit last weekend, I had surprising control without discomfort from pressure.
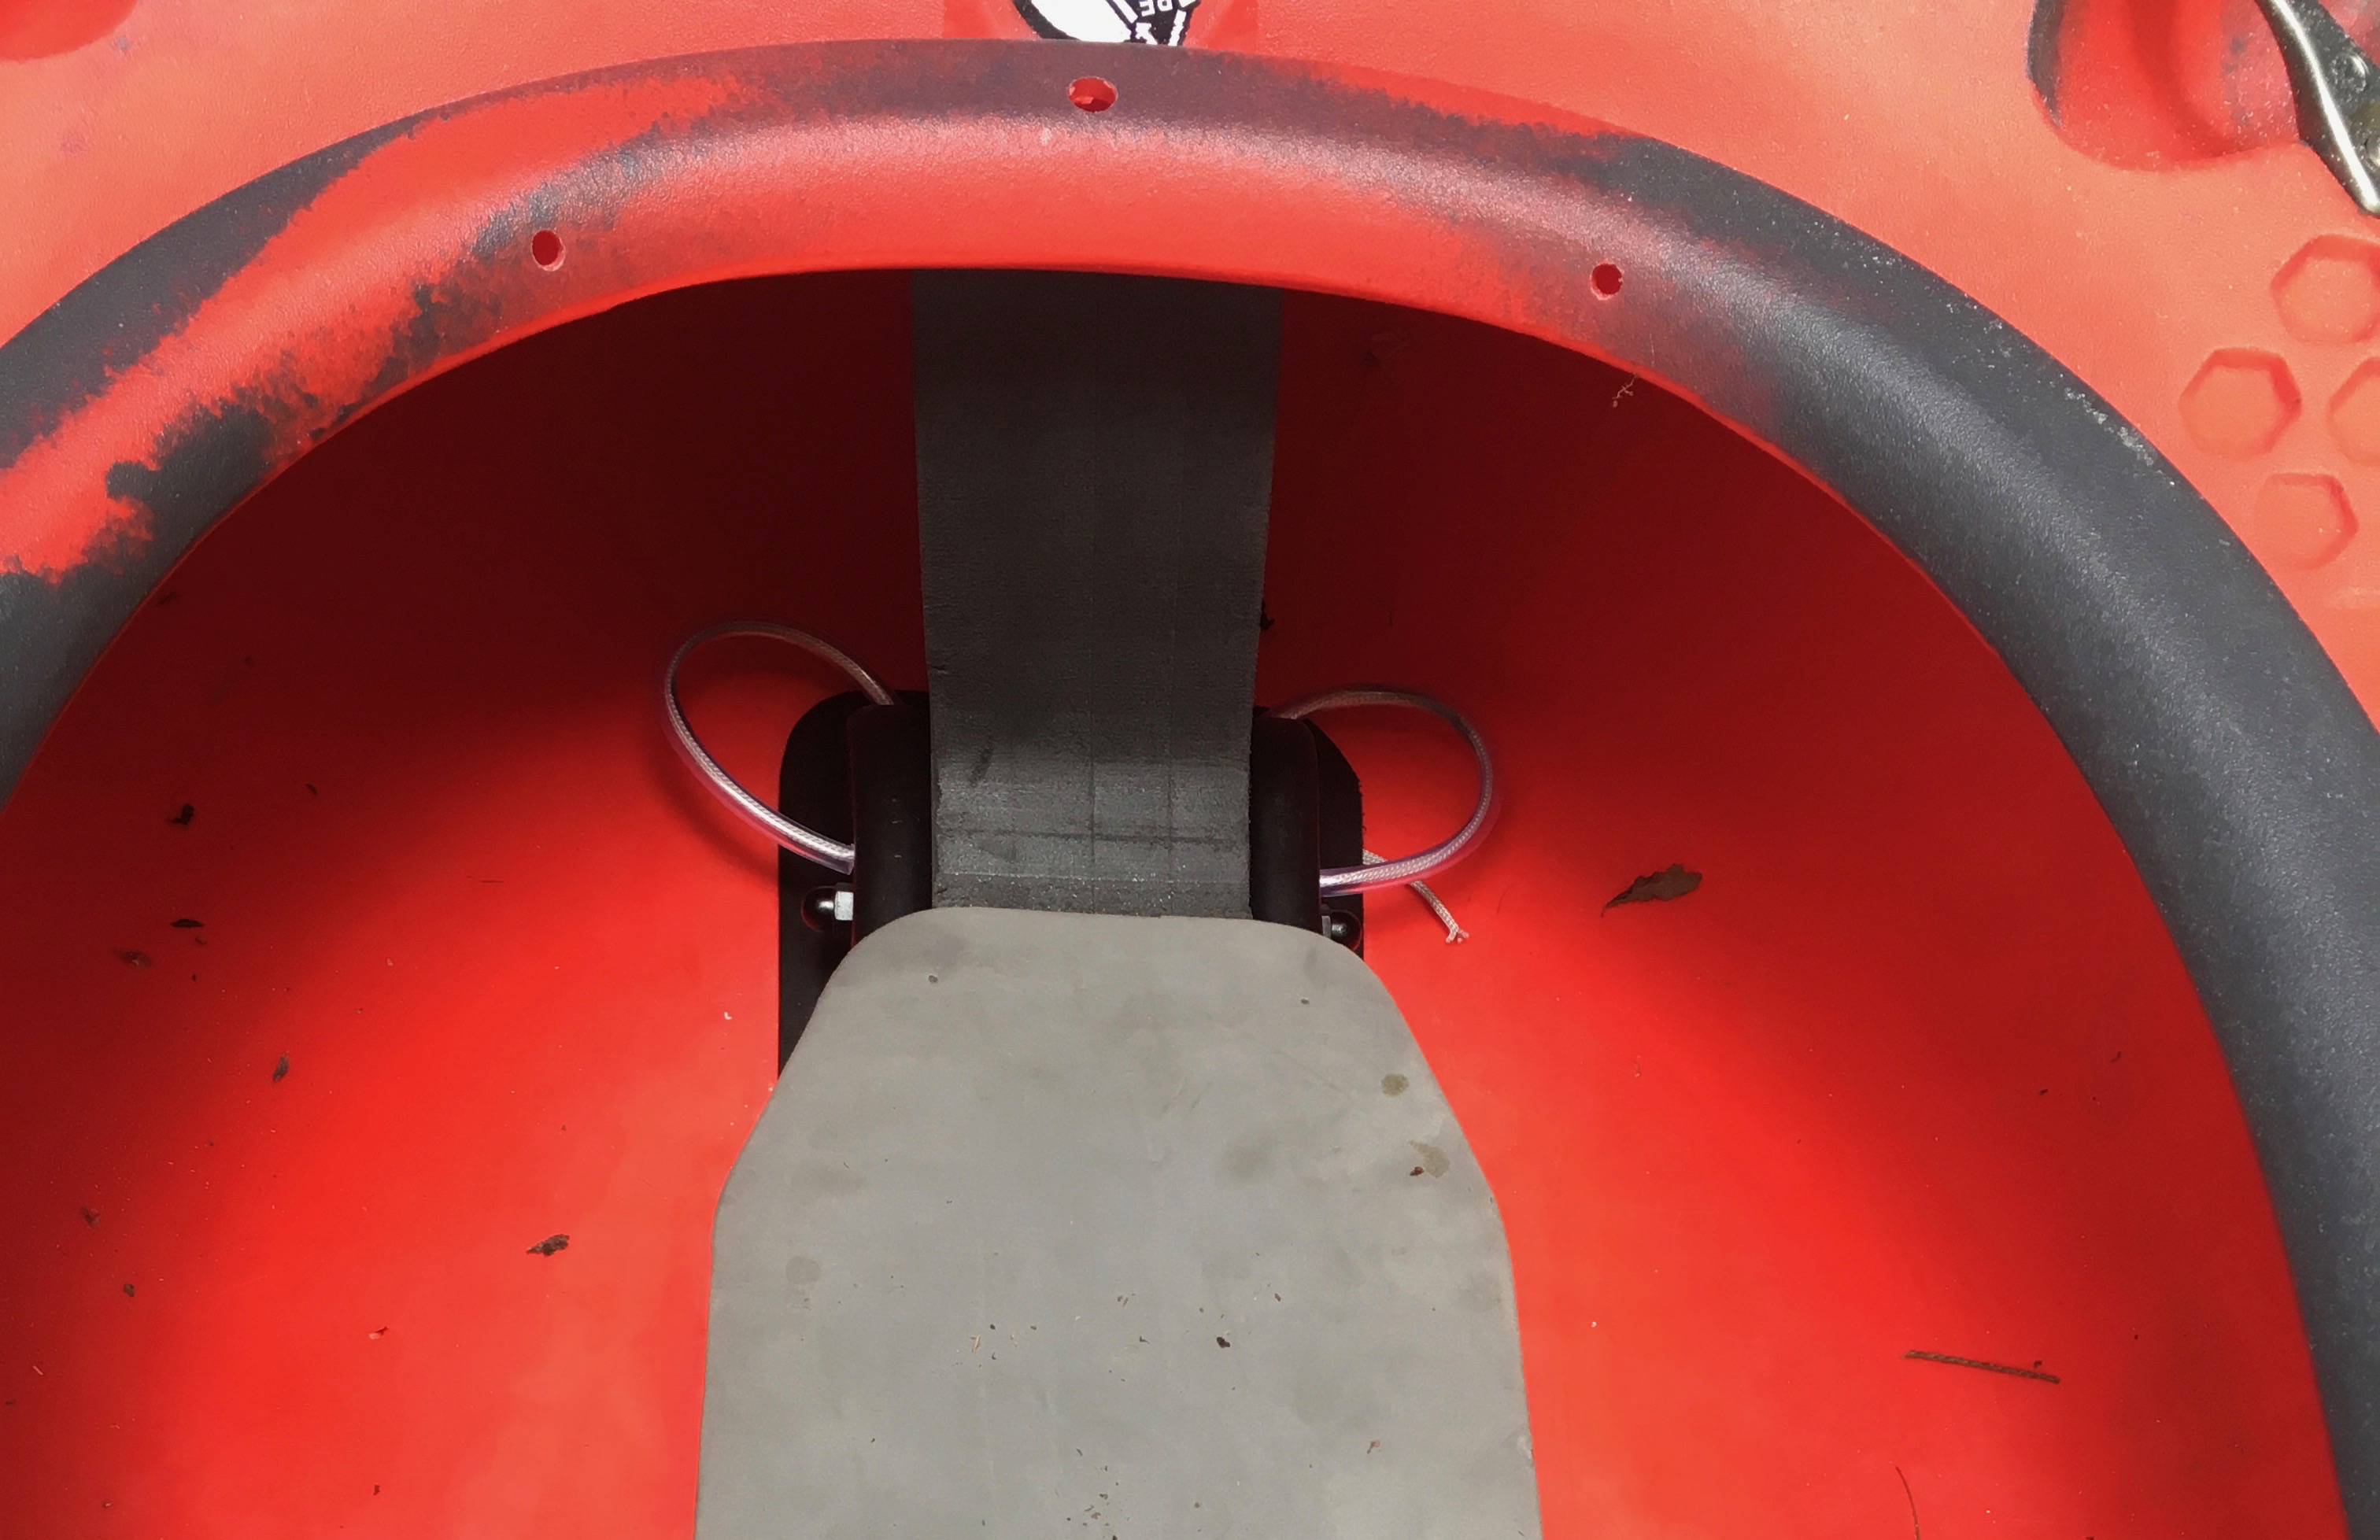
Seat Belt
Yes, I paddle with a seat belt, and do it since it is safer than thigh straps. I came up with this idea years ago. Reaching in between your legs to get to thigh straps when you need to is hard if you are plastered on the back deck, but you can get to a seat belt. Also, I use plastic hardware deliberately because I can break it if I need to get out of the boat.
My theory on escape has proven correct on an occasion likely saving me from a very bad situation. If you want to know more about it, you will have to sit around a campfire. There was no way I was getting forward, and I punched out easily.
Hence, for my seat belt, I use two-inch tubular webbing wrapped around the aluminum plates on the inside of the bolts that used to hold the kayak seat in.
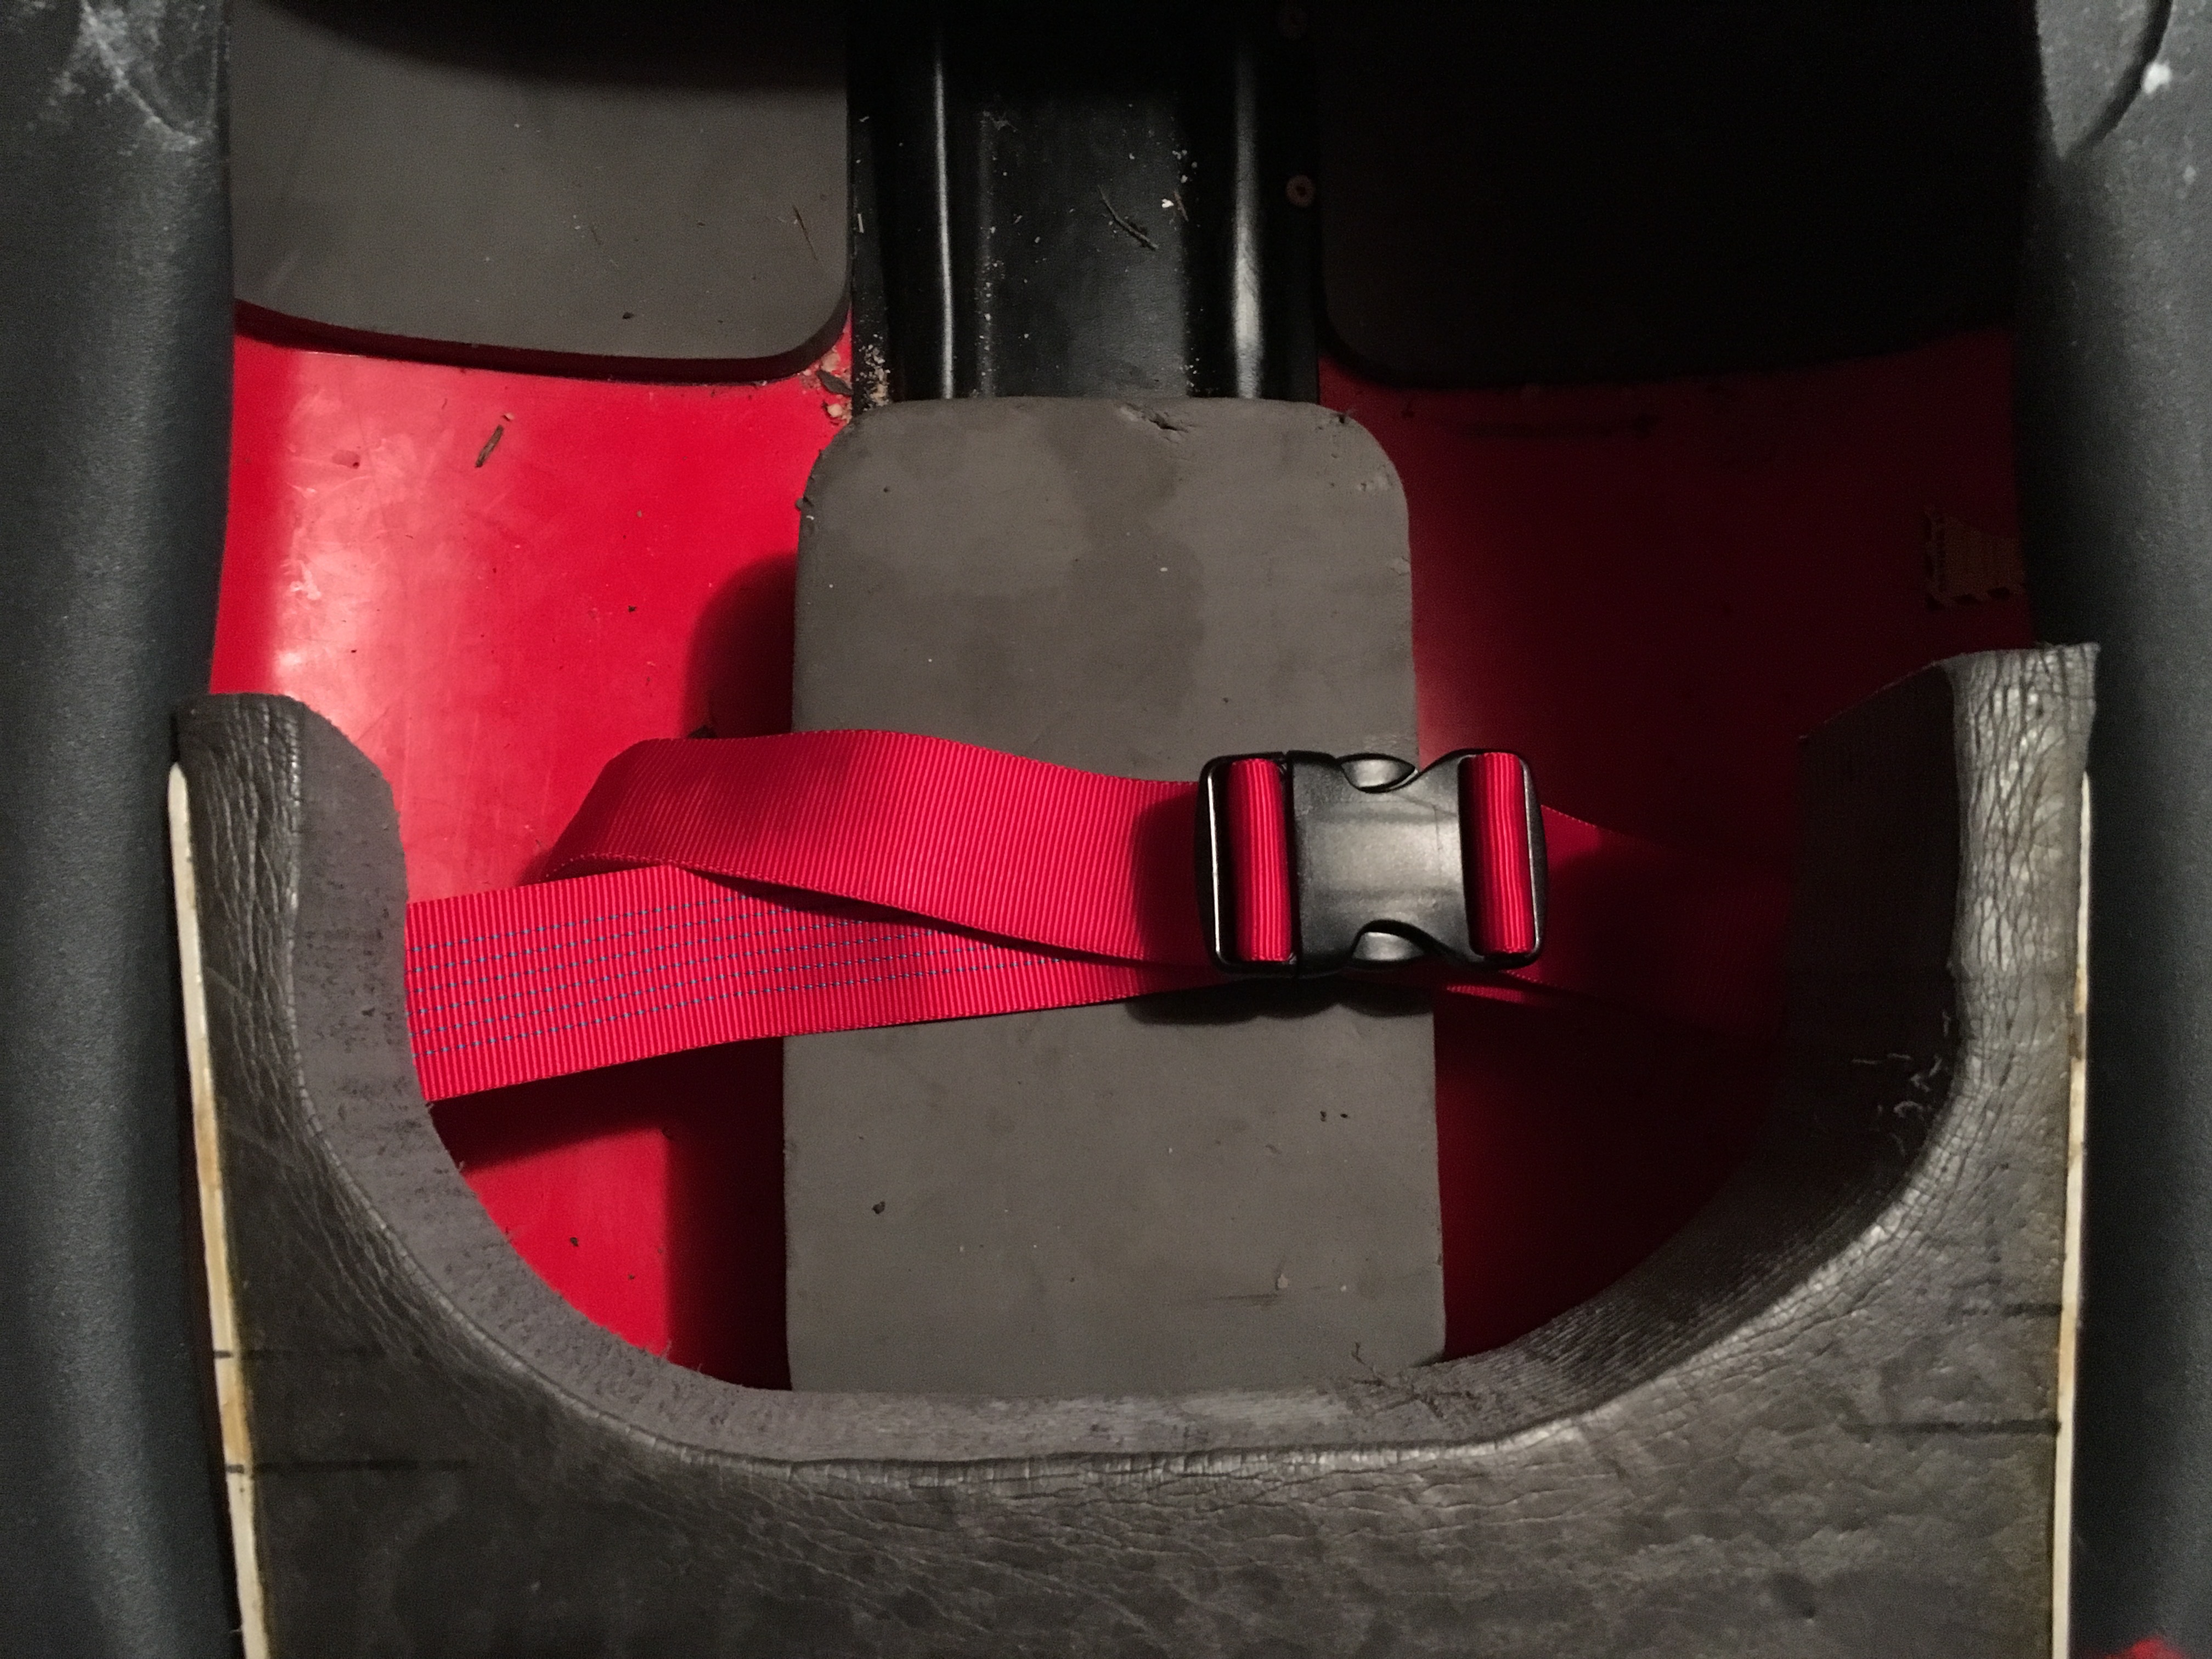
When in the boat, I do not keep it very tight at all. It is just there to keep me from inadvertently getting flushed out of the boat. All the control comes from the bulkhead and the hip hugger.
Hopefully this helps for anybody interestd in one way to outfit a C1. This is the culmination of knowledge gained from outfitting open boats, slalom race boats, and kayaks convereted to C1's for over 20 years, now. This happens to be the second boat I have outfitted using this formula (the first is a Stinger), and I am even more pleased this time around. It really works well.