Publish a Cached Map to ArcGIS.com Without Burning Credits

Publishing a map to ArcGIS.com, typically it is preferable to cache the map for faster rendering and performance. However, the larger the spatial extent, the more credits will be used to create the cache. Recently a solution to this has been created. ArcGIS.com can now publish tile packages created using ArcMap. This provides visualization, but if you want access to the features for pop-ups, you will still need a feature service as well. When combined in an ArcGIS.com map, you will be able to render the points quickly and still be able to create pop-ups to identify features.
Create and Publish a Tile Package as a Cached Map Service
Previously even if the geometry was very simple, such as points, but the area covered was large, such as the entire United States, you would still use a boatload of credits to publish your service as cahced on ArcGIS.com. Take the example of store locations. In this case, I am using REI store locations because I like being outside and naturally also like really cool gear. As you can see in the screenshot, the map is not outrageously complicated. In fact, when publishing the service, I will even remove the basemap. There will only be one layer, REI points symbolized with little blue triangles. When published though, I would like to have this render quickly, so I would like to have it cached.
This is the part previously impossible to accomplish without burning through a ton of credits. The reason is not due to the complexity of the data. The data in this example is stupidly simple, 119 points symbolized with blue triangles. The problem is our spatial extent, the area we are covering. It is the entire contiguous United States. Using the online credit estimator, this would burn through over 250,000 credits.
The white space between all the points, this area still has to be cached. Tiles have to be created. This requires a lot of computing power, making the processor work hard and using a lot of RAM. Making your computer work hard is a lot cheaper than making Esri's computer work hard. If you create the cache locally as a tile package and share it on ArcGIS.com, you burn a manageable number of credits and can still get the speed of a cached map service.
Enable ArcGIS Runtime Tools

Once you have the map created and ready for publishing, it is time to create the map package. To have this option available, you first need to enable ArcGIS runtime tools. Do this by going to Customize > ArcMap Options > Sharing. Ensure Enable ArcGIS Runtime Tools is checked.
Share As Tile Package

With this enabled you are ready to share your map as a tile package. Go to File > Share As > Tile Package.
This brings up the Tile Package dialog. First, you have the option to either upload the package to ArcGIS Online directly from this dialog, or save it. Although you can save it locally and upload it later, I am going to describe how to do it all in one step here. Hence, select the option, Upload package to my ArcGIS Online account.

The next option for Tile Format, you will want to set the Tiling Scheme to ArcGIS Online / Bing Maps / Google Maps. This is because the cache levels need to all match. Since ArcGIS.com basemaps will be used, your cache needs to match.
Regarding the Tile Format, there are a number of considerations. Rather than discussing format considerations here, please take a look at the help documentation regarding map cache properties. Look under the Tile Format header for a description of each format and considerations for use.
Under Item Description, ensure you give it a Summary and Tags. As indicated, these are required. It is also advisable to give it a description, describe any access and use constraints and also list any data credits as well. After all, metadata is good.
Finally, under Sharing, choose who you want to be able to see this once it is published on ArcGIS.com. If you want to create a public map, this will need to be Everyone. Otherwise, choose which groups on ArcGIS.com you want to be able to see this.
With all these settings completed, you are ready to analyze and share your package. After clicking on Analyze, the prepare window will appear displaying errors, warnings and messages. A good practice is to try and address all or as many of the errors, warnings and messages as possible before publishing.
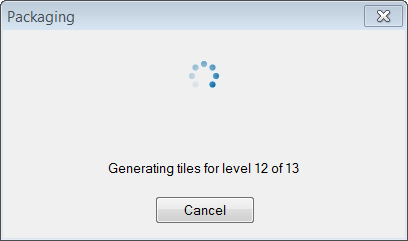
At a minimum, ensure no errors are present. You cannot publish anything with an error. Warnings typically should be addressed for map efficiency, but will not keep you from publishing. Messages are good to know tidbits. These tidbits likely should be remedied, but are not going to be show-stoppers. After addressing errors, warnings and messages, click share and let your computer go to work. Get comfy, building a tile package can take some time.
After packaging and publishing, a tile package and cached map service will appear in My Content on your ArcGIS.com account with the name you specified in the first pane of the Tile Package dialog. Unless you really need it, you can delete the tile package. You can now use the cached map service in a web map.
Share As Feature Service
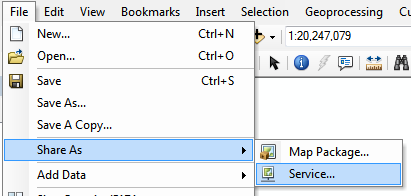
If you want access to any feature information in the web map, you will also need to publish a map service with feature access. Typically the primary reason for wanting feature access is to enable pop-ups in the web map, enabling somebody to click on a point and information about the point to appear in a pop-up.This process is fairly similar to publishing the tile package, except this time we are sharing the map. Go to File > Share Map > Service.
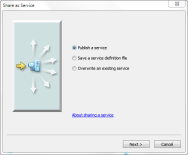
Next, select Publish as a Service.
Select My Hosted Services (<organization name>) and give your service a name.

After clicking continue, the service editor dialog will appear. In this dialog, Tiled Mapping in the default choice under capabilities. You do not want this selected. Tiled Mapping is a cached map. As earlier discussed, this will consume a tremendous amount of credits. What you want is a feature service. Uncheck Tiled Mapping and check Feature Service.

After providing, at a minimum, a feature description and tags, analyze and publish the service just like the tile package. First view and rectify as many errors as possible. Then publish the service to ArcGIS.com.
This step creates a tile package and uploads it to ArcGIS.com. There is one more step you must complete to have a cached service on ArcGIS.com, publishing the package. Yes, this seems redundant. Publishing from ArcMap creates and uploads the tile package to ArcGIS.com, but it does not automatically create a cached map service from the tile package. You must perform this step.
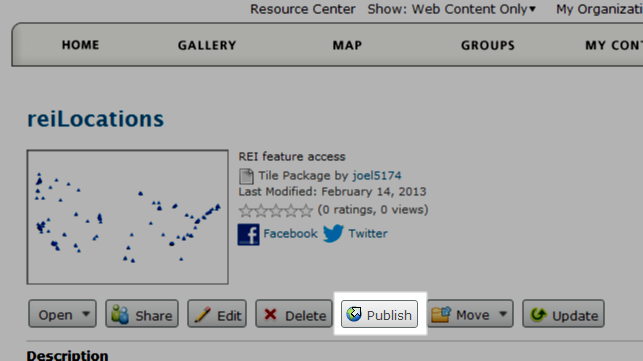
After uploading, locate the uploaded tile package on ArcGIS.com in My Content. While viewing the page for the uploaded tile package on ArcGIS.com, there will be a button on the right side called (no kidding), Publish. Pressing this button will open a small dialog prompting for two parameters, the service name and tags. After completing this, you have published your tile package as a cached map service on ArcGIS.com without burning a ton of credits.
Once published, the feature service can be added to a web map with the service created from the tile package. Pop-ups are enabled for the feature service and the visibility is set to completely transparent. In this way you get the best of both worlds, a fast rendering map due to the cached tiles with feature access in pop-ups due to the feature service.